
View Our Recent Work:

Overview — Most boat floors can be repaired if the rot is caught early and the stringers and bulkheads beneath are still solid. Start by pulling up any carpet or sole panels, probing suspicious areas with an awl, and checking the bilge for standing water or wet foam.
Before you cut anything, run through these first steps:
- Remove all interior coverings and look for staining, bubbling gelcoat, or soft spots underfoot.
- Probe every suspicious area with a screwdriver or awl; sound core resists, rotted core gives way.
- Check the bilge for wet foam, rusted fasteners, or a persistent mildew smell.
- If rot has reached the stringers or bulkheads, or if a large portion of the core is delaminated, stop the DIY work and call a professional yard.
Safety first: wear an organic-vapor respirator and nitrile gloves before you open any bilge space or mix resin. Ventilate the workspace before you start cutting.
Key Takeaways
Catching rot early and using epoxy encapsulation on every surface and edge is what separates a floor repair that lasts decades from one that fails within a season.
| Point | Details |
|---|---|
| Inspect before you cut | Use an awl, moisture meter, and tap test to map damage fully before removing any material. |
| Use the 50% threshold | Replace the full panel when more than roughly 50% of the core is delaminated; patching beyond that threshold rarely holds. |
| Epoxy over polyester | Epoxy recovers approximately 81.7% of original laminate strength versus polyester’s ~70.5% in comparative testing. |
| Encapsulate every edge | Seal all plywood faces, edges, and fastener holes with penetrating epoxy to prevent edge-wicking and repeat rot. |
| Mazzamarine for pro-scope work | When rot reaches stringers or bulkheads, Mazzamarine’s Florida yard network handles full structural repairs and refits. |

Table of Contents
- How do you inspect a boat floor and diagnose rot or delamination?
- How do you decide between patching, panel replacement, or hiring a yard?
- What materials and tools do you need for a boat floor repair?
- Step-by-step: how to cut out the old floor and install a new one
- Epoxy vs. polyester: which resin should you use for structural repairs?
- Safety, ventilation, and responsible disposal
- What does a boat floor repair actually cost, and how long does it take?
- When should you stop DIY and call a professional yard?
- Moisture detection tools that go beyond the basic poke test
- Common mistakes that derail a boat floor repair
- Finishing options and how to match your existing deck
- What most guides get wrong about boat floor repairs
- Mazzamarine: professional floor and structural repairs for Florida boat owners
- Sources
How do you inspect a boat floor and diagnose rot or delamination?
Good inspection work saves you from cutting into a floor only to discover the damage is three times what you expected. Pull back every piece of carpet, foam padding, and sole panel before you form any opinion about repair scope.
According to Sea Tow’s repair guidance, soft spots are often a late symptom. The earlier clues — a mildew smell under a hatch, spinning fasteners, or rust streaks around screws — frequently indicate deeper stringer or bulkhead decay that changes the entire repair scope. That’s a critical point: by the time your foot feels the floor flex, the rot has usually been working for months.
Inspection tools and what to look for:
- Awl or screwdriver probe: press firmly into suspect areas. Healthy marine plywood resists; rotted core compresses or crumbles.
- Moisture meter: a pin-type or pinless meter (Delmhorst and Tramex make reliable marine models) gives you a reading before you cut. Readings above 20% in plywood signal active moisture.
- Flashlight and inspection mirror: look up through bilge hatches at the underside of the deck panels for dark staining, delamination, or wet foam.
- Tap test: knock across the deck with your knuckles. A hollow, drum-like sound indicates delamination between the fiberglass skin and the core.
- Smell: a persistent musty or ammonia-like odor under hatches almost always means biological decay in the core.
Document everything with photos and moisture readings before you call a yard for a quote. A shop that sees your moisture map and photos can give you a far more accurate estimate than one working from a verbal description alone.
How do you decide between patching, panel replacement, or hiring a yard?
The decision comes down to three measurable thresholds, and being honest with yourself about each one.
Decision checklist:
- Patch it yourself if the soft spot is smaller than 12 inches in diameter, the surrounding core is dry and firm, and the fiberglass skins are intact. A single isolated soft spot on an otherwise solid floor is a reasonable DIY repair.
- Replace the panel if more than roughly 50% of a panel or core section is delaminated or if adjacent panels are also compromised. Patching a floor where half the core is gone is like patching a tire with a hole in the sidewall — it buys time, not safety.
- Hire a professional yard immediately if rot has reached the stringers or bulkheads, if you find evidence of hull penetration (water intrusion through a thru-hull or fitting), or if electrical wiring or plumbing runs under the deck. Structural members are not a DIY repair for most owners.
The cost-effectiveness argument for replacement over repeated patching is real. A patch on a floor with widespread moisture tends to fail within a season or two because the surrounding wet core continues to degrade. One thorough replacement, done correctly with full epoxy encapsulation, lasts decades.
What materials and tools do you need for a boat floor repair?
Preparation is where most DIY repairs either succeed or stall. Having the right materials on hand before you start cutting prevents the frustrating mid-project hardware store run.
Core material options
| Core Material | Best Use | Key Advantage | Key Risk | Maintenance Notes |
|---|---|---|---|---|
| Marine plywood (BS 1088 / Okoume) | Structural floors, high-load areas | Strong, familiar to work with | Rots if edges are not fully encapsulated | Requires full epoxy seal on all faces and edges |
| Closed-cell PVC foam | Wet areas, pontoon decks, areas prone to moisture | Will not rot, lightweight | Less stiff than plywood at equal thickness | Minimal; bond surfaces need prep |
| Balsa core | Lightweight performance builds | Excellent stiffness-to-weight ratio | Wicks moisture aggressively if skin is breached | Avoid in high-moisture zones; inspect frequently |
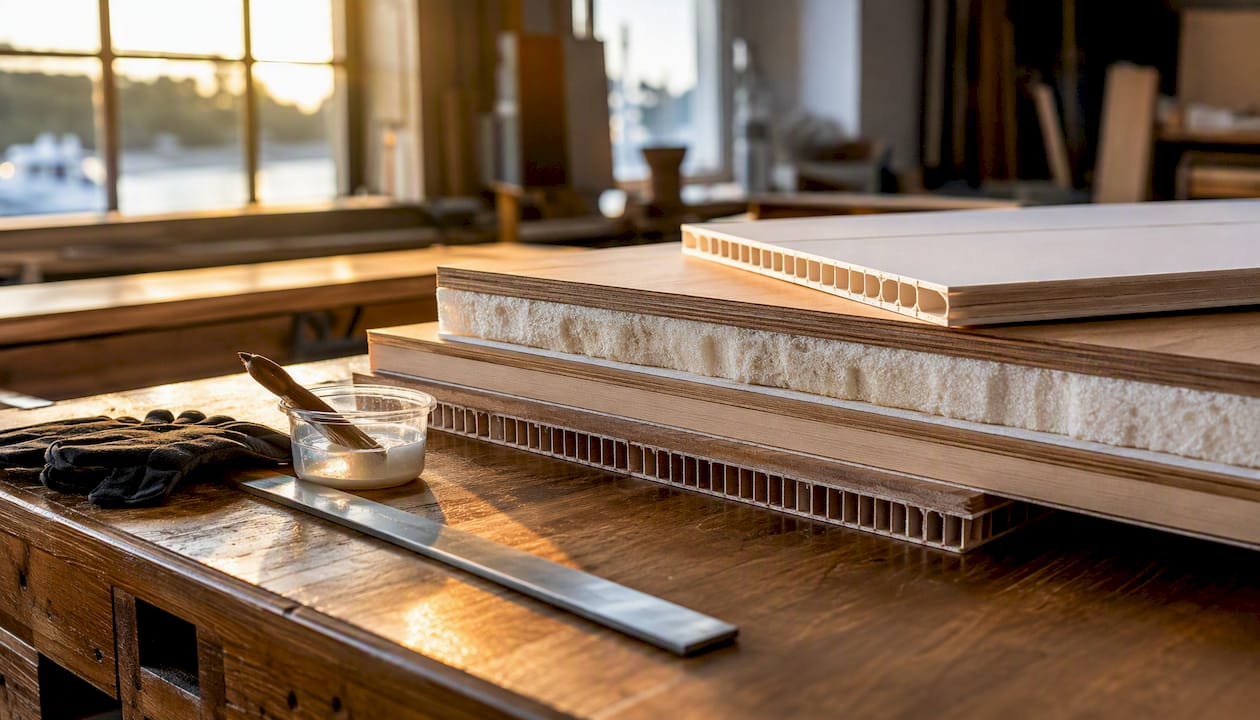
Pro Tip: When using marine plywood, encapsulate every face, edge, and fastener hole with at least two coats of penetrating epoxy before installation. Edge-wicking — moisture entering through an unsealed cut edge — is the single most common cause of repeat rot.
Materials checklist
- Marine-grade plywood (BS 1088 Okoume or Douglas Fir), or closed-cell PVC foam panels
- 6 oz fiberglass cloth for finish layers; biaxial (1708) cloth for structural layers
- Epoxy resin system (West System 105/205 or 105/206 for warmer climates)
- Thickening agents: colloidal silica for gap-filling, wood flour for filleting
- 316 stainless steel fasteners and backing plates
- Marine bedding compound (Sikaflex 291 or 3M 4200 for hardware re-installation)
Tools checklist
- Circular saw with blade depth set to core thickness only
- Oscillating multi-tool for cutting close to bulkheads
- Router for scarfing bevel edges
- Angle grinder with 36-grit disc for surface prep
- Mixing buckets, graduated cups, rollers, and chip brushes
- Organic-vapor respirator, nitrile gloves, safety glasses, and coveralls
- Moisture meter, pry bars, clamps, and a straightedge
The Fiberglass Warehouse DIY guide is a practical reference for confirming your materials list against a real replacement workflow.
Step-by-step: how to cut out the old floor and install a new one
This is the heart of the work. Follow the sequence carefully — skipping steps here is what creates callbacks and repeat failures.
-
Demo and removal. Set your circular saw blade depth to just past the core thickness so you don’t cut into stringers below. Cut along panel seams or scribe new cut lines. Use the oscillating tool near bulkheads. Pry out panels carefully and photograph the substructure before touching anything else.
-
Inspect and repair stringers. Probe every stringer and bulkhead with an awl. Soft or crumbling fiberglass tabbing means the stringer itself has rotted. If the stringer is compromised, this becomes a professional repair — stop here and call a yard.
-
Remove wet foam and dry the substrate. Dig out all saturated foam from bilge cavities. Use a heat gun or allow extended air-drying (minimum 48–72 hours in Florida heat) before applying any epoxy. Epoxy will not bond to wet wood.
-
Dry-fit new panels. Cut replacement panels to fit with a 1/8-inch gap at all seams and edges. This gap gets filled with thickened epoxy, creating a monolithic, water-resistant joint. Number each panel and mark its orientation.
-
Epoxy encapsulation. Coat every face, edge, and drilled hole of the new plywood with two coats of penetrating epoxy. Let each coat reach a tacky “green cure” stage before applying the next. This is the step that determines how long the floor lasts.
-
Bed the panels. Apply thickened epoxy (colloidal silica to a peanut-butter consistency) to the stringer tops and set panels into it. Clamp or weight panels flat. Fill all seams with thickened epoxy and tool into a smooth fillet.
-
Fiberglass layup. Once the epoxy has cured, apply a layer of 6 oz cloth over seams, then a full layer of biaxial (1708) cloth across the entire deck surface. Wet out each layer fully with epoxy, working out air bubbles with a squeegee. A second 6 oz finish layer over the biaxial gives a smoother fairing surface. The Epoxyworks runabout repair guide recommends two to three epoxy coats for full repair strength.
-
Fairing and finishing. Sand cured laminate with 80-grit, fill low spots with fairing compound, and finish to 120-grit before applying your chosen deck surface (painted non-skid, carpet, or synthetic teak).
-
Re-install hardware. Drill new fastener holes slightly oversized, fill with thickened epoxy, re-drill to final size once cured, and bed all hardware with Sikaflex 291 or 3M 4200. This prevents future water intrusion at every penetration point.
Pro Tip: Use peel-ply over your wet laminate layers. It pulls off cleanly after cure and leaves a chemically active surface ready for the next coat — no sanding required between layers.
Epoxy vs. polyester: which resin should you use for structural repairs?
The short answer is epoxy, almost always, for structural boat floor repairs. The longer answer explains why polyester keeps showing up in boatyards and why that’s often a mistake.
Comparative testing from West System shows that epoxy repairs recover approximately 81.7% of original laminate strength, while polyester repair averages land around 70.5%. That gap matters on a floor that carries people, gear, and the dynamic loads of a boat underway. Epoxy also bonds far more effectively to cured laminates and wood substrates, shrinks less in larger pours, and resists moisture penetration far better than polyester.
As Boats, epoxy is the accepted choice for bonding to wood, for moisture-critical applications, and for any repair where long-term structural integrity is the goal. Polyester is economical and works well for production hull layup, but it bonds poorly to cured epoxy and to wood, and it shrinks as it cures — which creates stress at the repair boundary.
Practical mixing and application guidance:
- Always measure epoxy by the manufacturer’s specified ratio by volume or weight. West System’s technical documentation provides exact ratios and cure-temperature charts for each hardener.
- In Florida summer heat, use a slow hardener (West System 206) to extend pot life. A fast hardener in 90°F ambient temperature can kick in under 10 minutes in the mixing cup.
- Mix small batches (4–6 oz at a time) and transfer immediately to a roller tray or wide container to slow the exotherm.
- To prep a cured polyester laminate for an epoxy repair: sand to 80-grit, wipe with acetone, and cut a 12:1 bevel at all repair edges. The 12:1 bevel recommendation comes directly from West System’s technical notes, maximizing bond area.
- After structural epoxy work is complete, a polyester gelcoat topcoat is acceptable for color and UV protection — just never use polyester for the structural bond layer itself.
Safety, ventilation, and responsible disposal
Resin work in an enclosed bilge or cockpit is genuinely hazardous. This isn’t a section to skim.
PPE requirements:
- Organic-vapor respirator cartridges (not a dust mask) for all sanding, mixing, and laminating work
- Nitrile gloves, changed frequently — epoxy sensitization is cumulative and permanent
- Safety glasses or a face shield when grinding or cutting fiberglass
- Disposable coveralls for laminating work; fiberglass dust embeds in skin and clothing
Ventilation:
- Always run a forced-air fan to move fresh air through enclosed spaces. A bilge blower works well for small spaces.
- Never mix or apply resin in a space where you can smell fumes without a respirator — that concentration is already above safe limits.
- In Florida heat, work in early morning hours when temperatures are lower. High ambient heat accelerates pot life and increases exotherm risk in large pours.
Cleanup and disposal:
- Resin-soaked rags can self-ignite as they cure. Spread them flat outdoors to cure fully before disposal, or submerge in water in a metal container.
- Cured epoxy is generally non-hazardous and can go in regular trash in most U.S. jurisdictions. Uncured resin is a hazardous material — contact your local household hazardous waste program for drop-off locations.
- 316 stainless fasteners are recyclable at most scrap metal facilities.
What does a boat floor repair actually cost, and how long does it take?
Costs vary significantly depending on scope, core material choice, and finishing option. These ranges reflect U.S. market conditions for materials and typical shop labor.
DIY material cost estimates:
- Small patch (under 12 inches): $50–$150 in epoxy, cloth, and fairing compound
- Single panel replacement (4×8 ft): $200–$500 in materials (plywood or foam, epoxy, biaxial cloth, fasteners)
- Full floor replacement on a 20-foot runabout: $800–$2,000 in materials, depending on core choice and finishing surface
Professional shop labor (U.S. market):
- Small patch: $300–$600 in labor, depending on access and prep time
- Full floor replacement: $2,500–$8,000 or more, depending on stringer condition, finishing choice, and boat size
Timeline estimates:
- Demo and removal: half a day to a full day
- Drying time before epoxy: 48–72 hours minimum (longer in humid conditions)
- Laminating and cure cycles: 3–5 days for a full floor, accounting for multiple cure windows
- Fairing, sanding, and finishing: 1–2 days
- Total calendar time for a full DIY replacement: 10–14 days is realistic for most owners working weekends
Variables that stretch both cost and time include hidden stringer damage discovered after demo, high humidity slowing cure, and finishing choices. Synthetic teak or painted non-skid costs more than carpet but lasts significantly longer in Florida’s UV environment. Accessibility matters too — a boat on a trailer in your driveway is far easier to work on than one blocked up in a crowded boatyard.
When should you stop DIY and call a professional yard?
There’s no shame in recognizing when a repair has grown past what one person with a circular saw and a few weekends can safely handle. The structural integrity of your boat depends on getting this call right.
Hire a professional yard when:
- Rot has reached the stringers or bulkheads (probing reveals soft tabbing or crumbling glass)
- You find evidence of hull penetration or compromised thru-hulls beneath the deck
- Electrical wiring or plumbing runs under the damaged section
- More than 50% of the floor area shows active moisture or delamination
- You lack the workspace, tools, or time to complete a proper cure cycle
What a professional yard checks and how they price it:
A good yard starts with a moisture survey, mapping the entire deck with a pinless meter before cutting anything. They’ll photograph the substructure, assess stringer and bulkhead condition, and give you a written scope. Labor is typically quoted by the hour for diagnostic work and by fixed scope for defined replacement jobs. Ask specifically about warranty on structural repairs — a reputable yard stands behind its fiberglass and epoxy work.
Questions worth asking any yard:
- Can I see the moisture map readings before you cut?
- What core material will you use, and will it be fully epoxy-encapsulated?
- What is the warranty on the structural repair?
- Will you photograph the substructure before closing up the deck?
For owners whose damage has grown past DIY scope, Mazzamarine offers professional marine repair services including fiberglass structural work, full refits, and access to a trusted network of Florida yard specialists. Their A-1 fiberglass repair capabilities cover exactly the kind of structural deck work that exceeds a weekend DIY project.
Before committing to a major yard job, it’s also worth coordinating a professional boat survey to get an independent moisture map and structural assessment — that document gives you leverage when reviewing a yard’s scope and pricing.
Moisture detection tools that go beyond the basic poke test
The awl test tells you where rot already is. Moisture meters tell you where it’s going next.
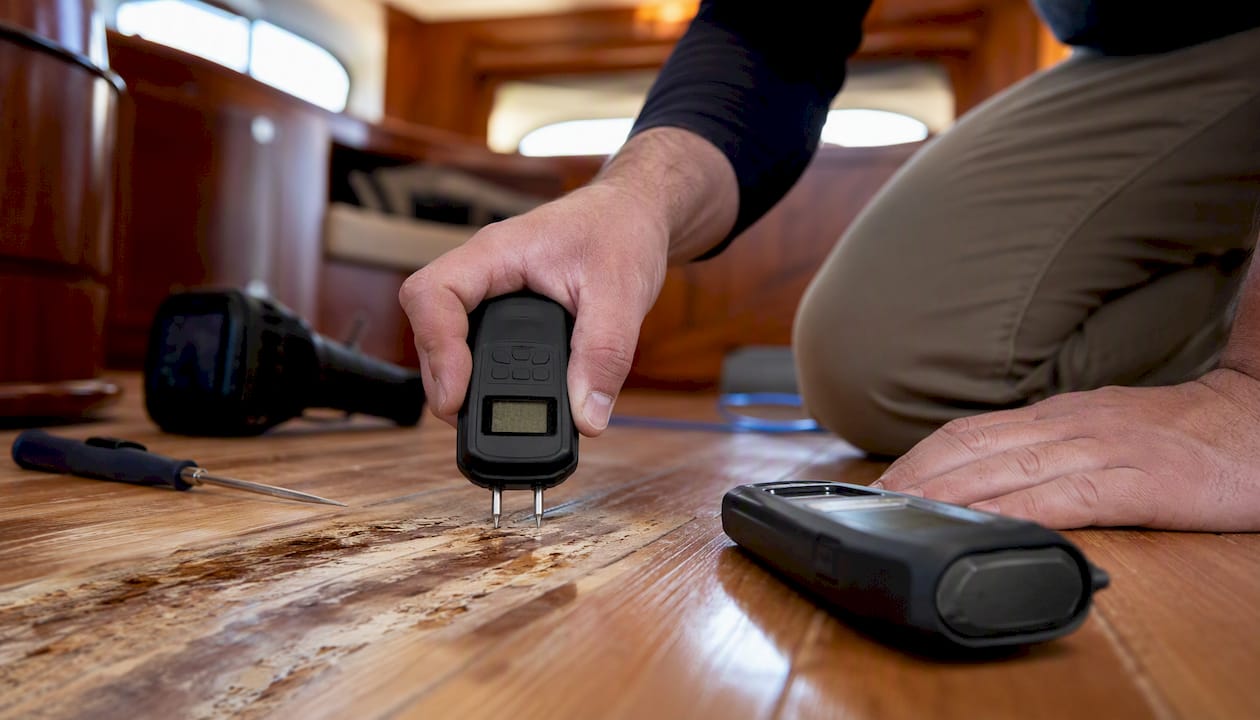
A pin-type moisture meter (Delmhorst BD-2100 is a widely used marine model) drives two small pins into the wood and measures electrical resistance. It’s accurate and affordable, but it leaves small holes and only reads the top layer. A pinless or radio-frequency meter (Tramex Skipper Plus is the standard in professional marine surveys) reads moisture through the fiberglass skin without penetrating it, making it ideal for mapping large deck areas quickly.
Thermal imaging adds another layer. An infrared camera or even a consumer-grade thermal attachment for a smartphone can reveal moisture-laden areas as temperature differentials, particularly in morning hours when the deck has warmed unevenly. This technique is most useful for identifying the boundary of a wet zone before cutting.
For bilge spaces and enclosed cavities, a hygrometer measuring relative humidity inside the space can confirm whether moisture is actively migrating.
Common mistakes that derail a boat floor repair
Most failed boat floor repairs share the same handful of errors. Knowing them in advance is worth more than any single technique.
Cutting corners on drying time is the most common. Two days of Florida sun feels like enough — it rarely is for wood that has been wet for months. Use your moisture meter, not your judgment.
Using polyester resin for structural wood bonds is a close second. Polyester shrinks as it cures and bonds poorly to wood fibers. A polyester patch on a plywood core looks fine for a season and then cracks at the boundary. Use epoxy for all structural work.
Skipping edge encapsulation on new plywood panels is how rot restarts within a few years. Every cut edge, every drilled hole, every fastener penetration is a potential entry point for moisture. Fill and seal all of them.
Re-installing hardware without epoxy-plugging the holes is another recurring mistake. Drill the hole oversized, fill with thickened epoxy, let it cure, then re-drill to final size. This creates a waterproof sleeve around every fastener.
Finally, underestimating the scope after demo is a planning failure, not a skill failure. Budget extra materials and time before you start cutting, because what you find under the floor is almost always worse than what you expected from above.
Finishing options and how to match your existing deck
The structural repair is done. Now the floor needs to look like it belongs on your boat.
Painted non-skid is the most economical and durable option for working boats. Interlux Interdeck and Toplac, along with Awlgrip’s non-skid systems, are widely available and bond well to epoxy-primed surfaces. Color-matching to existing deck paint is straightforward with a chip sample. For guidance on topcoat selection after structural work, the Awlgrip vs. gelcoat comparison covers the tradeoffs in detail.
Carpet is the fastest and cheapest finish, and it’s still the most common choice on bass boats and family runabouts. Marine-grade carpet (not indoor/outdoor) with a closed-cell foam backing resists mildew better than standard carpet. The downside is that carpet traps moisture and hides early signs of recurring rot — which is exactly how many owners end up doing this repair twice.
Synthetic teak (composite decking panels like those made from PVC or co-extruded materials) has become the preferred finish on center consoles and sportfish boats. It looks sharp, drains freely, stays cool underfoot compared to solid teak, and requires no varnishing. The teak deck restoration vs. replacement guide walks through the cost and durability tradeoffs between real and synthetic teak in Florida’s climate.
Gelcoat is the right choice when you’re repairing a section of an existing gelcoat deck and want a seamless match. Color-matching gelcoat requires a sample chip and some patience — most marine suppliers can tint to match. Apply over a properly primed epoxy surface, and finish with a UV-stabilized topcoat to prevent chalking.
Whatever finish you choose, apply a UV-protective topcoat or sealer as the final layer. Florida’s sun degrades unprotected epoxy and paint faster than almost any other environment in the country.
What most guides get wrong about boat floor repairs
The standard advice on boat floor repairs is technically sound but structurally backwards. Most guides lead with materials lists and step-by-step workflows, which is useful — but they bury the decision that actually determines whether a repair succeeds: the inspection.
Owners who skip thorough moisture mapping before cutting often discover, mid-project, that the damage is three times what they expected. At that point, they’re committed. The boat is torn apart, the materials are bought, and the pressure to finish pushes them to patch what should have been replaced. That’s how a $400 repair becomes a $4,000 problem two seasons later.
The other thing most guides understate is the permanence of epoxy sensitization. Repeated skin contact with uncured epoxy can cause an allergic reaction that makes you sensitive to epoxy for life. This isn’t a minor inconvenience — it means you can no longer work with the material at all. Nitrile gloves and a proper respirator aren’t optional safety theater; they’re what keeps this a hobby you can continue doing.
My honest take: the 12:1 bevel and full encapsulation steps feel tedious when you’re three days into a repair and just want to close up the deck. Do them anyway. The owners who skip them are the ones calling a yard two years later with the same problem, and by then the stringers are usually involved.
Mazzamarine: professional floor and structural repairs for Florida boat owners

When a boat floor repair grows past what a weekend and a circular saw can handle, you need a yard with the tools, the expertise, and the network to do it right the first time. Mazzamarine connects Florida boat owners with a trusted network of yacht repair specialists covering everything from fiberglass structural work and full deck refits to stringer replacement and hardware re-bedding. Whether you’ve pulled up the carpet and found rot into the stringers, or you simply want a professional moisture survey before committing to a scope, Mazzamarine’s team gives you a clear picture of what the job actually requires.
If you’re seeing soft spots, spinning fasteners, or a bilge that never quite dries out, the signs you need professional yacht repairs guide is a good starting point. Reach out to Mazzamarine directly to get a professional assessment and a realistic scope for your repair.
Sources
These are the authoritative references worth bookmarking for technical specs, mixing ratios, and materials:
For mixing ratios and cure schedules, always defer to the manufacturer’s current technical data sheet rather than a third-party summary. Formulations change, and the manufacturer’s own documentation is the authoritative source.
Recommended
Text or Call 954-330-9653 Schedule Appointment
Mazza Marine Yacht Services & Refit

Fiberglass Upgrades and Damage Repair

Premium Yacht Paint/ Faux Teak

Fishing: Custom Rods, Reels,Tackle

Electrical, Electronics and Navigation

Paint, Hull and Gelcoat

Teak Decks, Wood Cabinets, Carpentry

Canvas, Enclosures and Upholstery

Mechanical, Repower and Running Gear

Plumbing, Bilge and Thru-Hulls

Welding and Custom Fabrication

Interior Refit And Past Work
Get your yacht value Estimate
"*" indicates required fields