
View Our Recent Work:

If your boat is over 30 feet, has high freeboard, or you’re tired of white-knuckling every crosswind docking approach, a bow thruster is worth the investment. The most practical choice for the vast majority of recreational retrofits is a DC electric tunnel thruster, not hydraulic or retractable systems. Budget realistically: installed costs typically run $4,000 to $22,000 depending on hull work and electrical complexity, and the job takes anywhere from a couple of days to several weeks.
Here’s what determines your path forward:
- Boat over 30 feet or high-windage hull? A thruster is generally worth it, especially for full-keel or high-freeboard vessels.
- Comfortable with fiberglass work and 12V/24V electrical systems? DIY is feasible for simpler tunnel installs.
- Complex hull curvature, hydraulic integration, or no haul-out access? Bring in a professional installer from the start.
Key Takeaways
A reliable bow thruster installation depends on correct tunnel placement, properly sized electrical wiring, and a commissioning process that verifies performance under real load.
| Point | Details |
|---|---|
| Match thruster to vessel | Electric tunnel thrusters suit most boats over 30 feet; hydraulic units fit larger yachts with existing systems. |
| Survey before cutting | Confirm hull thickness, stringer location, and insurer or yard requirements before any hull penetration. |
| Fairing determines thrust | A well-faired tunnel outperforms a bigger motor in a poorly shaped opening. |
| Size electrical for load | Undersized cable causes voltage drop at the motor, cutting thrust even with a correctly mounted unit. |
| Consider Mazzamarine | Mazzamarine coordinates hull engineering, electrical work, and commissioning under one contract for Florida yacht owners. |
Table of Contents
- Types of Bow Thruster Installation and When to Choose Each
- Planning a Bow Thruster Installation: Hull Survey and Permits
- Hull Engineering: Cutting, Reinforcement, and Fairing
- Electrical and Power Design for a Bow Thruster
- Mechanical Mounting and Corrosion Protection
- Commissioning and Testing a New Bow Thruster
- Bow Thruster Installation Cost and Timeline
- DIY vs. Professional Bow Thruster Installation
- Mazzamarine’s Bow Thruster Installation Service
- What a Bad Tunnel Cut Taught Us About Patience
- Ready to Get Your Bow Thruster Installed Right?
- Sources
Types of Bow Thruster Installation and When to Choose Each
Most owners default to an electric tunnel thruster, and for good reason. It’s the simplest system to wire, the most widely stocked for parts, and it handles the intermittent, short-burst demands of docking maneuvers well. Power ranges typically span from low to high horsepower depending on boat size, but duty cycles matter: these motors are built for bursts of a few minutes, not continuous running.
Hydraulic thrusters make sense on yachts that already run a hydraulic plant for windlasses, stabilizers, or steering. They tolerate longer duty cycles and higher loads, but retrofitting hydraulics onto a boat that doesn’t already have them adds real cost and complexity, as industry cost guides confirm.
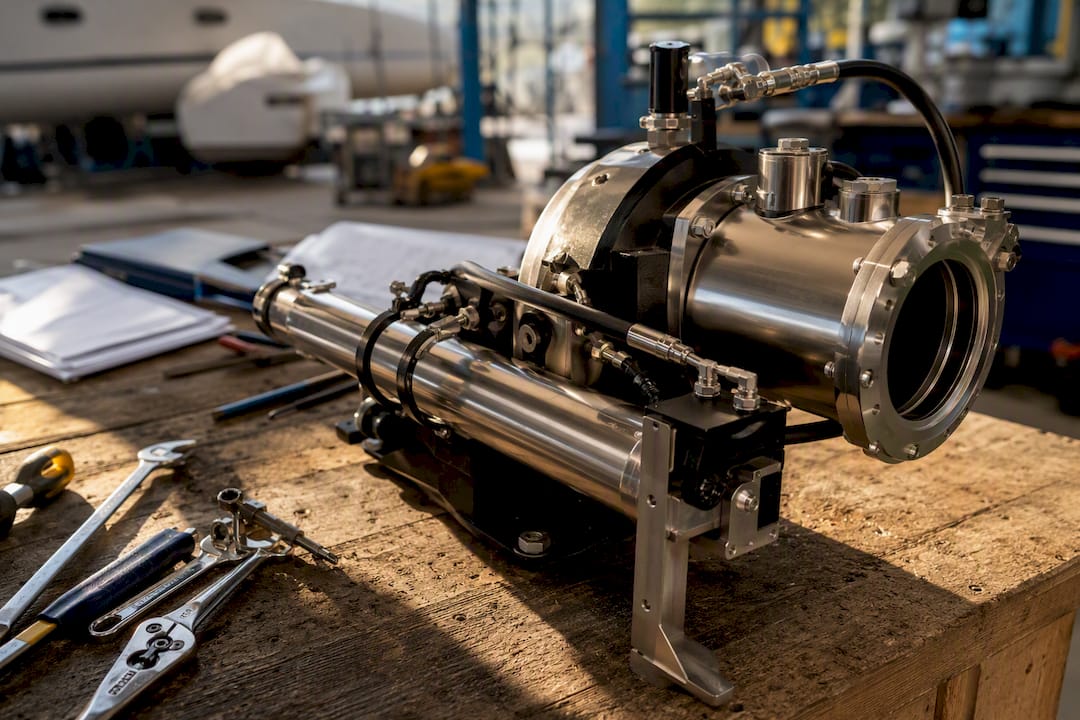
Retractable and jet-drive thrusters solve the drag problem for performance sailboats and racers, since a fixed tunnel creates parasitic drag underway. The trade-off is mechanical complexity, higher noise, and a steeper price tag.
Control style matters too:
- On/off toggle: simple, cheap, jerky at low power.
- Proportional joystick: smoother, more intuitive, standard on higher-end installs.
Planning a Bow Thruster Installation: Hull Survey and Permits
Before anyone touches a hole saw, you need a real survey. This is where DIY installers most often skip steps, and it’s the single biggest predictor of a clean job versus a leaking headache.
- Check hull thickness and laminate schedule at the proposed tunnel location. Thin cored hulls need different reinforcement than solid glass.
- Locate internal stringers and bulkheads. The tunnel needs clearance from structural members, and cutting through one without compensating is a serious mistake.
- Triangulate the ideal tunnel position forward enough for leverage, but clear of the waterline and anchor locker.
- Assess access. Will you need to remove an interior berth, cabinet, or headliner to reach the installation point from inside?
- Confirm insurance and yard policies. Some marinas and insurers require the work to be performed or signed off by a certified installer before they’ll cover the vessel.
Pro Tip: Photograph the hull interior from multiple angles before you cut anything. If a problem shows up six months later, those photos are the only record of what the structure looked like beforehand.
Hull Engineering: Cutting, Reinforcement, and Fairing
This is the part of the job you cannot undo, and it’s exactly where most long-term problems originate. Poor tunnel placement, an unfaired opening, or a rushed lamination job will cost you thrust, add noise, and sometimes cause vibration that never fully goes away.
The sequence matters:
- Mark and pilot-drill the tunnel centerline from both sides to confirm alignment before committing to the full-diameter cut.
- Cut the tunnel opening, then dry-fit the tube to check squareness against the hull.
- Laminate a backing frame around the tunnel flange, building up glass layers to match or exceed the surrounding hull schedule.
- Fair the exterior surface smooth. A tunnel with turbulent edges or an unfair transition creates cavitation, which robs thrust and generates noise regardless of motor size.
- Bed the flange with marine sealant and torque fasteners evenly in a cross pattern, not in sequence around the ring.
Pro Tip: Run your hand along the faired tunnel opening once the fiberglass cures. If you can feel a ridge or step where the tunnel meets the hull, water flow will find it too, and thrust will suffer.
Inspect the glass-to-hull seal closely before moving forward. Practitioners consistently point to seal quality as the most critical long-term factor in a thruster installation. This is where hidden leaks originate, and they’re expensive to trace once the interior is buttoned back up.
Electrical and Power Design for a Bow Thruster
A mechanically perfect thruster with undersized wiring will still disappoint you. Tunnel thrusters draw heavy current in short bursts, often 200 to 400 amps for larger units, and that load exposes any weakness in your battery bank or cable sizing fast.
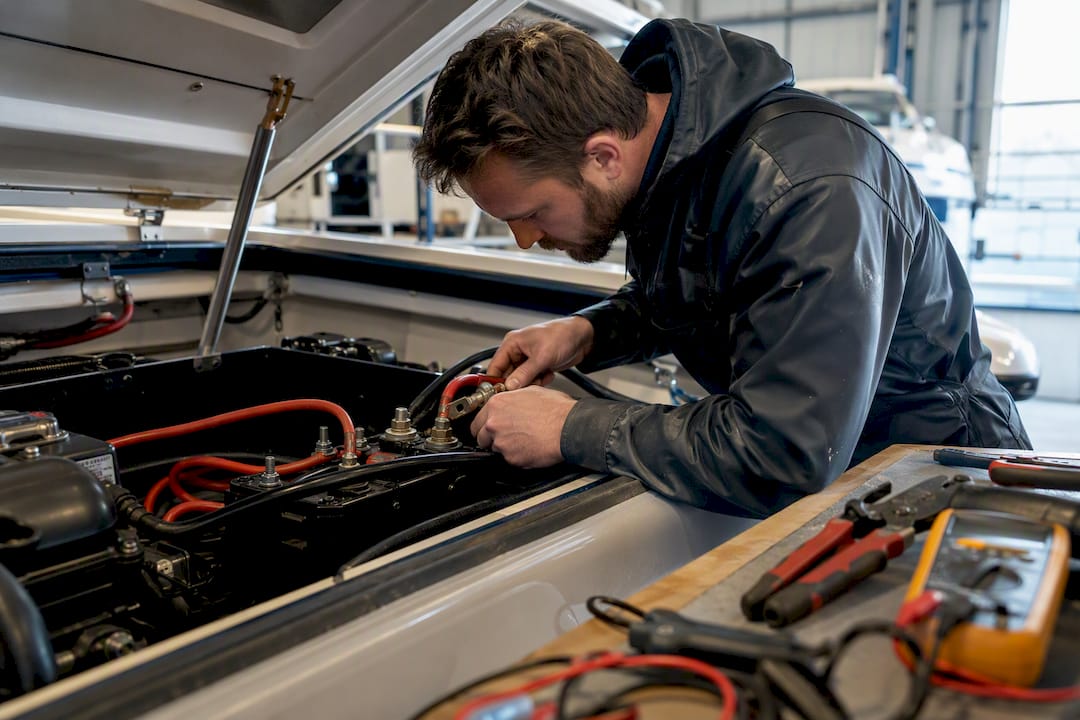
Voltage drop is the silent killer of thruster performance. A thruster rated for full thrust at 12.6V might deliver a fraction of that if voltage sags to 10.5V under load because the cable run is too thin or too long.
Practical wiring guidance:
- Size cable gauge for the full amperage draw at the actual cable length, not a generic chart estimate, and consult a marine battery bank guide when sizing capacity.
- Install a properly rated fuse or circuit breaker as close to the battery as possible.
- Route cables away from bilge water and chafe points, and protect them with conduit where they pass through bulkheads.
- Use marine-grade tinned copper cable exclusively. Standard automotive wire corrodes fast in a bilge environment.
Statistic Callout: Installed cost guides show electrical integration alone often accounts for a meaningful share of the $4,000 to $22,000 total range, particularly when a dedicated battery bank and new cable runs are required.
A dedicated thruster battery avoids competing with house loads during maneuvers, though a shared bank works fine on smaller boats if cable sizing and isolation are handled correctly.
Mechanical Mounting and Corrosion Protection
The mechanical side of a bow thruster installation is where sloppy shortcuts turn into recurring service headaches. Backing plates need to spread load across the laminate, not concentrate it at a few bolt points, and through-bolting with large washers generally outperforms adhesive-only mounting for anything beyond the smallest units.
Get the sealant and torque specs right the first time:
- Use a marine polyurethane or polysulfide sealant rated for below-waterline use, never a general-purpose caulk.
- Torque fasteners to the manufacturer’s spec in a cross pattern to avoid distorting the flange.
- Install a sacrificial anode near the thruster to manage galvanic corrosion, and check it every haul-out.
- Inspect the shaft seal and flange condition annually, since these are the parts most likely to weep slowly before failing outright.
Plan service access before you close anything up. If the motor housing ends up buried behind a fixed bulkhead, every future inspection turns into a bigger job than it should be.
Commissioning and Testing a New Bow Thruster
A thruster installation isn’t finished when the unit spins. It’s finished when it’s been tested under real load and passes a defined checklist.
- Confirm thrust direction matches the control input, both left and right, before the boat leaves the dock.
- Measure voltage under load at the motor terminals, not at the battery. This is where hidden voltage drop actually shows up, and it’s a step DIY installers frequently skip.
- Listen and feel for abnormal vibration or grinding, which usually points to a misaligned prop or bearing issue.
- Run a sea trial with repeated full-power bursts in both directions, checking for consistent thrust and no overheating.
Pro Tip: If a professional installer won’t demonstrate the terminal voltage measurement during handoff, ask why. It takes two minutes and it’s the single best proof the wiring was sized correctly.
Helm placement matters for usability too. A joystick mounted where your hand naturally rests during docking gets used; one buried on a side panel often doesn’t.
Bow Thruster Installation Cost and Timeline
Costs scale with scope, not just unit price. A straightforward electric tunnel retrofit on a 30 foot boat with easy interior access sits toward the lower end of the $4,000 to $22,000 range. Complex hull curvature, a dedicated battery bank, or hydraulic integration on a larger yacht pushes toward the top.
What drives the number:
- The thruster unit itself, which scales with thrust rating and control type.
- Labor for hull cutting, lamination, and fairing, the most time-intensive portion of the job.
- Electrical work, especially if a new battery bank and heavy cable runs are needed.
- Interior demolition and rebuild if the tunnel location sits behind furniture or tankage.
Statistic Callout: Labor hours for common retrofits range from roughly 8 hours for simple deck-mounted jobs to 40+ hours for complex hull work, with calendar time stretching to multiple weeks when haul-out scheduling and cure times for fiberglass are factored in.
Owners commonly control cost by choosing the right-sized unit for actual usage rather than over-specifying, and by scheduling the work alongside a planned haul-out instead of a dedicated one.
DIY vs. Professional Bow Thruster Installation
Be honest about the skillset before you start cutting. You need working fiberglass lamination experience, comfort with 12V or 24V marine electrical systems, and access to a haul-out or lift.
- Assess your tooling and experience. A hole saw and a wiring diagram aren’t enough; you need fairing tools, a multimeter, and fiberglass layup experience.
- Weigh the cost of a mistake. A misplaced tunnel or a poorly faired opening often costs more to correct than the entire installation would have cost professionally the first time.
- Vet any installer you hire. Ask for references on structural hull work specifically, a written electrical plan, a warranty on the installation, and a commissioning report.
Getting this decision right the first time avoids the expensive rework that follows a rushed or under-planned retrofit, a pattern documented in detailed retrofit accounts where iterative fitting and multiple test cycles were required to get sealing right.
Mazzamarine’s Bow Thruster Installation Service
Jason and the team at Mazzamarine have spent years on Florida yards handling exactly this kind of hull and electrical integration work, alongside sportfish upgrades, custom welding, and thru-hull installations for owners who’d rather trust the details to people who do this daily.
A Mazzamarine thruster installation includes:
- A hull survey to confirm tunnel placement and structural feasibility.
- Engineering and lamination work handled by an experienced hull team.
- Electrical integration sized correctly the first time, including battery and cable planning.
- Full commissioning with sea trial verification before signoff.
- Warranty coverage backing the completed work.
What a Bad Tunnel Cut Taught Us About Patience
A few years back, a rushed tunnel cut on a sportfish retrofit came in slightly off-center, and the fairing crew spent two extra days correcting turbulence that shouldn’t have existed. The lesson stuck: measure the tunnel position twice, from both interior and exterior reference points, before the saw ever touches fiberglass. Every experienced yard has a version of that story. The good ones learn to slow down at exactly the moment it matters most.
— Jason
Ready to Get Your Bow Thruster Installed Right?
Mazzamarine gives you a coordinated team for a bow thruster installation instead of juggling a fiberglass shop, an electrician, and a rigger separately, which is where most DIY timelines and budgets fall apart. Our crews handle the hull engineering, electrical integration, and commissioning under one contract, with the same people accountable from survey to sea trial.

When you reach out for a quote, include your boat’s make and model, current photos of the proposed tunnel location from inside and outside the hull, and any access notes about furniture or tankage near the site. That lets us scope the job accurately before anyone sets foot on your boat. Check out our full marine repair and installation services and reach out to schedule a survey.
Sources
- Necessary or nice?: bow thrusters
- What really goes into a thruster installation?
- Bow Thruster Installation Cost 2026 | Official Site
- Bow Thruster Installation Cost Guide 2026 – One and Done Prep
Recommended
Text or Call 954-330-9653 Schedule Appointment
Mazza Marine Yacht Services & Refit

Fiberglass Upgrades and Damage Repair

Premium Yacht Paint/ Faux Teak

Fishing: Custom Rods, Reels,Tackle

Electrical, Electronics and Navigation

Paint, Hull and Gelcoat

Teak Decks, Wood Cabinets, Carpentry

Canvas, Enclosures and Upholstery

Mechanical, Repower and Running Gear

Plumbing, Bilge and Thru-Hulls

Welding and Custom Fabrication

Interior Refit And Past Work
Get your yacht value Estimate
"*" indicates required fields