
View Our Recent Work:

Galvanic corrosion is stopped or slowed by three moves: fit the correct sacrificial anodes for your water type, keep a low-resistance bonded system that you actually inspect, and add galvanic isolation or an isolation transformer whenever shore power ties your boat to the dock ground. ABYC standards and the galvanic series give you the numbers. Technicians in the marine repair field see the failures firsthand, and the pattern rarely changes.
TL;DR:
- Using the correct sacrificial anodes for your water type and regularly replacing them can prevent rapid galvanic corrosion.
- Conducting routine inspections of anodes, bonding systems, and hull potentials helps detect problems before significant damage occurs.
- Stray-current corrosion causes rapid metal loss in days and requires immediate electrical fault diagnosis and haul-out, unlike slow galvanic action.
- Installing galvanic isolators or isolation transformers effectively reduces dockside galvanic currents, but their limits require proper assessment and maintenance.
- Regularly logging voltage readings, anode conditions, and wiring integrity with professional diagnostics prevents costly shaft and prop damage.
Table of Contents
- Quick Diagnostic Checklist: Signs, Urgency, and Who Should Act
- How Galvanic Corrosion Actually Works
- Anodes, Isolators, and Isolation Transformers: Choosing What Fits Your Boat
- The Inspection Routine That Actually Catches Problems Early
- What the ABYC Standards Actually Say
- Mazzamarine’s Field Checklist: What We Check First
- A Case Worth Remembering
- Get Your Boat’s Bonding and Anodes Checked by marine service professionals
- Sources
Quick Diagnostic Checklist: Signs, Urgency, and Who Should Act
Not every pitted prop means the same thing, and the pace of damage tells you more than the damage itself. A boat losing metal slowly, over months, is behaving the way galvanic corrosion normally behaves. A boat losing metal in days is telling you something electrical just went wrong.
Walk the hull and running gear and look for these signals:
- Anodes disappearing faster than your normal replacement cycle, sometimes down to a nub within weeks
- Shiny, etched, or unusually bright metal on the propeller, shaft, or trim tabs
- A pinkish or reddish tint on bronze fittings, a telltale sign of dezincification
- Pitting, small holes, or a rough, sponge-like texture on underwater hardware
Slow, steady loss across multiple anodes usually points to ordinary galvanic action that needs better protection, not panic. Rapid, bright erosion concentrated on one component often signals stray-current corrosion, which can eat through metal in days and demands an immediate haul-out and electrical fault check, not a wait-and-see approach.
How Galvanic Corrosion Actually Works
Two different metals sitting in the same electrolyte, meaning seawater or brackish water, form what’s called a galvanic couple. Connect them electrically, through a bolted fitting, a shared bonding wire, or even just proximity in the water, and a voltage potential difference starts pushing current between them. The less noble metal becomes the anode and sacrifices itself; the more noble metal becomes the cathode and stays protected.
The rule of thumb worth memorizing: when two metals sit more than about 200 millivolts apart on the galvanic series, expect real trouble without added protection. Aluminum and stainless steel are a classic mismatched pair, separated by roughly that margin or more depending on the alloys involved. Make the cathode (the stainless) large relative to the anode (the aluminum), and the aluminum corrodes faster, because a bigger cathode demands more current and pulls harder on its weaker partner.
Anodes, Isolators, and Isolation Transformers: Choosing What Fits Your Boat
Every prevention method on this list does something different, and most boats need more than one working together.
- Sacrificial anodes. Match the metal to the water: zinc for straight seawater, magnesium for fresh water where zinc passivates and stops working, and aluminum alloys for mixed or brackish conditions. Size matters more than owners think. Undersized anode area gets consumed fast and leaves hardware exposed; check condition regularly and replace when significantly depleted rather than waiting for total loss.
- Bonding systems. A bonded network ties underwater metal together electrically so anodes protect everything at once instead of leaving isolated fittings undefended. A single corroded bonding wire or a loose crimp can silently strip protection from an entire system, even with fresh anodes installed.
- Galvanic isolators. These block low-level DC current traveling through the shore power ground wire, which is where a lot of dockside galvanic trouble originates. They’re inexpensive and effective for their job, but they have real limits: surge capacity is finite, and a bypassed or corroded ground path defeats them entirely. ABYC A-28 covers installation guidance directly.
- Isolation transformers. These break the electrical connection to shore power completely, handling both galvanic and many stray-current problems that isolators can’t touch. They’re heavier, pricier, and more common on larger boats or vessels that live at the dock for months at a time.
- Insulation and coatings. Nonconductive washers, G10 fiberglass barriers between dissimilar metals, and quality protective coatings reduce exposed cathode surface area, which slows the whole reaction even before an anode gets involved.
Pro Tip: If your boat has permanently installed shore power and you’ve never checked whether it has a galvanic isolator or isolation transformer, that’s the first thing to find out. This is a common gap found on boats losing anodes too fast.
The Inspection Routine That Actually Catches Problems Early
A once-a-year glance at the anodes isn’t a maintenance program. Build a routine around these checks, done both in season and at haul-out:
- Inspect every anode for shape, pitting pattern, and remaining mass, not just whether it’s “still there”
- Measure hull potentials with a silver/silver-chloride reference electrode or a marine-rated multimeter
- Test bonding continuity and terminal resistance at each connection point
- Inspect thru-hulls, struts, and shaft logs for pitting or discoloration
Healthy hull potentials typically fall in a range of roughly negative 200 to negative 400 millivolts against a reference electrode; readings drifting outside that band in either direction deserve a closer look. For galvanic isolators, check in-water DC voltage across the terminals, which normally reads between about 0.3 and 0.6 volts on a healthy unit, or run an out-of-water diode test that should climb slowly toward 0.8 to 0.9 volts. Log every reading with the date, the anode’s weight or visual condition, and any bonding resistance figures. That log is what turns a slow, creeping failure into something you catch months before it becomes a haul-out emergency.
What the ABYC Standards Actually Say
ABYC guidance gives you something firmer than gut feeling when you’re arguing with a marina electrician or reading a survey report. Standard A-28 recommends galvanic isolation, meaning a galvanic isolator, a polarization transformer paired with an isolator, or a full isolation transformer, for any boat with permanently installed shore power. Standard E-2 sets the cathodic protection criteria surveyors use to judge whether your hull potentials sit in a safe range, and E-11 covers transformer-specific installation notes.
One caution worth repeating: overprotection is a real risk, not a theoretical one. Pushing hull potentials too negative through excessive impressed current can cause alkali damage in wooden hulls, paint blistering, and even hydrogen embrittlement in certain metals. When you bring in a marine electrician, reference A-28 and E-2 by name. It shortens the conversation considerably.
Mazzamarine’s Field Checklist: What We Check First
On a corrosion complaint, experienced technicians start in the same three places every time: bonding continuity across the whole underwater system, anode condition and remaining mass, and thru-hull or shaft integrity. Then they trace wiring for bypasses around any installed galvanic isolator, because a frayed ground wire touching a rail or a bypassed isolator explains a large share of “why are my zincs disappearing so fast” calls.
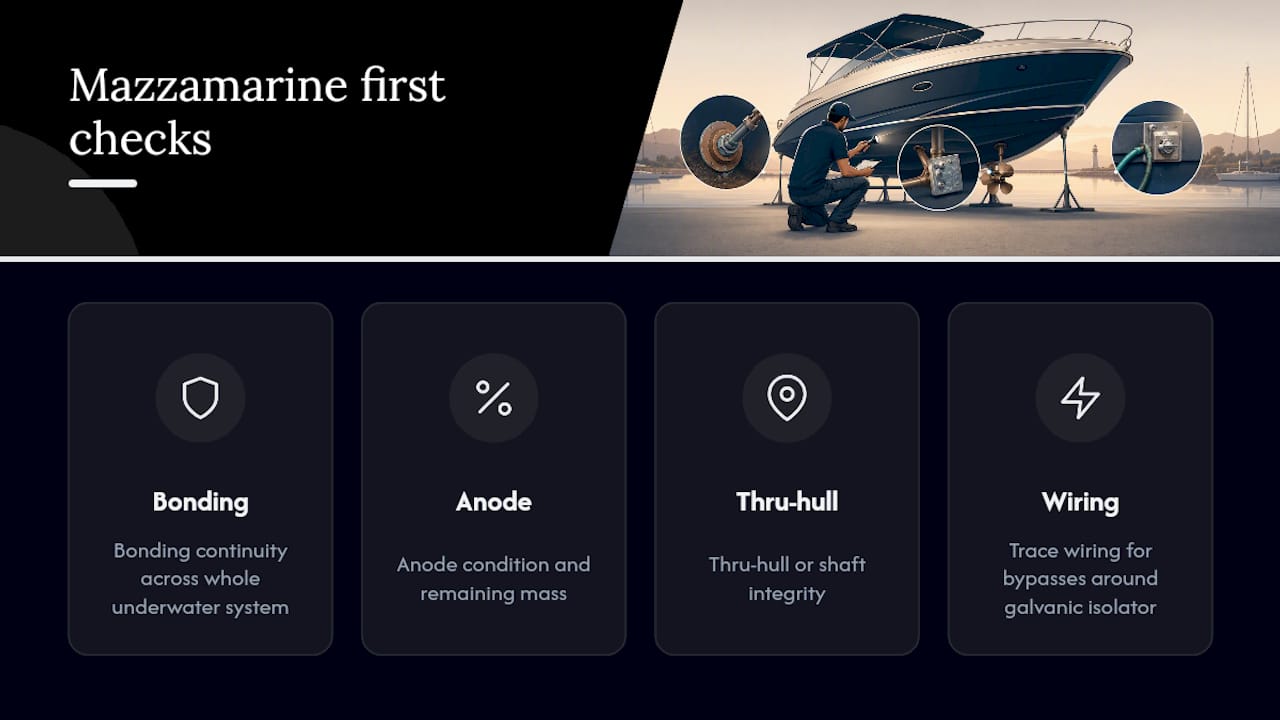
Common owner mistakes include using the wrong anode alloy for the water type, wiring that routes around a galvanic isolator instead of through it, and insufficient anode surface area for the boat’s underwater metal. If you’re seeing rapid zinc loss, visible pitting, or any hint of a failed bond or stray current, that’s not a wait-for-the-next-haul-out situation. That’s a call-now situation.
A Case Worth Remembering
A sportfish owner once called about a shaft that looked freshly machined; bright, smooth, no anode nearby doing its job. A quick bonding check found a single corroded ground strap, invisible unless you went looking for it, that had quietly isolated the shaft from the rest of the protected system for months. Replacing one $40 strap saved a shaft and coupling that would have run into thousands. The lesson holds for any boat: schedule the checks, log the voltages, and don’t wait for visible damage to start looking.
— Jason
Get Your Boat’s Bonding and Anodes Checked by marine service professionals
A galvanic isolator installed wrong, an anode sized for the wrong water, or a bonding strap nobody’s checked in three years costs far more in shaft and prop damage than catching it early ever would. Mazzamarine handles the full diagnostic, from hull potential readings to bonding resistance checks, plus the repair work that follows: anode replacement, custom welding on damaged thru-hulls, and wiring corrections around isolators that have been quietly bypassed.

Before you call, grab a few things: recent voltage readings if you have them, photos of your anodes, and a plain description of what you’re seeing, whether that’s fast zinc loss, pitting, or a shaft that looks too bright to be normal. If the damage looks acute, Mazzamarine offers emergency repair service and can coordinate a haul-out fast. For everything else, start with a full diagnostic and repair consultation and get ahead of the next anode cycle instead of chasing it.
Sources
- E-2 Cathodic protection (ABYC excerpt)
- Preventing galvanic & stray-current corrosion (ProBoat, 2026)
- Best Practices — Corrosion (JOwners technical brief)
Recommended
Text or Call 954-330-9653 Schedule Appointment
Mazza Marine Yacht Services & Refit

Fiberglass Upgrades and Damage Repair

Premium Yacht Paint/ Faux Teak

Fishing: Custom Rods, Reels,Tackle

Electrical, Electronics and Navigation

Paint, Hull and Gelcoat

Teak Decks, Wood Cabinets, Carpentry

Canvas, Enclosures and Upholstery

Mechanical, Repower and Running Gear

Plumbing, Bilge and Thru-Hulls

Welding and Custom Fabrication

Interior Refit And Past Work
Get your yacht value Estimate
"*" indicates required fields