
View Our Recent Work:

A leak on your yacht is rarely just an inconvenience. Left undetected, water finding its way into your hull can rot stringers, corrode electrical connections, and turn a weekend cruise into a Coast Guard call. Learning how to fix yacht leaks the right way means understanding where water hides, why it travels in unexpected directions, and which repairs actually hold in Florida’s saltwater, high-humidity environment. This guide gives you a methodical path from detection through verified repair, built for the realities of South Florida boating.
Table of Contents
- What you need: tools and preparation for leak detection
- Detecting leaks: a methodical approach for Florida yachts
- Fixing yacht leaks: step-by-step repair for common problem areas
- Verifying repairs and maintaining leak-free yachts in Florida
- Why traditional leak fixes might fail Florida yacht owners — and what really works
- Professional support: maintaining your Florida yacht’s integrity
- Frequently asked questions
Key Takeaways
| Point | Details |
|---|---|
| Systematic detection | A methodical approach with the right tools saves time and prevents missed leaks. |
| Proper repair prep | Thorough cleaning and dry surfaces are critical for lasting sealant bonds. |
| Replace vs repair | Replacing damaged thru-hulls and fittings is safer than patch repairs. |
| Regular maintenance | Monthly seacock exercise and bilge monitoring prevent leaks in humid Florida. |
| Professional help | Haul-outs and expert inspections complement DIY care for complex leaks. |
What you need: tools and preparation for leak detection
Before you chase a single drip, gather the right gear. Walking into a bilge inspection without preparation leads to missed leaks and wasted time. Here is what experienced Florida yacht owners keep on hand:
Essential leak detection tools:
- Moisture meter (digital, marine-rated)
- Bright flashlight or headlamp
- Dry towels and paper towels
- Garden hose with adjustable nozzle
- Chalk or a grease pencil for marking suspected areas
- Isopropyl alcohol for cleaning test surfaces
- A helper stationed below while you run the hose above
Moisture meters and bilge monitoring are genuinely underused by DIY inspectors. A moisture reading above 20% on a fiberglass surface indicates water infiltration that your eyes will never see. Moisture meters and towels help detect hidden leaks effectively over 1 to 2 days of monitoring, giving you a clear picture of what is dry and what is not.
Preparation steps before any inspection:
| Step | Action | Why it matters |
|---|---|---|
| 1 | Pump the bilge completely dry | Creates a clean baseline for new water tracking |
| 2 | Wipe bilge surfaces with dry towels | Removes residual moisture that confuses readings |
| 3 | Mark current bilge water level with chalk | Reveals slow seepage over 24 hours |
| 4 | Note recent weather and docking conditions | Separates rain entry from hull or plumbing leaks |
| 5 | Check all plumbing and thru-hull basics for visible corrosion | Flags obvious candidates before testing |
A garden hose and flashlight are essential for targeted testing of deck fittings and thru-hulls. Keep the hose handy because you will use it section by section in the next phase. Before you begin, add the bilge inspection to your Florida yacht spring checklist so it never gets skipped between seasons.
Now that you have the right tools and setup, let’s learn how to find where the leaks hide.
Detecting leaks: a methodical approach for Florida yachts
The biggest mistake yacht owners make is testing everything at once. It feels faster. It is not. Water from a deck fitting can travel two feet behind an interior panel before dripping into the bilge, which means the drip point and the entry point are rarely the same location. Patience and one-at-a-time testing are what separate a successful yacht leak detection guide from a frustrating afternoon.
Step-by-step detection method:
- Start at the bow and work aft, testing each deck fitting individually.
- Run the hose over one fitting or seam for 30 to 60 seconds while a helper watches inside for drips.
- Hose testing deck fittings for 30 to 60 seconds each while a helper watches inside is one of the most reliable ways to isolate a leak source.
- Mark any wet area inside with chalk immediately before moving to the next fitting.
- After testing topside fittings, test portlights and hatches the same way.
- Perform a static bilge test: add a known volume of clean water, mark the bilge water level and monitor over 24 hours to track slow leaks.
Common leak points on Florida yachts:
- Stanchion base fittings (these flex every time someone grabs the lifeline)
- Chainplate knees where the deck meets standing rigging
- Portlights and fixed windows, especially older acrylic frames
- Hatches with dried or cracked gaskets
- Seacocks and thru-hull fittings, particularly on vessels over 10 years old
- Raw water hose connections below the waterline
Here is a diagnostic trick that most online guides skip entirely. Carefully taste testing bilge water distinguishes fresh water leaks from saltwater, guiding your focus immediately. Salty bilge water points to a hull penetration or seacock. Fresh water suggests a plumbing fitting, a water tank connection, or rain entering through deck hardware. You just cut your search area in half with one simple test.
Pro Tip: Water travels surprisingly far inside a cored fiberglass deck before it drips. If your flashlight shows a drip in one location, trace the interior surface uphill from that point to find the actual entry. Use the moisture meter on the deck above the drip before you assume you have found the source.
With the leak located, it’s time to tackle the repairs.
Fixing yacht leaks: step-by-step repair for common problem areas
Now comes the work that actually stops the water. Knowing how to seal yacht leaks properly means understanding that the sealant itself is only as good as the surface beneath it. Complete removal of old sealant, cleaning, and dry surface prep is critical for successful re-bedding. This is where most DIY repairs fail.
Repair steps for deck hardware and portlights:
- Remove the fitting completely if possible. Do not just run new sealant over the old.
- Scrape away every trace of old bedding compound using a plastic scraper to avoid gouging the deck.
- Clean the mating surfaces with isopropyl alcohol and allow to dry fully, at least 30 minutes in Florida humidity.
- Apply marine-grade sealant appropriate to the location (see table below).
- Reinstall the fitting, torquing bolts evenly and gradually.
- Tighten portlight bolts again after sealant cures (typically 24 to 48 hours) to seat the gasket properly.
- Use Tef-Gel on stainless fasteners going into aluminum to prevent galvanic corrosion.
Sealant selection guide:
| Location | Recommended product | Key property |
|---|---|---|
| Deck hardware above waterline | 3M 5200 or equivalent polyurethane | Strong, flexible, permanent bond |
| Below-waterline fittings | Hybrid polyurethane sealants | Elasticity under hull flex and vibration |
| Portlights and windows | Silicone or polysulfide | Paintable, UV-resistant |
| Teak overlay bedding | Polysulfide | Won’t attack teak oils |
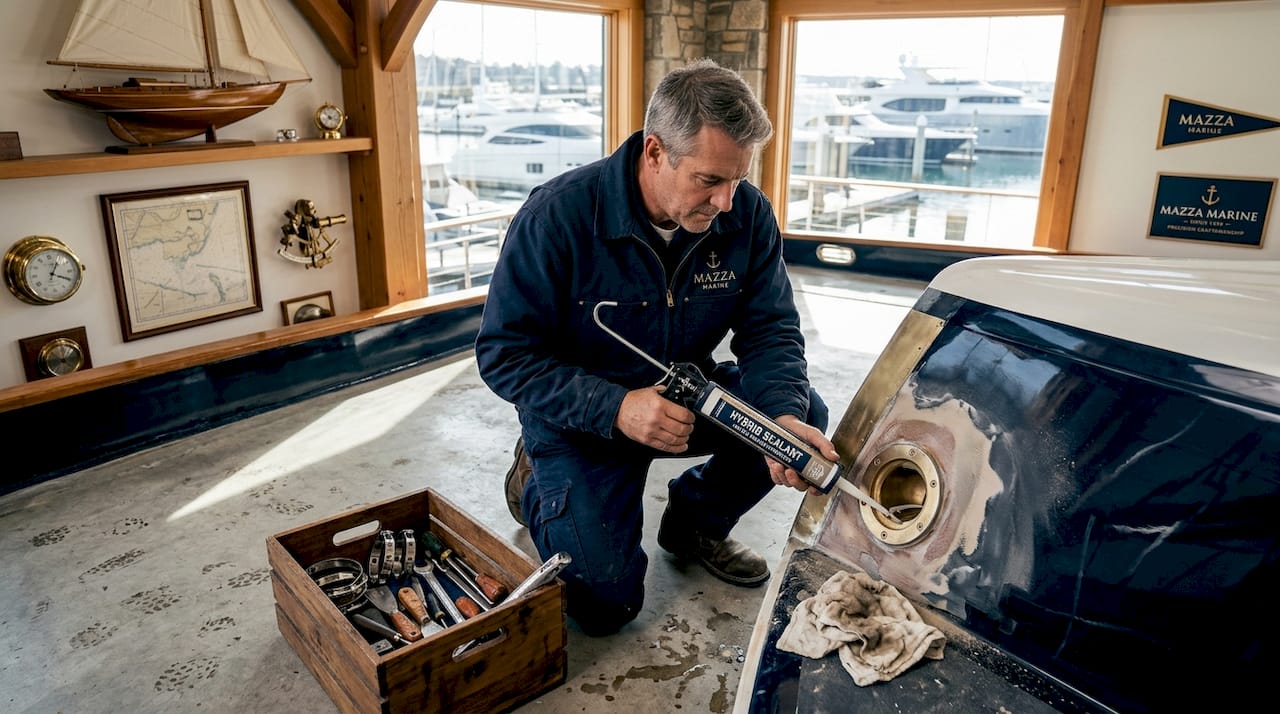
Below-waterline fittings should use hybrid polyurethane sealants for elasticity under hull flex. This matters more in Florida than in cooler climates because the heat cycles and UV exposure here accelerate sealant aging faster than most owners realize.
For thru-hulls and seacocks:
This is where we have to be direct with you. Thru-hulls and seacocks usually require haul-out for proper re-bedding. Running a bead of sealant around a leaking seacock from inside the boat is not a repair. It is a temporary illusion of safety.
ABYC recommends replacing bronze thru-hulls every 15 to 20 years and taking immediate action on any pink dezincification (that chalky pink discoloration on bronze fittings). If you see pink, the fitting has lost its zinc and is structurally weakened. Replace it. More on fixing thru-hull leaks and hull maintenance and repairs is available from the Mazza Marine team.
Emergency repair kit (always aboard):
- Softwood tapered plugs on lanyards attached to each seacock handle
- Marine epoxy putty for temporary hull seam repairs
- Self-amalgamating tape for hose fittings under pressure
Pro Tip: Below-waterline hoses should be double clamped at every barbed fitting, with both clamps positioned so their screws face opposite directions. In Florida’s humid, salt-rich air, a single failed clamp on a raw water intake hose can flood a bilge in minutes.
After fixing leaks, verifying repairs ensures confidence before your next voyage.
Verifying repairs and maintaining leak-free yachts in Florida
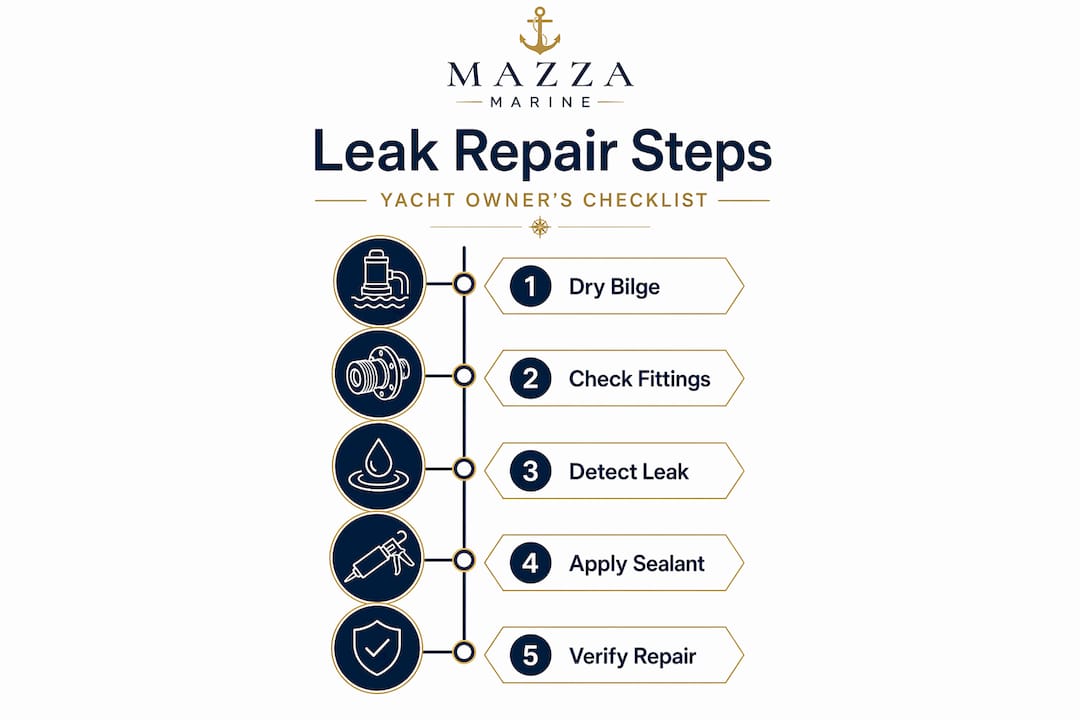
A repair you have not tested is a hope, not a fix. The verification step is short but non-negotiable. Retest every area you touched using the same hose test that found the leak initially. Give each fitting a full 60-second water exposure and have someone watch the interior repair area for any new moisture.
Post-repair verification steps:
- Run the hose over repaired deck fittings and portlights for 60 seconds each.
- Repeat the static bilge test: pump dry, add clean water, mark the level, and check after 24 hours.
- On the first post-repair sea trial, watch the bilge every 30 minutes for the first two hours underway.
- Check your repair areas again after the first heavy Florida rain.
Seasonal maintenance habits that prevent future leaks:
- Monthly exercise of seacocks prevents corrosion and seizure in humid saltwater environments. Open and close each one fully, every single month without exception.
- Inspect and double clamp all below-waterline hoses at least twice a year.
- Keep the bilge clean, well-lit, and ideally painted white or a light color. Monitor bilge water levels regularly and keep the bilge light-colored to spot new leaks immediately. A dark, oily bilge hides problems for months.
- Maintain a simple log noting bilge pump cycles. If your automatic pump runs twice in a calm overnight when it used to run zero times, something has changed.
Reviewing your Florida yacht maintenance checklist at the start of each season and building maintenance routines for leak prevention into your calendar keeps small issues from becoming expensive emergencies.
Why traditional leak fixes might fail Florida yacht owners — and what really works
Here is an uncomfortable truth we have seen play out repeatedly on South Florida docks. The most dangerous leak repair is the one that appears to work. A tube of sealant squeezed over a weeping thru-hull fitting will often stop the visible drip for a season. The bronze underneath continues corroding. By the time water reappears, the fitting is structurally compromised in a way that a cosmetic repair never addressed.
Repairs often mask corrosion; full replacement with proper bedding is needed to ensure true safety. This is not a vendor’s pitch for more work. It is what the data, the ABYC standards, and any experienced surveyor will tell you.
The second failure pattern we see is impatience during detection. Owners run the hose over an entire deck section for two minutes, see no drip, and declare that area clean. Water travels unpredictably inside hull layers, so visual checks alone frequently miss the real source. A methodical, one-fitting-at-a-time approach with a moisture meter in hand is slower. It is also the only approach that reliably works.
Florida adds specific pressure to all of this. The combination of UV degradation, salt air, thermal expansion from intense summer heat, and the sheer frequency of use on Florida yachts means sealants and fittings age faster here than in other parts of the country. What might last 15 years in the Pacific Northwest may need replacement in 8 to 10 years in Miami. Factor that into your hull maintenance insights and replacement schedule.
Choose the right materials from the start. Replace aged parts rather than repeatedly patching them. Build a maintenance rhythm that catches problems early. That approach costs less over time than any number of emergency repairs at the dock.
Professional support: maintaining your Florida yacht’s integrity
Some repairs are genuinely rewarding to handle yourself, and the detection and above-waterline sealant work in this guide falls into that category. Other repairs, particularly anything involving thru-hulls, seacocks, or hull seams below the waterline, deserve professional eyes and a proper haul-out. Knowing which is which is part of being a smart yacht owner.

At Mazza Marine, our network of Florida yacht experts handles everything from bilge inspections and plumbing and thru-hull repairs to full paint, hull, and gelcoat services for owners who want their vessel protected from the inside out. If you are seeing signs that your yacht needs professional repairs, our team is ready to help you assess the situation honestly. Mino, Luigi, and the wider Mazza Marine network bring decades of experience and a genuine passion for keeping Florida yachts in the water and running beautifully.
Frequently asked questions
How can I tell if a leak is fresh water or salt water?
Carefully taste testing bilge water distinguishes fresh water from saltwater leaks. A salty taste points to a hull penetration or below-waterline source, while fresh water typically comes from plumbing or deck hardware.
How often should I inspect and exercise my seacocks to prevent leaks?
Monthly exercise of seacocks prevents corrosion and seizure, especially in humid Florida conditions. Open and close each seacock fully every month and inspect for any weeping or discoloration.
Is it safe to repair a leaking thru-hull fitting without replacement?
No. Repairs often mask corrosion and create a false sense of security. ABYC standards recommend full replacement, and any pink dezincification on a bronze fitting is grounds for immediate action.
What sealants are recommended for below-waterline leak repairs?
Hybrid polyurethane sealants are preferred for below-waterline use because they stay elastic under hull flex, vibration, and the thermal stress common in Florida waters.
Can I do leak detection myself or should I hire a professional?
Above-waterline inspections and hose tests are well within a careful owner’s ability. However, thru-hull leak repairs typically require haul-out and professional re-bedding for a safe, lasting result.
Recommended
Text or Call 954-330-9653 Schedule Appointment
Mazza Marine Yacht Services & Refit

Fiberglass Upgrades and Damage Repair

Premium Yacht Paint/ Faux Teak

Fishing: Custom Rods, Reels,Tackle

Electrical, Electronics and Navigation

Paint, Hull and Gelcoat

Teak Decks, Wood Cabinets, Carpentry

Canvas, Enclosures and Upholstery

Mechanical, Repower and Running Gear

Plumbing, Bilge and Thru-Hulls

Welding and Custom Fabrication

Interior Refit And Past Work
Get your yacht value Estimate
"*" indicates required fields