
View Our Recent Work:

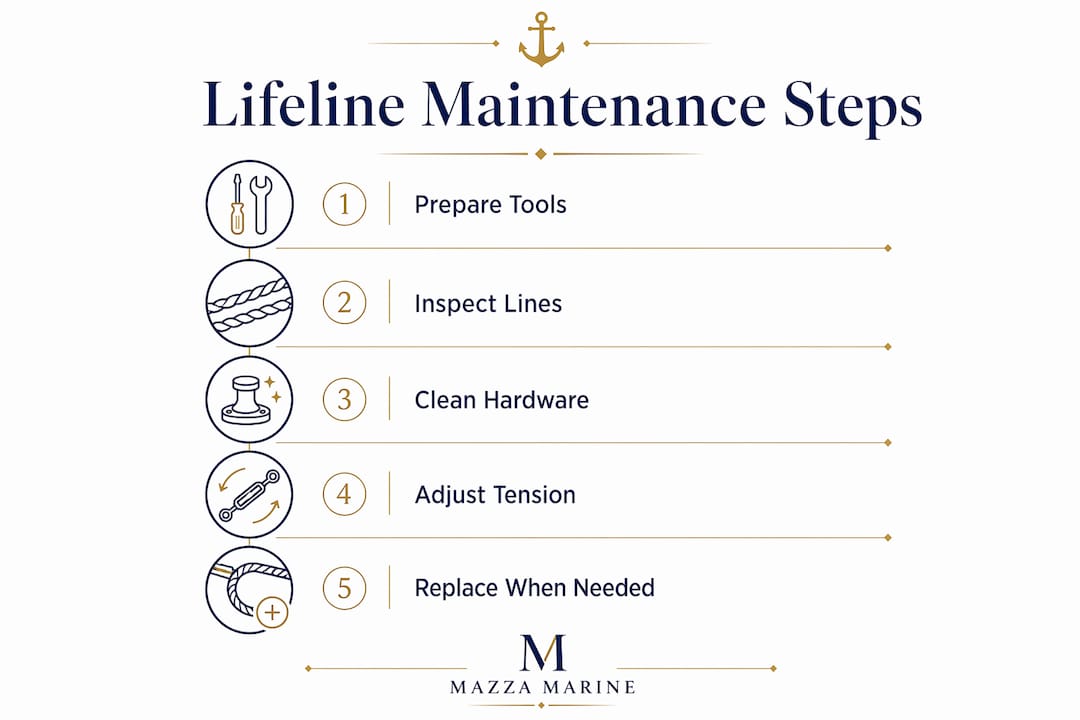
Yacht lifelines are the primary safety barrier between your crew and the open water, and knowing how to maintain yacht lifelines is one of the most consequential skills any owner can develop. These lines, along with their stanchions, turnbuckles, pelican hooks, and gate hardware, form a system that must be inspected, cleaned, tensioned, and replaced on a disciplined schedule. A single corroded swage or an unsecured gate can turn a routine passage into a man-overboard emergency. This guide covers every step of proper lifeline care, from the tools you need to the moment you know it’s time to replace the wire entirely.
What tools and materials do you need for yacht lifeline maintenance?
Effective lifeline maintenance starts with having the right equipment on hand before you begin. Showing up to inspect a lifeline system with nothing but your eyes and bare hands is how problems get missed.
Essential tools:
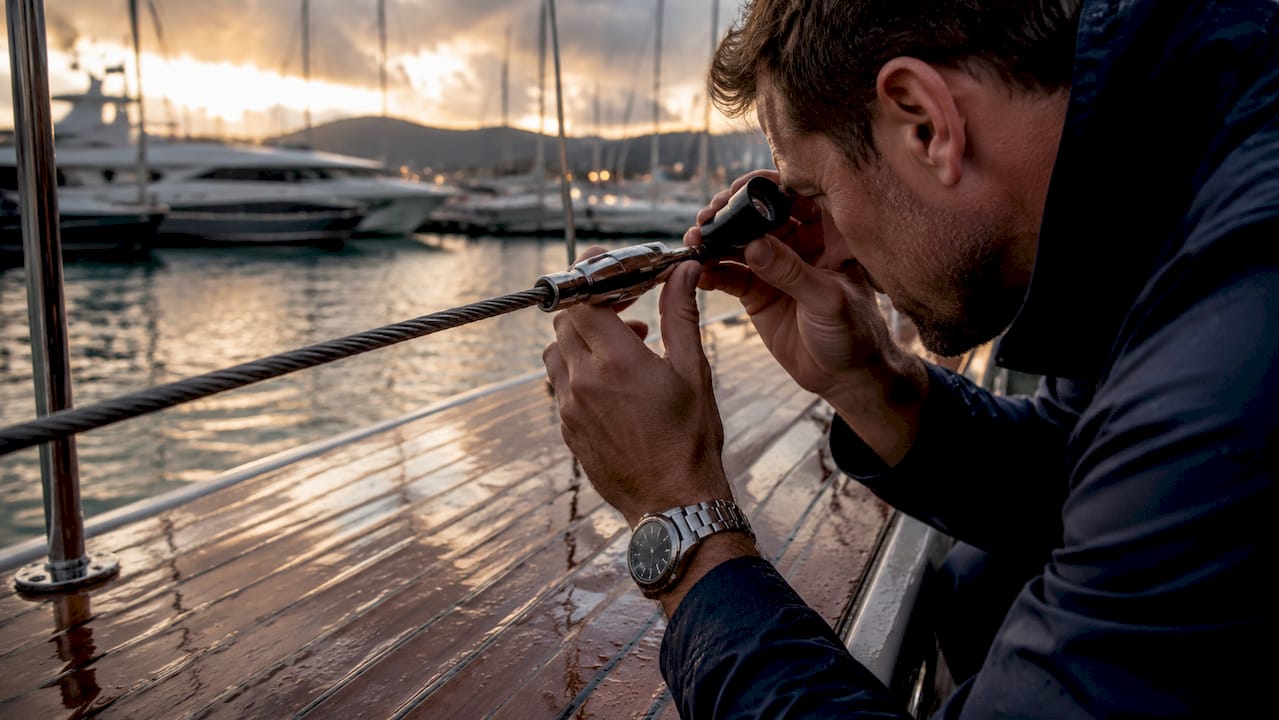
- Magnifying glass or loupe (10x minimum) for examining swages, clevis pins, and wire strands
- Turnbuckle wrench or open-end wrenches sized to your specific fittings
- Stainless steel wire cutters for removing damaged sections cleanly
- Lashing line and marine-grade tape for gate security and temporary fixes
- Inspection mirror for viewing the underside of stanchion bases
Cleaning and finishing materials:
- Fresh water and a soft-bristle brush for salt removal
- Mild dish detergent or a dedicated marine cleaner like Star Brite Boat Wash
- Acetone for cautiously whitening synthetic lifelines (use sparingly)
- Polishing cloths and a corrosion inhibitor like Boeshield T-9 for stainless fittings
Here is a quick-reference table to keep your kit organized:
| Tool or Material | Purpose | Key Tip |
|---|---|---|
| 10x magnifying loupe | Inspect swages and wire strands | Check every fitting, not just visible ones |
| Turnbuckle wrench | Adjust tension precisely | Never use pliers; they damage threads |
| Stainless wire cutters | Remove corroded or damaged wire | Cut cleanly to avoid fraying |
| Marine tape (self-amalgamating) | Secure pelican hooks on gates | Replace tape before every offshore passage |
| Acetone | Whiten synthetic lines | Test on a small section first |
| Boeshield T-9 | Lubricate and protect hardware | Apply after every cleaning session |
A well-stocked kit turns a two-hour inspection into a confident, thorough process rather than a guessing game.
How to inspect yacht lifelines, gates, and hardware
Inspect lifelines and gates before the first trip of every season, and repeat the check after any heavy weather passage. The lifeline system is only as strong as its weakest component, so your inspection must cover wire, fittings, gates, and the deck itself.
Step-by-step inspection checklist:
- Run your fingers along the full length of each wire, feeling for broken strands, kinks, or rough spots
- Use your magnifying loupe to examine every swage fitting, clevis pin, and turnbuckle body for pitting or rust staining
- Check vinyl-coated wire closely. Corrosion hides under coatings and may not be visible until the wire is already compromised
- Open and close every gate, testing the pelican hook for smooth engagement and positive locking
- Inspect stanchion bases by pressing firmly on each stanchion to test for movement or flex
- Examine the deck around every stanchion base for gelcoat cracks or soft spots
Pro Tip: Gelcoat cracking near a stanchion base is not a cosmetic issue. It signals abnormal loading that may indicate compromised deck structure beneath. Treat it as a structural warning and investigate further before your next passage.
Pay special attention to the gate hardware. Pelican hooks on gates are a frequent maintenance oversight because they look fine until they fail under load. Vibration and boat motion can work a hook open over time, so confirming positive engagement at every inspection is non-negotiable.
Stanchion bases must be through-bolted with reinforcing backing plates. If you find a stanchion fastened only with screws into the deck core, that is a repair to schedule immediately, not a note to revisit later.
How to properly clean yacht lifelines and hardware
Salt is the enemy of every metal fitting and synthetic line on your boat. A consistent cleaning routine after every trip is the single most effective yacht lifeline care tip you can adopt.
Follow these steps after each outing:
- Rinse everything with fresh water. Run a hose along the full length of each wire, over every stanchion, and through every gate fitting. Fresh water rinsing removes salt crystals that accelerate corrosion and degrade synthetic materials.
- Scrub fittings with mild detergent. Use a soft brush and a marine cleaner like Star Brite Boat Wash on stainless turnbuckles, clevis pins, and swage fittings. Avoid abrasive pads that scratch the surface and create new corrosion points.
- Clean synthetic lines separately. Dyneema and other high-performance synthetic lifelines need gentle scrubbing with mild soap. Avoid bleach, which degrades the fiber structure over time.
- Use acetone for whitening. If your synthetic lines have yellowed from UV exposure, acetone whitens lifelines effectively. Apply it with a cloth, test a small section first, and never soak the line.
- Lubricate all moving hardware. After drying, apply Boeshield T-9 or a similar corrosion inhibitor to turnbuckle threads, clevis pins, and pelican hook mechanisms. This step is what separates a clean boat from a well-maintained one.
- Allow everything to dry fully before covering. Trapping moisture under sail covers or lifeline covers accelerates the exact corrosion you are trying to prevent.
Pro Tip: Never use a heat gun or direct sun drying on synthetic lifelines. High heat weakens the fiber core even when the outer sheath looks intact. Air dry in shade whenever possible.
How to adjust tension and secure lifeline gates
Correct tension is one of the most overlooked aspects of maintaining yacht safety lines. A lifeline that sags under your hand offers false security and can actually destabilize a crew member who leans against it.
The standard for lifeline deflection is no more than 2 inches of movement under an 11 foot-pound mid-span force. That translates to a firm, taut line with minimal give when you press it firmly with your palm. Slack lines pose a direct hazard during crew movement, especially in rough conditions.
| Tension Level | Effect on Crew Safety |
|---|---|
| Too slack (over 2 inches deflection) | Crew can fall through or lose balance leaning on the line |
| Correct tension (2 inches or less) | Provides reliable handhold and fall barrier |
| Overtightened | Stresses stanchion bases, swages, and deck fittings; accelerates wear |
To adjust tension, use your turnbuckle wrench to tighten or loosen the turnbuckle at each end of the wire run. Work gradually, checking deflection at mid-span as you go. Never crank a turnbuckle to its mechanical limit. Overtightening loads the stanchion bases and swage fittings in ways they were not designed to handle.
Gate security is equally critical. Tape pelican hooks closed with self-amalgamating marine tape before every offshore passage. Vibration and wave motion can work a hook open without anyone noticing. This is a 30-second task that has prevented countless overboard incidents. Replace the tape at the start of each passage, not just at the start of the season.
When and how to replace yacht lifelines and hardware
Knowing when to replace is just as important as knowing how to inspect. The best practices for yacht lifelines include a clear replacement protocol, not just a maintenance schedule.
Replace lifeline wire or hardware when you find:
- Any visible corrosion on bare stainless wire, especially at swage fittings
- Corrosion suspected under vinyl coating, even without visible evidence. Vinyl-coated wire masks corrosion until the wire is already structurally compromised, so when in doubt, replace it
- Broken or kinked wire strands anywhere along the run
- Cracked, pitted, or loose swage fittings
- Stanchions that move or flex after re-tightening
- Any pelican hook that does not engage positively and hold under load
For self-retracting lifelines (SRLs), the replacement rules are stricter. SRLs require inspection before every use and a competent six-monthly check. More critically, an SRL must be retired after any fall event, even if it looks undamaged externally. The internal mechanism may be compromised in ways that are invisible to the eye.
When selecting replacement materials, bare stainless steel wire (1×19 construction) remains the standard for offshore use. Synthetic alternatives like Dyneema offer lighter weight and no corrosion risk, but require different inspection techniques since UV degradation is harder to detect than rust.
Pro Tip: Document every replacement and inspection with a dated log. Note the wire diameter, fitting type, and any findings. This record protects you legally, helps your rigger plan future work, and gives you a clear picture of your vessel’s maintenance history. A smarter maintenance approach always starts with good records.
For a broader look at when corrosion or hardware failure crosses into repair territory, the Florida yacht repair guide covers the warning signs that call for professional intervention.
Key takeaways
Proper lifeline maintenance combines regular inspection, consistent cleaning, correct tensioning, and timely replacement to keep your crew safe and your vessel ready for any passage.
| Point | Details |
|---|---|
| Inspect before every season | Check wire, swages, gates, and stanchion bases before the first trip of the year. |
| Clean after every outing | Rinse with fresh water and lubricate hardware to prevent salt-driven corrosion. |
| Maintain correct tension | Lifelines should deflect no more than 2 inches under an 11 foot-pound mid-span force. |
| Tape gates before passages | Secure pelican hooks with marine tape before every offshore trip to prevent accidental opening. |
| Replace on corrosion, not just age | Vinyl-coated wire can hide corrosion; replace at the first sign of doubt, not the last. |
What i have learned after years of watching owners skip this step
Most yacht owners I talk to treat lifeline maintenance as a once-a-year checkbox. They look at the wire, give a stanchion a shake, and move on. What I have found, time and again, is that the real problems live in the places nobody looks: under the vinyl coating, at the base of a swage fitting, and inside a pelican hook that has not been opened in two seasons.
The mindset shift that matters most is this: you are not inspecting for compliance. You are inspecting because the person leaning on that wire in a 25-knot squall is trusting it with their life. That framing changes how carefully you run your fingers along the wire and how seriously you take a hairline crack in the gelcoat near a stanchion base.
I have seen boats where the lifelines looked pristine from the dock and were genuinely dangerous up close. I have also seen older vessels with modest wire that was immaculate because the owner cleaned and checked it after every single trip. The condition of your lifelines reflects your habits, not your budget.
The other thing worth saying plainly: unsecured gates are the most common and most preventable failure I encounter. Taping a pelican hook takes 30 seconds. Skipping it because you are in a hurry to cast off is the kind of shortcut that ends passages badly. Build it into your departure checklist and never leave the dock without it done.
— Jason
Keep your lifelines ready with professional support
Mazzamarine works with a trusted network of Florida yacht specialists who handle everything from tension adjustments and hardware replacement to full lifeline re-rigging and corrosion treatment. Owner maintenance is the foundation, but a professional eye catches what daily familiarity can miss.

Whether you need a pre-season safety inspection, a complete yacht maintenance package, or urgent repairs after finding corrosion under a vinyl coating, Mazzamarine connects you with the right expert for the job. The team at Mazzamarine understands that your lifelines are not just rigging. They are the last line of defense for everyone on board. Reach out to schedule your inspection and head into the season with confidence.
FAQ
How often should you inspect yacht lifelines?
Inspect lifelines before the first trip of every season and after any heavy weather passage. Safety gear must be functional, not just present, so a visual check alone is not sufficient.
What is the correct tension for yacht lifelines?
Lifelines should deflect no more than 2 inches under an 11 foot-pound mid-span force. Lines with more slack than that compromise crew balance and fall protection.
Can you clean synthetic lifelines with bleach?
No. Bleach degrades the fiber structure of synthetic lines like Dyneema over time. Use mild soap and fresh water instead, and apply acetone cautiously for whitening.
When should you replace vinyl-coated lifeline wire?
Replace vinyl-coated wire whenever corrosion is suspected, not just confirmed. The coating hides deterioration, so replace at first doubt rather than waiting for visible failure.
Do self-retracting lifelines need special maintenance?
Yes. SRLs require a pre-use inspection every time they are deployed and a competent check every six months. They must be retired and replaced after any fall event, regardless of external appearance.
Recommended
Text or Call 954-330-9653 Schedule Appointment
Mazza Marine Yacht Services & Refit

Fiberglass Upgrades and Damage Repair

Premium Yacht Paint/ Faux Teak

Fishing: Custom Rods, Reels,Tackle

Electrical, Electronics and Navigation

Paint, Hull and Gelcoat

Teak Decks, Wood Cabinets, Carpentry

Canvas, Enclosures and Upholstery

Mechanical, Repower and Running Gear

Plumbing, Bilge and Thru-Hulls

Welding and Custom Fabrication

Interior Refit And Past Work
Get your yacht value Estimate
"*" indicates required fields