
View Our Recent Work:

You can safely retrofit marine LED lights yourself on most leisure boats — provided you follow ABYC E-11 wiring rules, use marine-grade fixtures and tinned copper wire, and verify compliance with USCG and ABYC A-16 requirements for any navigation lights you touch. The job is genuinely within reach for a competent DIYer. Where it stops being DIY territory is when you find corroded wiring, an unknown battery bank short-circuit current, or compromised fixture housings below the sheer line.
Before you touch a single fixture, do these three things:
- Disconnect the battery (both positive and negative at the bank, not just the switch)
- Confirm whether the lights you are replacing are navigation lights governed by ABYC A-16 and USCG 33 CFR Part 84 — those carry photometric and arc requirements that a generic LED bulb swap will not automatically satisfy
- Inspect the existing wiring for corrosion, chafe, or undersized conductors before you commit to a retrofit
Pro Tip: The single most common warranty-killing mistake is sealing splices with single-wall heat shrink or twist-on wire nuts. Use dual-wall adhesive-lined heat shrink over every crimp or solder joint. It costs almost nothing extra and is the difference between a five-year splice and a six-month corrosion failure.
Table of Contents
- What tools and materials do you need before starting?
- What ABYC and USCG rules apply to your LED retrofit?
- How do you plan fixture placement and choose mounting methods?
- Step-by-step: how to retrofit marine LED lights safely
- Wire sizing, fusing, and voltage drop: the electrical details
- How to waterproof connections and prevent corrosion
- Engine room and enclosed spaces: what changes?
- Should you retrofit LED modules or replace the whole fixture?
- How to test every circuit before the boat goes back in the water
- How long does a retrofit take, and what does it cost?
- Common DIY mistakes and your pre-power checklist
- How to dispose of or recycle old marine lighting components
- Key Takeaways
- What most retrofit guides get wrong about LED upgrades
- Mazzamarine’s ABYC-compliant retrofit service for Florida yacht owners
- Useful sources and references
What tools and materials do you need before starting?
Showing up at the dock without the right gear turns a half-day job into a two-trip ordeal. Pull this list before you buy anything.
Optional but genuinely useful
- Wire ferrules and a ferrule crimper for terminal block connections
- Dielectric grease for connector pins and terminal surfaces
- Cable glands for clean, watertight wire exits through bulkheads
- Waterproof terminal blocks for junction points
- Voltage regulator or LED driver when fixtures require constant-current input rather than direct 12V
- Temporary test leads for bench-testing fixtures before mounting
Separating “essential” from “optional” matters when you are budgeting. The essentials above are non-negotiable for a safe, compliant installation. The optional items improve longevity and make future maintenance easier, but they will not make or break the job on day one.
What ABYC and USCG rules apply to your LED retrofit?
ABYC E-11 is the baseline standard for all marine electrical work in the United States, covering wire sizing, overcurrent protection, grounding, and panel layout. If you are replacing or modifying navigation lights, ABYC A-16 and USCG 33 CFR Part 84 add photometric and placement requirements that the replacement fixture must meet — not just the original housing.
Regulatory checklist
- AIC-rated fuses and breakers — ABYC’s updated E-11 standards include explicit formulas for Ampere Interrupting Capacity based on battery chemistry and bank size; a fuse that cannot interrupt the available short-circuit current is a fire risk, not a safety device
Critical safety checks before you power up
- Battery fully isolated (both poles)
- Correct AIC fuse or breaker installed and rated for the bank
- All conductors protected from chafe at every bulkhead penetration and support point
- Metallic fixtures bonded where required
- LED driver or regulator shielded for EMI — poorly shielded regulators can interfere with VHF radios and chartplotters; look for CE-marked or equivalent shielding, or add ferrite cores to lead runs
Red flags that require a professional
- Corroded or brittle wiring harnesses anywhere in the affected circuits
- Unknown battery bank short-circuit current (common after battery upgrades)
- Damaged fixture housings below the sheer line
- Any installation requiring watertight integrity for a below-waterline penetration
ABYC-compliant service providers in South Florida note that saltwater climates accelerate corrosion failures in non-compliant wiring, making proper installation practice even more critical here than in freshwater environments. When any of those red flags appear, Mazzamarine’s marine electrical work team handles the full scope — wiring audit, AIC sizing, and compliant installation.
How do you plan fixture placement and choose mounting methods?
Placement is where a lot of retrofits go sideways. Navigation lights are not decorative — they must meet specific visibility arc and range requirements, and the USCG is explicit that decorative colored LEDs that could be mistaken for regulatory signals are a safety violation.
Navigation lights
Port (red), starboard (green), stern (white), and anchor lights must maintain their required arc angles and luminous intensity per ABYC A-16. Mount replacements in the same position as the originals unless you have confirmed the new position satisfies the arc geometry. Never substitute a white LED strip for an anchor light — it will not meet photometric requirements.
Deck and courtesy lights
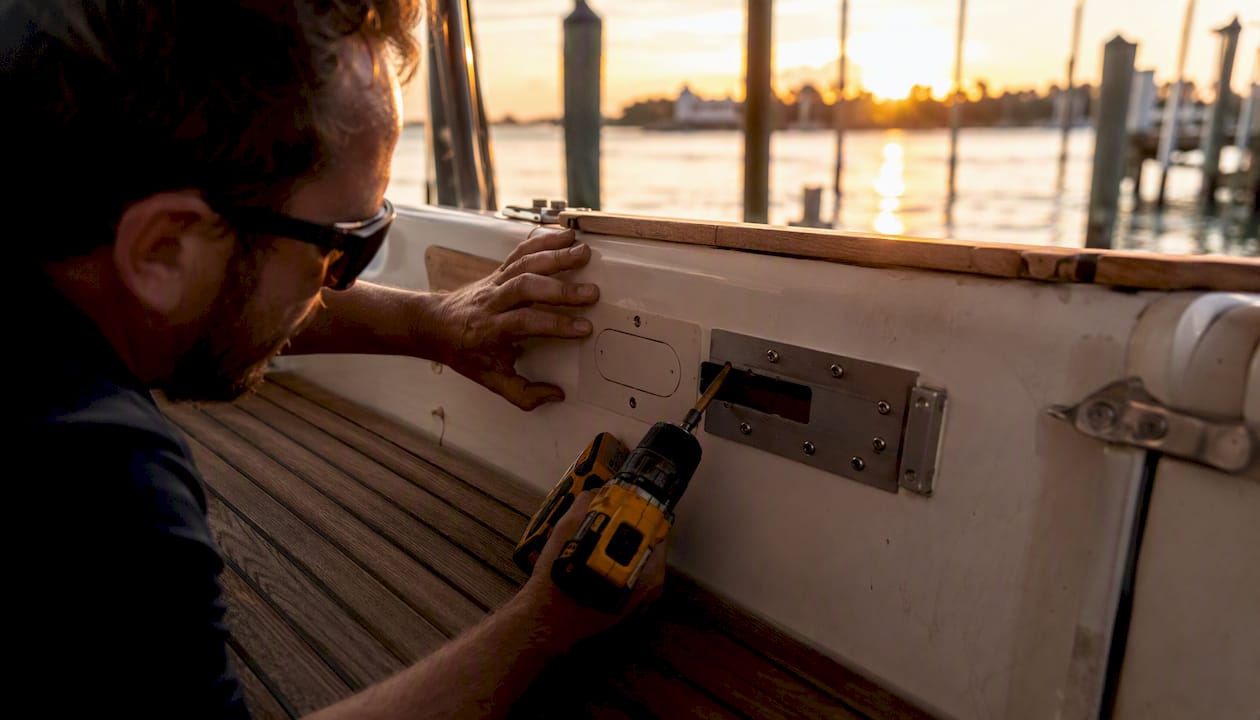
These have more flexibility. Recess-mount courtesy lights into the toe rail or cockpit coaming using the existing cutout where possible. When cutting new holes, use a template (most quality fixtures include one), drill a pilot hole first, and back the cutout with a backing plate on fiberglass decks to prevent cracking and give the fastener threads something solid to grip.
Engine room fixtures
Space these to cover the work areas around the engine, alternator, and raw-water strainer without placing them directly above exhaust manifolds or other high-heat surfaces. Fixtures here need a minimum IP65 rating and a metal housing that can tolerate oil mist and vibration.

Underwater lights
Depth and spacing matter. Most manufacturers recommend mounting underwater fixtures tens of centimeters below the waterline at the stern quarters, spaced roughly half a meter apart for even coverage. Keep them away from sacrificial anodes — proximity accelerates anode consumption and can cause stray-current corrosion on the fixture body. Follow the specific depth guidance in the manufacturer’s installation manual; the Bluefin LED Great White manual is a good example of how detailed these requirements get.
Mounting hardware and isolation
Use marine-grade stainless steel fasteners throughout. On metal hulls, install isolation sleeves or nylon bushings between the fixture body and the hull to break the galvanic path. Apply marine sealant under the flange before fastening, and tool the excess out cleanly before it cures.
Step-by-step: how to retrofit marine LED lights safely
Follow these steps in order. Skipping the documentation steps at the beginning costs you dearly when something needs troubleshooting six months later.
- Inspect and document. Photograph every existing fixture, its wiring, and the circuit it feeds. Sketch or photograph the wiring diagram. Note wire colors, gauge, and any existing fuse or breaker labeling.
- Safety prep. Disconnect both battery terminals. If the vessel has a battery switch, turn it off first, then disconnect at the bank. Wear safety glasses when working in the engine room or bilge.
- Remove old fixtures. Unscrew, unplug, or unsolder the existing fixture. Inspect the housing for cracks, UV degradation, or corroded mounting points. Decide here whether to retrofit the LED module into the existing housing or replace the entire fixture (see the decision guide below).
- Prepare the mounting surface. Clean the mounting area. If cutting a new hole, use the template, drill the pilot, and cut with the hole saw. Install a backing plate on fiberglass. Apply marine sealant to the underside of the flange before setting the fixture.
- Run wiring. Use fish tape to route tinned copper wire through the hull, keeping runs away from fuel lines and exhaust. Maintain a minimum bend radius of five times the wire diameter. Protect every bulkhead penetration with a grommet or cable gland. Separate DC wiring from AC runs by at least 2 inches, or use shielded cable.
- Make splices and connections. Crimp with a ratcheting crimper, then solder the joint for belt-and-suspenders reliability in high-vibration areas. Cover every splice with dual-wall adhesive-lined heat shrink — this achieves approximately IP67 protection at the joint. Install inline fuses at the battery end of each new run, sized to the conductor ampacity and rated for the bank’s AIC.
- Final mounting and sealing. Set the fixture, torque stainless fasteners to the manufacturer’s specification (typically finger-tight plus a quarter turn for deck fittings — overtightening cracks fiberglass). Bond metallic housings where required by E-11.
- Pre-power checklist before first energizing:
- Fuses installed and rated correctly
- Polarity verified at every fixture terminal with a multimeter
- All splices covered with adhesive-lined heat shrink
- No bare wire ends exposed in the bilge
- Bonding connections made and secure
- Photos taken for warranty records
Pro Tip: Capture a labeled wiring diagram photo after step 6 and store it in a waterproof sleeve near the electrical panel. Future you — or a marine electrician — will thank you when a circuit needs tracing two seasons from now.
The OceanLED X-Series Quick Install Guide is a useful reference for how a quality manufacturer structures these steps, including the requirement to test before the boat returns to the water.
Wire sizing, fusing, and voltage drop: the electrical details
Use ABYC-approved tinned copper wire, sized for the continuous load plus inrush current, and match every fuse or breaker to both the conductor ampacity and the battery bank’s available short-circuit current.
Wire size reference for 12V LED circuits
| Circuit load | Suggested AWG (up to 10 ft run) | Suggested AWG (10–20 ft run) | Notes |
|---|---|---|---|
| Under 5A | 16 AWG | — | Typical courtesy or accent lights |
| 5–10A | — | 12 AWG | Spreader or deck flood lights |
| 10–20A | 12 AWG | 10 AWG | Multiple fixtures on one circuit |
| Underwater lights | Per manufacturer spec | Per manufacturer spec | — |
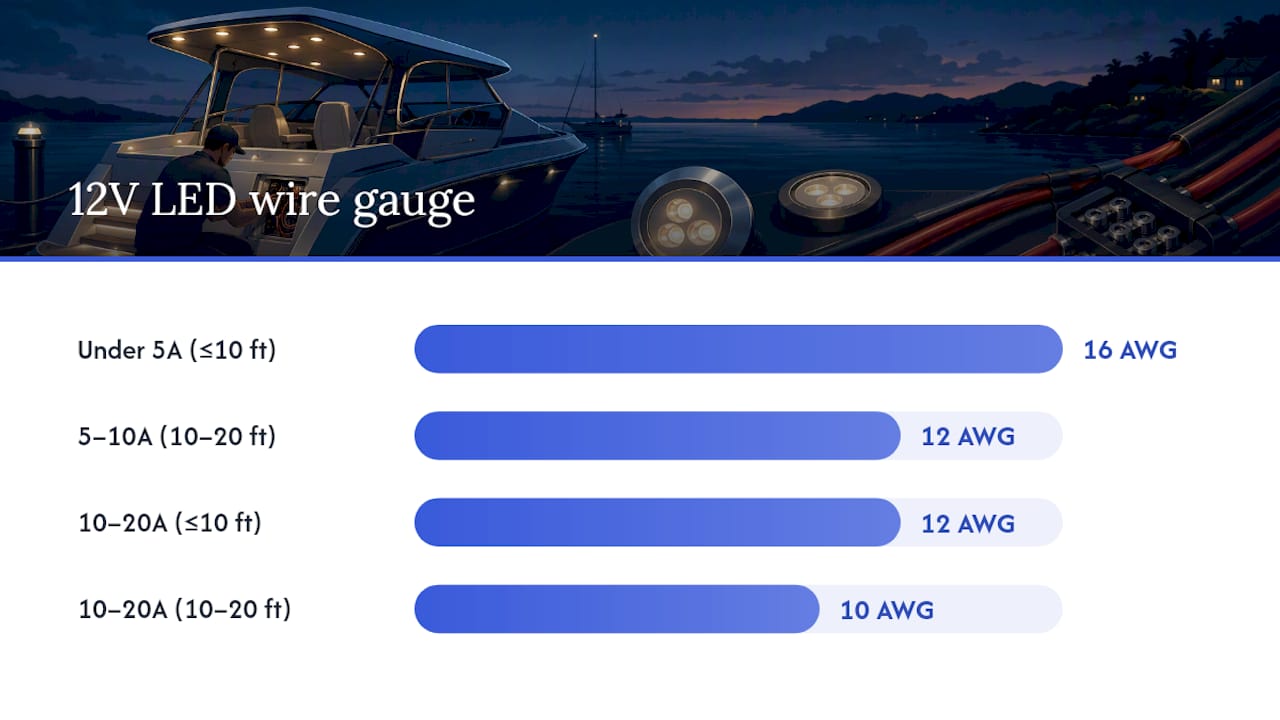
These are illustrative starting points. Always calculate voltage drop for your actual run length and load, and size up if drop exceeds 3% for lighting circuits per ABYC E-11 guidance.
Fusing and AIC
The updated ABYC E-11 standard requires that fuses and breakers carry an AIC rating equal to or greater than the maximum short-circuit current available at the point of installation. On a modern lithium bank, that number can be very high. Inline fuses at the battery are required when the conductor run to the first overcurrent device exceeds 7 inches (with limited exceptions). Solid-state overcurrent protection is now explicitly permitted in branch circuits under the updated standard.
Voltage drop and LED drivers
Voltage drop across a long run dims LEDs noticeably and can cause flicker. Calculate drop using the standard formula (drop = current × resistance × 2 for a round trip), and upsize the conductor when drop exceeds 3%. Some fixtures, particularly high-output underwater lights, require a constant-current LED driver rather than direct 12V connection. Check the fixture spec sheet — running a driver-required fixture directly off 12V often voids the warranty and shortens LED life.
How to waterproof connections and prevent corrosion
Permanent, vibration-resistant seals are the baseline for marine wiring. A splice that looks fine at the dock will fail inside a year if it is not properly sealed against moisture and the constant flexing that comes with a boat in motion.
Materials that actually work
- IP68 gel-filled connectors — for underwater fixture cable exits, as specified in manufacturer manuals like the Bluefin LED installation guide
Maintenance rhythm
Inspect every exterior seal annually and after any heavy weather passage. Look for cracking sealant, discolored heat shrink, or green oxidation at terminal surfaces. Many deck fixtures can be resealed by carefully removing the fixture, cleaning the old sealant, and applying fresh compound without disturbing the wiring.
Pro Tip: Keep wire ends elevated and away from the bilge until the moment you make the final connection. Bilge water wicks into tinned copper faster than you expect, and a contaminated wire end under heat shrink will corrode from the inside out.
For underwater fixtures, pair the installation with a fresh sacrificial anode on the same transom plate. The fixture body is a dissimilar metal in a conductive medium — the anode absorbs the galvanic attack so the fixture does not.
Engine room and enclosed spaces: what changes?
Engine rooms need fixtures and mounting strategies that prioritize cooling, secure fastening, and protection from oil mist and heat exposure. LEDs are far more heat-tolerant than incandescent bulbs, but they are not immune — junction temperature directly affects both light output and rated life.
Should you retrofit LED modules or replace the whole fixture?
Replace the entire fixture when housing integrity, seals, or mounting points are compromised. Retrofit the LED module into the existing housing when the housing is structurally sound, the seal is intact, and the new module’s footprint is compatible.
| Decision factor | Retrofit LED module | Replace entire fixture |
|---|---|---|
| Housing condition | Sound, no cracks or UV crazing | Cracked, brittle, or UV-degraded |
| Seal integrity | Original gasket compresses correctly | Gasket flattened, torn, or missing |
| Mounting points | Fastener holes intact and solid | Stripped, corroded, or delaminated |
| Footprint compatibility | New module matches existing cutout | Different cutout size required |
| Photometric compliance | Existing housing meets A-16 optics | Housing optics do not suit LED source |
| Warranty | Manufacturer supports retrofit | Manufacturer requires full replacement |
A few practical notes on this decision:
- Many manufacturers void the warranty when you use connectors other than the supplied gel connectors or deviate from the installation manual. Document every step and keep the records.
- If the existing housing is a navigation light that originally used incandescent optics, the reflector geometry may not work correctly with an LED point source — photometric output can fall outside the required arc even when the bulb fits. Full replacement with a purpose-built LED navigation light is often the cleaner answer.
- Retrofit makes the most economic sense for interior courtesy lights and engine room fixtures where photometric precision is not a regulatory requirement.
How to test every circuit before the boat goes back in the water
Comprehensive testing before launch prevents safety issues and warranty disputes. This is not optional — the OceanLED installation guide explicitly requires testing before the vessel returns to the water, and most other quality manufacturers say the same.
Sea trial checklist
- Verify navigation light arc coverage visually from the water (have someone observe from a dinghy or dock while you energize each light)
- Check VHF radio and chartplotter for EMI interference with LED circuits energized — any new noise points to an unshielded driver or regulator
- Inspect all deck fixture seals after the first water exposure for weeping or discoloration
- Check underwater fixtures for bubbles or water intrusion at the cable exit after the first swim
How long does a retrofit take, and what does it cost?
A single courtesy light swap is a half-day job for most owners. A full-boat retrofit covering navigation lights, deck lighting, engine room, and underwater fixtures is a multi-day project, and costs scale accordingly.
| Project scope | Typical DIY time | Ballpark material cost | Cost drivers |
|---|---|---|---|
| Single fixture swap (interior/courtesy) | 1–3 hours | $20–$80 | Fixture cost, sealant |
| Multi-fixture deck retrofit (4–8 lights) | 4–8 hours | $150 | Fixture quality, wire runs |
| Navigation light replacement (bow/stern/anchor) | 3–6 hours | $200–$500 | ABYC A-16 compliant fixtures cost more |
| Full boat retrofit (deck + nav + engine room) | 2–4 days | $600–$1,500 | Wiring condition, panel work |
| Underwater lights (2–4 fixtures) | 1–2 days | $400–$1,500 | Haul-out fees, through-hull work |
Material costs above are illustrative ranges based on typical retail pricing for marine-grade components. Labor for a certified marine electrician adds $75–$150/hour in most Florida markets.
What pushes costs higher
- Wiring replacement throughout the vessel (common on boats over 15 years old)
- AIC/fuse upgrades triggered by a battery bank change
- Electrical panel work or new circuit additions
- Haul-out fees for below-waterline fixture installation
- Discovery of corroded wiring that must be replaced before the retrofit can proceed
When hidden wiring replacement, battery bank rework, or AIC sizing questions arise, professional scope becomes cost-effective quickly. A marine electrician who catches a corroded harness before it causes a fire saves far more than the labor rate. LED retrofits can also cut energy consumption significantly, which extends battery range on passage and reduces generator run time — a real operational benefit that compounds over time.
Common DIY mistakes and your pre-power checklist
The mistakes that cause failures and void warranties are almost always the same ones. Here is the do/don’t list, followed by the checklist to run before you energize anything.
Do/don’t list
- Don’t use non-marine fixtures. Automotive and household LEDs lack the IP ratings, tinned terminals, and vibration resistance for a marine environment. The Saltwater Sportsman guide is clear on this: IP rating and marine-grade construction are non-negotiable.
Pre-power checklist
- [ ] Polarity verified at every fixture terminal
- [ ] Correct inline fuse installed and seated at the battery end of each run
- [ ] AIC rating of fuse/breaker confirmed against battery bank short-circuit current
- [ ] All splices covered with dual-wall adhesive-lined heat shrink
- [ ] Stainless fasteners torqued correctly; backing plates installed on fiberglass
- [ ] Bonding/grounding connections made for all metallic fixtures
- [ ] Cable glands or grommets installed at every bulkhead penetration
- [ ] Installation photos taken and stored for warranty records
- [ ] Manufacturer installation manual followed and kept on file
How to dispose of or recycle old marine lighting components
Old incandescent and halogen marine fixtures contain materials that should not go into a general landfill. Fluorescent tubes and compact fluorescent lamps contain mercury and are regulated as hazardous waste in most U.S. states — check your state’s environmental agency for the nearest drop-off location. The EPA’s Responsible Appliance Disposal program and Earth911’s locator tool are practical starting points for finding certified recyclers near Florida marinas.
Incandescent bulbs and standard halogen lamps are not federally regulated for disposal, but many municipalities accept them at household hazardous waste events. Fixture housings made of aluminum or stainless steel are recyclable through standard metal recycling channels. Polycarbonate or ABS plastic housings typically go to general waste unless your local recycler accepts mixed plastics.
For underwater fixture through-hull fittings you are removing permanently, plug the penetration with a properly sized through-hull plug and marine sealant immediately — never leave an open hull penetration unattended, even briefly.
Key Takeaways
A safe, compliant LED retrofit comes down to three things: marine-grade materials, correct overcurrent protection sized to your battery bank’s AIC, and proper sealing at every splice and fixture.
| Point | Details |
|---|---|
| ABYC E-11 wiring is mandatory | Use tinned copper wire, size conductors for the load, and protect every circuit with an AIC-rated fuse or breaker. |
| Navigation lights require A-16/USCG compliance | Replacement fixtures must meet photometric and arc requirements — a generic LED bulb swap does not automatically satisfy these rules. |
| Seal every splice with adhesive-lined heat shrink | Dual-wall adhesive-lined heat shrink over a crimped or soldered joint achieves approximately IP67 protection and resists vibration failure. |
| Test before launch, not after | Verify polarity, voltage under load, fuse presence, and navigation arc coverage before the boat returns to the water. |
| Mazzamarine handles complex scopes | When corroded wiring, AIC sizing, or below-waterline work exceeds DIY scope, Mazzamarine provides ABYC-compliant installation with written documentation and sea trial verification. |
What most retrofit guides get wrong about LED upgrades
There is a tendency in the DIY world to treat a marine LED retrofit as a simple bulb swap — pull the old fixture, plug in the new one, done. That framing causes most of the failures I see. The fixture is almost never the problem. The wiring behind it is.
On boats that have been in Florida saltwater for more than a decade, the wiring harness is often the real story. Tinned copper that was installed correctly twenty years ago can look fine at the panel and be green powder inside the insulation at the first bulkhead penetration. A new LED fixture on a corroded circuit will fail within a season, and the owner will blame the fixture. The actual culprit is the 18 inches of compromised wire nobody looked at.
The other thing guides understate is the AIC question. Most recreational boaters upgraded to lithium batteries in the last few years without upgrading their fuse ratings. A lithium bank can deliver a very high short-circuit current, often exceeding the interrupt rating of original fuses. Installing a new LED circuit on that system with an undersized fuse is not a minor oversight. The updated ABYC E-11 standard addresses this directly, and it is worth reading before you touch any circuit on a boat with a modern battery bank.
The bottom line: treat a retrofit as a circuit integrity project. The LED fixture is the easy part.
Mazzamarine’s ABYC-compliant retrofit service for Florida yacht owners

When the retrofit scope goes beyond a fixture swap — corroded wiring, AIC compliance questions, haul-out installations, or a full navigation and deck lighting overhaul — Mazzamarine’s team handles it with the precision a Florida yacht deserves. The service includes a full electrical inspection, ABYC E-11 wiring assessment, fuse and AIC sizing, bonding checks, and a post-install sea trial verification. Every job comes with a written ABYC compliance checklist, before-and-after photos, and a wiring diagram you keep on file.
What makes this worth the call rather than a second DIY attempt is the documentation. Warranty claims, insurance surveys, and resale valuations all benefit from a paper trail showing compliant, professional installation. Mazzamarine’s marine electrical work team works across the full scope of lighting upgrades — from a single navigation light replacement to a complete interior and exterior refit.
If you are not sure whether your project is DIY territory or professional scope, the marine repair service guide is a good place to start. For owners who want ongoing coverage beyond a single retrofit, Mazzamarine’s maintenance packages include regular lighting and electrical checks as part of a complete care program.
Contact Mazzamarine to schedule an inspection or request a quote — and get the retrofit done right the first time.
Useful sources and references
These are the primary references worth bookmarking for planning, specification checks, and standards verification:
- American Boat and Yacht Council (ABYC)
- ABYC A-16 Electric Navigation Lights (excerpt)
- ABYC Standards Compliance for South Florida Boats and Yachts — DRSA
- How to Select, Install and Use Marine LEDs — Saltwater Sportsman
- Marine engine room LED retrofit guide — DRSA
- ABYC publishes updated battery and electrical standards — Panbo
- Bluefin LED Great White Installation Manual
- Waterproof Electrical Connectors: Complete Guide — Helixal
- OceanLED X-Series Quick Install Guide
A note on manufacturer installation manuals: the instructions supplied with your specific fixture are binding for warranty purposes. Follow them exactly, keep a copy on file, and photograph each step. A deviation that voids the warranty is rarely worth the shortcut.
For service inquiries, installation quotes, or a full electrical audit, visit Mazzamarine.
Recommended
Text or Call 954-330-9653 Schedule Appointment
Mazza Marine Yacht Services & Refit

Fiberglass Upgrades and Damage Repair

Premium Yacht Paint/ Faux Teak

Fishing: Custom Rods, Reels,Tackle

Electrical, Electronics and Navigation

Paint, Hull and Gelcoat

Teak Decks, Wood Cabinets, Carpentry

Canvas, Enclosures and Upholstery

Mechanical, Repower and Running Gear

Plumbing, Bilge and Thru-Hulls

Welding and Custom Fabrication

Interior Refit And Past Work
Get your yacht value Estimate
"*" indicates required fields