
View Our Recent Work:

Overview: for yacht and large-boat owners, “jet ski hull repairs” in this context means professional gelcoat, fiberglass, and structural hull repair work performed by a marine refit yard, not a weekend patch job. If you’re searching this phrase because your hull shows blistering, soft spots, or a failed gelcoat, the right move is to hire a yard with real osmosis and blister-repair experience, backed by epoxy barrier coatings. This is not a do-it-yourself repair.
Before you sign anything, demand three things in writing:
- A marine surveyor report with documented profile inspection points
- Numerical moisture-meter readings taken across multiple hull zones
- A written epoxy barrier-coat and fairing specification naming acceptable products (West System, Pettit, or System Three)
Pro Tip: Build slack into your haul-out calendar. Drying and cure time, not labor, is what blows up refit schedules. Ask the yard for their worst-case drying estimate, not their best-case one.
Key Takeaways
Professional hull repair succeeds when moisture is documented numerically, epoxy barrier coats are specified by name, and drying time is respected rather than rushed.
| Point | Details |
|---|---|
| Hire a refit yard, not a DIY approach | Osmosis and blister repair require composite expertise and controlled drying conditions. |
| Demand numerical moisture readings | Target dryness sits around 2 to 3 percent before any barrier coat gets applied. |
| Name your materials in the contract | Specify West System, Pettit Protect, or System Three products explicitly in the spec. |
| Budget for drying time first | Cure and drying phases typically outlast every other stage of the repair. |
| Mazzamarine coordinates the full scope | Survey coordination, osmosis repair, barrier coating, and fairing under one contracted process. |
Table of Contents
- What Jet Ski Hull Repairs Actually Cover on a Yacht
- How Should a Yard Diagnose Hull Damage?
- What Does the Actual Repair Process Look Like?
- How Long Does a Hull Repair Take, and What Drives the Cost?
- How Do You Choose the Right Refit Yard?
- What Should You Expect Once Work Begins?
- Keeping the Repair From Failing Again
- What Separates a Good Hull Repair From a Bad One?
- Get Your Hull Assessed by a Yard That Documents Everything
- Frequently Asked Questions
- Sources
What Jet Ski Hull Repairs Actually Cover on a Yacht
The phrase gets tossed around loosely, so let’s be precise about what you’re actually contracting for. Hull repair work on a yacht splits into four distinct categories, and knowing which one you’re dealing with changes everything about yard selection and cost.
- Cosmetic gelcoat touch-up — surface chips, spider cracks, and color mismatch with no moisture intrusion
- Localized blister repair — isolated osmosis pockets treated cavity by cavity
- Laminate or core structural repair — delamination, wet coring, or hydrolyzed glass requiring rebuild
- Full gelcoat removal with epoxy barrier coating — widespread blistering treated by stripping the hull and rebuilding a moisture barrier from scratch
The first is cosmetic. The other three are structural or moisture-related, and they demand a yard with genuine composite experience, not just a paint crew. When you write your scope of work, name your standard explicitly: WEST SYSTEM epoxy, the Pettit Protect system, or System Three SilverTip. Naming the product line up front tells the yard exactly what quality bar you’re holding them to, and it keeps their quote honest.
How Should a Yard Diagnose Hull Damage?
Diagnosis is where good and bad yards separate themselves fastest. A surveyor or yard technician worth hiring will drill small profile inspection points, typically 4 to 6 inches, at several locations along the hull to check for hydrolysis and hidden delamination beneath an intact-looking gelcoat surface, a technique detailed in West System’s osmosis repair manual.
Moisture-meter readings come next, and this is where you should insist on numbers, not adjectives. Have readings taken above and below the waterline at multiple stations, logged in writing.
West System’s own guidance puts the target dryness threshold at roughly 2 to 3 percent moisture content before any barrier coat gets applied. If your yard can’t produce a number, or shrugs and says the hull “feels dry,” that’s a yard to walk away from.
If the surveyor suspects hydrolysis in cored panels or spots wide-area delamination, push for a lab laminate analysis or an extended survey before committing to a fixed price. Require photographic documentation at every stage. A written acceptance checklist, cross-referenced against your surveyor’s findings, is what protects you if the repair needs to hold up to a future insurance claim or resale survey. Our guide on what a boat survey covers walks through what a thorough inspection report should include.
What Does the Actual Repair Process Look Like?
Once diagnosis is done, the repair itself follows a fairly consistent sequence, whether you’re dealing with three isolated blisters or a full hull peel.
- Open the blister cavities and grind back to sound laminate, removing every trace of degraded resin
- Dry the exposed laminate thoroughly, sometimes for weeks depending on climate and hull thickness
- Saturate cavities with epoxy rather than polyester, since epoxy resists moisture re-entry far better
- Fair the surface using a product like Pettit’s 7050 EZ-Fair to rebuild contour before coating
- Build the barrier coat with multiple layers, commonly West System 105/205 epoxy combined with 422 Barrier Coat Additive
- Apply topcoat or gelcoat finish once the barrier has fully cured
Full gelcoat removal gets recommended when blistering is extensive or hydrolysis is suspected across large sections. Yards handle this through grinding, sandblasting, or gelcoat peeling, and the method they choose should match your hull’s laminate schedule, not just their equipment on hand.
Your written spec should name products explicitly. On the Pettit side, that means the Pettit Protect system: 92 Bio-Blue or D95 for solvent cleaning, sanding to an 80-grit uniform dull finish, and 120 Brushing Thinner for cleanup between coats. On the epoxy side, West System 105/205 with 422 Barrier Coat Additive, or System Three SilverTip as an accepted alternative. Surface prep matters as much as the coating: complete antifouling removal, a documented solvent wipe, and an adhesion check before any epoxy goes on.
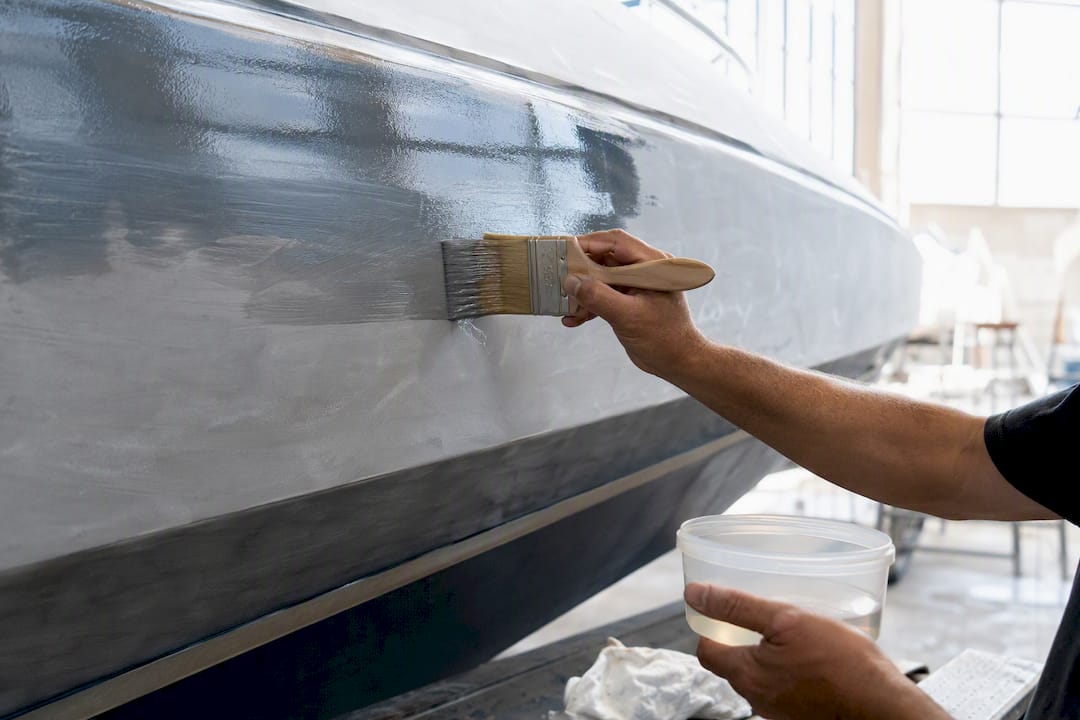
Pro Tip: Specify the number of coats and target thickness in writing. West System’s own guidance calls for a minimum barrier of about 20 mils (0.020 inches), typically built up over five to six coats. Also lock in a minimum cure temperature range. Epoxy applied in a cold, damp shed cures slower and weaker than the same product applied at 70°F.
How Long Does a Hull Repair Take, and What Drives the Cost?
Cost and schedule swing on a handful of variables, and knowing them ahead of time keeps you from being blindsided at week six.
- Severity — a few isolated blisters costs and takes vastly less than a full hull strip
- Drying time — often the single biggest schedule variable, and largely outside the yard’s control
- Yard location and season — refit costs run 30 to 50 percent higher at Northern European yards than Mediterranean ones, and similar regional swings show up domestically too
- Lift and shed access — larger vessels need specific lifting capacity and covered, heated space for proper cure
- Specialist labor — laminate and core repair commands a different rate than gelcoat touch-up
- Coat count — more barrier layers and fairing passes add both material and labor time
A typical project moves through survey and scope, gelcoat removal and prep, drying, structural repair if needed, barrier coat application, fairing and finishing, then QA and sea trials. Drying and cure time frequently dominate the calendar, sometimes outlasting every other phase combined. Build in contingency, since scope growth and schedule slippage are common enough in refit work that a fixed-bid quote with zero cushion should raise your eyebrows.
How Do You Choose the Right Refit Yard?
This is the decision that determines whether your repair lasts five years or fifty. Start with facility capability.
- Lifting capacity matched to your vessel’s tonnage and beam
- Covered paint halls, sandblast or wet-blast options, and tenting or heating for controlled drying
- An in-house composite shop with genuine epoxy experience, not subcontracted out blind
Then interrogate their track record directly.
- Ask for two or three past osmosis or blister projects, with photos and, ideally, an owner reference
- Confirm insurance limits and who supervises the drying process day to day
- Ask what test reports they’ll hand over, moisture logs, cure records, thickness gauges
Watch for red flags that signal a yard cutting corners.
- Vague specifications that don’t name products or coat counts
- Refusal to share moisture readings or drying data
- No project photos, no references, thin or evasive warranty language
Matching yard type to your project scope matters too. A yard built for new construction brings engineering depth but sometimes lacks the flexibility that refit work demands. Your contract should require a clear scope broken out by trade, defined milestones, a documented change-order process, acceptance testing, and warranty terms. Nicholson Yachts’ refit planning guidance recommends phase-based, itemized costing precisely because vague lump-sum quotes are where budgets quietly balloon.
What Should You Expect Once Work Begins?
Discovery almost always turns up something the initial survey missed. That’s not a red flag by itself. What matters is how the yard handles it.
- Budget time and money for change orders, and get a sign-off process in writing before work starts
- Require photographic evidence and moisture logs at every milestone, not just at the end
- Pin down warranty terms now: how defects get logged, cure periods, and who pays if the problem resurfaces
Refit work is inherently full of surprises once the strip-out begins. The yards that succeed are the ones that communicate openly through discovery rather than burying bad news until the invoice arrives.
Insist on a post-work inspection by an independent surveyor before final payment. No coating, however good, guarantees blistering will never recur, so your warranty language should reflect realistic terms, not marketing promises.
Keeping the Repair From Failing Again
A good barrier coat can still fail if you neglect basic upkeep afterward. Keep bilges dry and ventilated, and schedule moisture checks annually if you’re berthed somewhere humid year-round.
- Wash the hull regularly to clear water-soluble contaminants before they concentrate against the gelcoat
- Inspect anodes and re-bed any mechanical thru-hull fittings on a routine schedule
- Log any new soft spots or discoloration immediately rather than waiting for the next haul-out
A short sea trial with a post-repair checklist, checking for new moisture intrusion, coating adhesion, and fitting integrity, is worth the hour it takes. For hulls in aggressive fouling zones, a marine ceramic coating can add another layer of protection over the cured barrier, a point Diamond Brite’s guidance on hull protection covers well.
What Separates a Good Hull Repair From a Bad One?
The technical steps are well documented. What actually determines outcome, in my experience reviewing these projects, comes down to three things: whether the yard communicates honestly when they find something ugly mid-strip, whether they back their moisture claims with actual meter readings instead of confidence, and whether they respect drying time enough to not rush a cure to hit a launch date. Every failed repair I’ve seen traces back to one of those three.
Get Your Hull Assessed by a Yard That Documents Everything
If your hull is showing blisters, soft spots, or a gelcoat that’s lost its shine, Mazzamarine coordinates the full repair pathway in one place: marine survey coordination, osmosis and blister repair, epoxy barrier coat application, structural laminate rebuild, and topside fairing and finishing, so you’re not managing four separate contractors and hoping they talk to each other.

Reach out with your vessel’s length overall, any recent survey reports, photos of the affected area, and your preferred haul-out window. That’s enough for us to scope the job honestly instead of guessing over the phone. Whether you’re staring down a handful of isolated blisters or wondering if you’re looking at a full hull strip, our team can walk the vessel with you and lay out a real specification, not a vague estimate. Start by reviewing the signs that indicate your yacht needs repair work or go straight to requesting a quote through our marine repair service guide.
Frequently Asked Questions
Is jet ski hull repair the same process as PWC repair kits sold online?
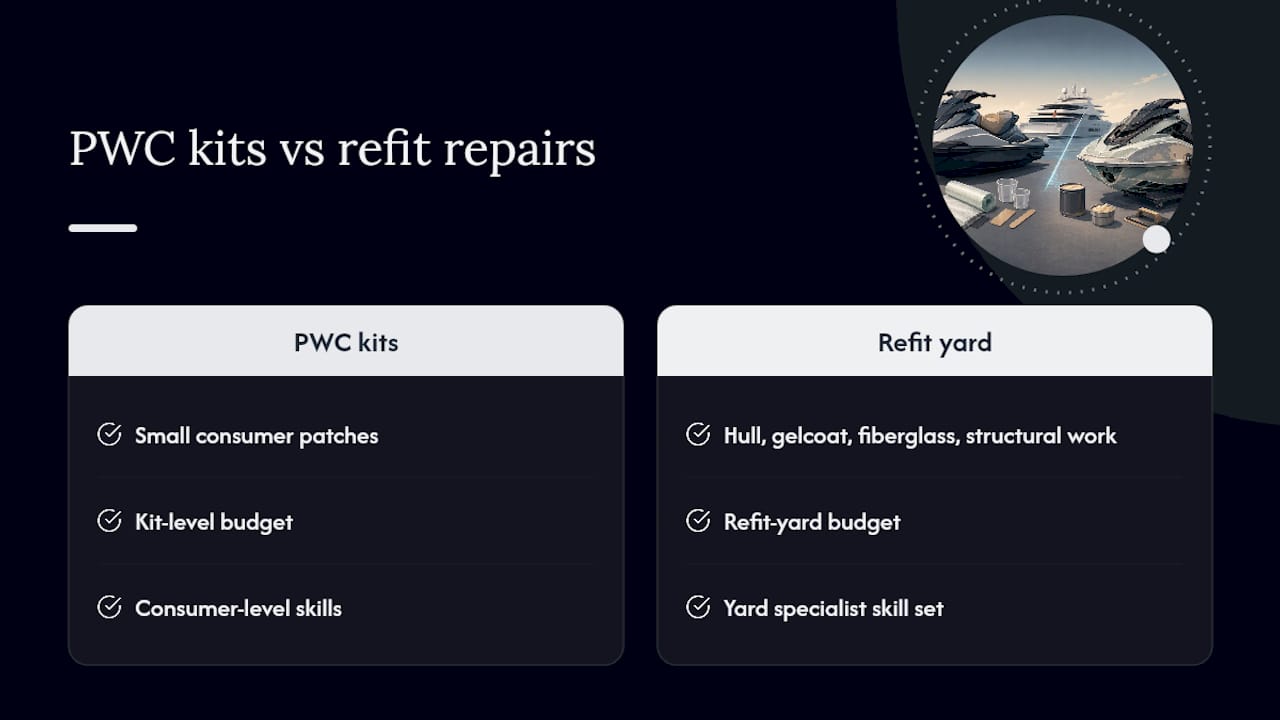
No. This guide addresses professional yacht and large-boat hull repair, gelcoat, fiberglass, and structural work done by a refit yard, which is a different scope, budget, and skill set than small consumer patch kits.
What moisture reading should trigger concern before repair?
Readings meaningfully above the 2 to 3 percent range that West System cites as the target dryness threshold signal the hull needs more drying time before any barrier coat gets applied.
Can a yacht be used while hull repairs are underway?
Generally no, since the vessel needs to stay on the hard for drying, sanding, and coating cure. Discuss temporary transport or storage arrangements with your yard during scheduling.
How do I know if I need a full gelcoat strip versus a localized repair?
That depends on how widespread the blistering is and whether hydrolysis shows up in profile inspection points. A surveyor’s numerical findings, not visual impression alone, should drive that call.
Sources
Share these with your yard to confirm they’re working to the same standard you’re expecting.
- How to gelcoat repair and blister prevention — Pettit Protect
- Gelcoat blisters: diagnosis, repair and prevention — WEST SYSTEM
- Choosing a superyacht refit yard — The Superyacht Forum
- Refit roadmap: planning scope, budget and yard selection for success – Nicholson Yachts
- Yacht Refit Costs Explained: Real Refit Budgets, Timelines & Hidden Expenses – Yachttrading
These cover the product specifications and yard-selection standards referenced throughout this guide. Ask your yard to match the same product and process names when they draft your written scope of work.
Recommended
Text or Call 954-330-9653 Schedule Appointment
Mazza Marine Yacht Services & Refit

Fiberglass Upgrades and Damage Repair

Premium Yacht Paint/ Faux Teak

Fishing: Custom Rods, Reels,Tackle

Electrical, Electronics and Navigation

Paint, Hull and Gelcoat

Teak Decks, Wood Cabinets, Carpentry

Canvas, Enclosures and Upholstery

Mechanical, Repower and Running Gear

Plumbing, Bilge and Thru-Hulls

Welding and Custom Fabrication

Interior Refit And Past Work
Get your yacht value Estimate
"*" indicates required fields