
View Our Recent Work:

Overview: a permanent yacht mooring is only as good as three things: the site assessment, the ground tackle sized to that site, and the connections you actually inspect afterward. Get any one of those wrong and the other two don’t matter. Size everything to your maximum water depth, verify your swing circle clears every neighboring boat and dock, and put eyes on every shackle and pin at least once a year.
Before you buy a single link of chain, run this checklist:
- Maximum depth at the highest expected tide, plus keel clearance at the lowest
- Seabed type (mud, sand, gravel, or rock) confirmed by probe or local knowledge, not guesswork
- Full swing circle mapped against neighboring vessels, docks, and channels
- Ground chain length near 1.5 times max depth, riding chain near 1 times max depth
- Buoy flotation sized to roughly twice the weight of the suspended chain
- Written permit or clearance from your local harbormaster or marina authority
A quick gut check on scale: PIANC’s single-point yacht mooring guidance treats swing radius miscalculation as one of the most common design failures in the industry, and most working yards still lean on the classic 1.5x/1x chain ratio and a two-year inspection cadence as their baseline rule of thumb.
Key Takeaways
A secure permanent yacht mooring depends on accurate site assessment, chain and buoy sizing matched to maximum water depth, and annual inspection of every hidden connection point.
| Point | Details |
|---|---|
| Size chain to depth | Ground chain runs about 1.5x max depth, riding chain about 1x max depth. |
| Match anchor to seabed | Mushroom anchors suit mud, pyramid or helical screw types suit sand and rock. |
| Map the full swing circle | Account for both wind heading and current heading, not a static circle. |
| Inspect hidden hardware yearly | Shackles, swivels, and buoy cores fail more often than the anchor itself. |
| Get a professional survey | Mazza Marine’s network handles site survey, installation, and commissioning reports for Florida owners. |
Table of Contents
- What Types of Yacht Moorings Should You Consider?
- What Are the Core Components of a Yacht Mooring?
- How Do You Assess a Mooring Site Before Installing?
- How Do You Size Chain, Anchor Weight, and Buoy Flotation?
- How Do You Install a Single-Point Yacht Mooring?
- How Often Should You Inspect and Maintain a Mooring?
- What Are the Safety Basics for Approaching a Mooring?
- Should You Install a Mooring Yourself or Hire a Professional?
- What Does a Worked Mooring Example Look Like for a 45-Foot Yacht?
- What Do Owners Get Wrong Most Often About Mooring Setup?
- How Mazza Marine Handles Your Mooring Project
- Where Can You Learn More About Mooring Standards?
- Frequently Asked Questions
- Sources
What Types of Yacht Moorings Should You Consider?
Not every anchorage calls for the same mooring. The right type depends on your seabed, your exposure to weather, and how long the boat sits unattended between visits.
Single-point (catenary) moorings are the classic setup: one anchor or block, a heavy ground chain that droops in a curve along the bottom, and a lighter riding chain running up to the buoy. The catenary curve itself absorbs shock loading, which is why this remains the default choice for sheltered bays and moderate-depth anchorages where the boat can swing freely.
Taut-leg or elastic moorings trade that slack curve for a tensioned line, often incorporating a rubber or elastomeric element that stretches under load instead of relying on chain droop. They shine where swing room is tight or where you need the boat to hold a more predictable heading, such as crowded mooring fields near channels.
Two-point or spread moorings use two ground anchors set at an angle, which drastically cuts the swing radius. Marinas and narrow coves often require this configuration simply because there isn’t room for a full catenary swing.
Pile or trot moorings secure the vessel between fixed piles or along a line of shared trots, common in tidal rivers and estuaries where current, not wind, dominates the load picture.
- Sheltered, deep, single-boat anchorage: single-point catenary
- Tight swing room or strong prevailing wind: taut-leg/elastic
- Crowded mooring field or narrow channel: two-point/spread
- Tidal river or estuary with strong current: pile/trot
What Are the Core Components of a Yacht Mooring?
Every mooring, regardless of type, breaks down into the same handful of parts. Understanding what each one does helps you spot a corner-cutting installer before they ever put gear in the water.
The anchor or block is your foundation. It resists uplift and drag, and its style should match your seabed. The ground chain connects the anchor to a swivel and absorbs most of the abrasion from seabed contact. The riding chain (sometimes called the riser) runs from that swivel up toward the surface, and the pennant is the line the boat actually clips onto, usually terminating at a buoy that keeps the whole rig visible and accessible.
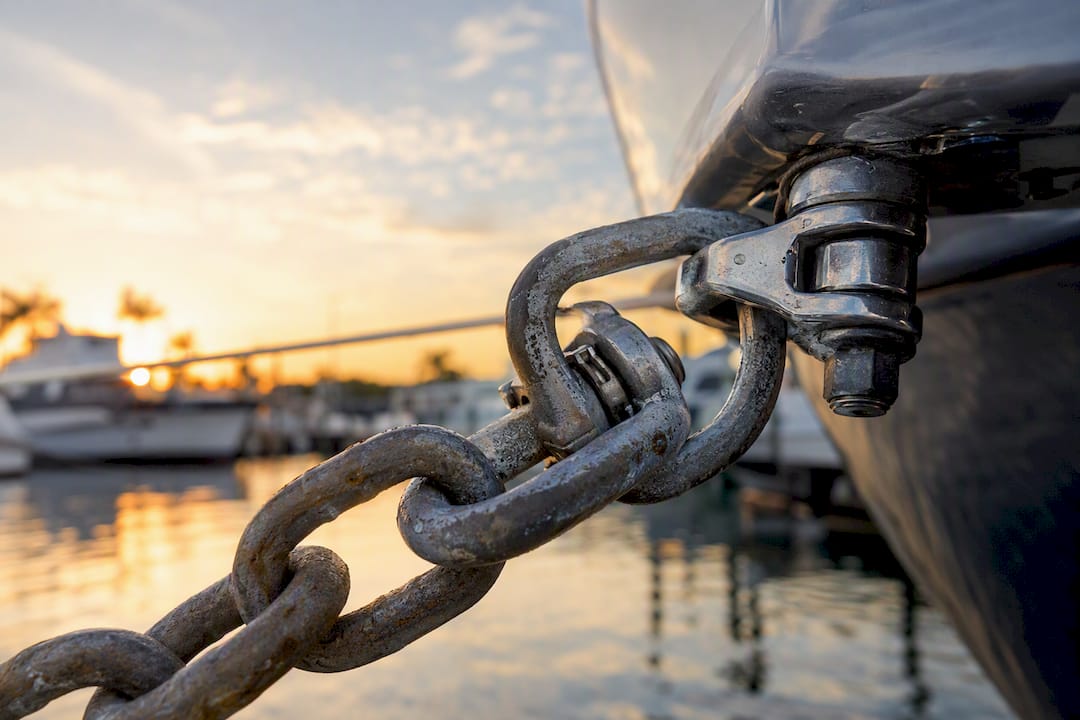
Shackles and swivels are the unsung heroes and, honestly, the most common point of failure. A swivel prevents the chain from twisting the boat into a hockey knot over a season of tide changes. Every shackle pin needs to be moused or seized, because a pin that backs out underwater is a mooring that simply lets go one night with no warning.
| Component | Material Guidance | Common Failure Point |
|---|---|---|
| Ground chain | Hot-dip galvanized proof coil | Abrasion at seabed contact |
| Riding chain/riser | Galvanized or submerged stainless | Wear at swivel connection |
| Pennant | Nylon (stretch), some Dyneema for chafe zones | UV degradation, chafe at chock |
| Shackles/pins | Galvanized, moused or seized | Hidden corrosion, pin backout |
| Buoy | Foam-core, rotomolded shell | Core crushing from chain rub |
Nylon remains the practical pennant choice for most owners because its stretch absorbs snatch loads that would otherwise transmit straight into your bow cleat. Polyester holds up better against chafe but gives you almost none of that elasticity, and Dyneema, while nearly abrasion-proof, is expensive overkill for most recreational setups. As Jamestown Distributors notes, a surprising number of “anchor failures” turn out to be a corroded shackle or a crushed buoy core instead, which is why chafe protection and proper hardware selection matter as much as the anchor itself.
How Do You Assess a Mooring Site Before Installing?
Site assessment is where most DIY mooring projects go sideways, usually because owners measure depth once, on a calm day, at whatever tide happened to be running. That single data point tells you almost nothing about what the mooring will face in February.
Start with a full tide cycle. Measure maximum depth at the highest predicted tide (this drives chain length) and minimum depth at the lowest (this tells you whether your keel and prop have clearance to swing safely). A mooring that works fine at high tide but grounds your keel at dead low is a mooring you’ll be calling a yard about within the month.
Seabed type dictates anchor selection almost entirely. Soft mud or silt favors a mushroom anchor, which relies on suction and burial for holding power. Sand and gravel often call for a pyramid or Dor-Mor style block, while rock or hard-packed bottoms may need a helical screw anchor driven mechanically, since nothing else will bite.
Then comes the swing circle, and this is the step where PIANC’s guidance is most useful: the mooring’s radius must account for wind-driven and current-driven heading changes, not just a static circle drawn around the buoy. A boat riding to wind can point one direction while a boat riding to current points another, and on a mooring, that difference determines whether you clear the neighbor’s transom or not.
- Depth logged across a full tide cycle, not a single reading
- Seabed confirmed by probe, chart, or diver report
- Swing circle plotted for both wind-dominant and current-dominant conditions
- Fairways, channels, and seagrass beds checked against your position
- Harbormaster or marina permit confirmed before ordering gear
Environmental sensitivity deserves its own line item. Seagrass meadows are protected in many Florida waters, and a chain that drags across the bottom during tide changes can scar a bed that took decades to establish. Choosing a mooring type with less bottom sweep, or positioning the anchor point to avoid grass entirely, keeps you compliant and keeps the anchorage healthy for everyone using it.
How Do You Size Chain, Anchor Weight, and Buoy Flotation?
Once the site data is in hand, sizing becomes a matter of running a few dependable ratios rather than guessing.
Ground chain length runs about 1.5 times your maximum water depth. This extra length is what lets the chain lie in a catenary curve along the bottom instead of pulling taut, and that curve is what absorbs shock loading before it ever reaches your boat. Riding chain length runs closer to 1 times max depth, since its job is simply to reach the surface with enough slack for tide swing.
Anchor weight scales with boat size, windage, and exposure, and West Marine’s guidance flags something a lot of owners miss: a concrete block loses a significant portion of its weight once submerged, so the “500-pound block” sitting on the dock is doing the holding work of a 290-pound block on the bottom. Size up accordingly, especially for exposed sites that see real storm exposure.
| Sizing Element | Rule of Thumb |
|---|---|
| Ground chain length | ~1.5x maximum water depth |
| Riding chain length | ~1x maximum water depth |
| Pennant length | 2 to 2.5x freeboard height |
| Buoy flotation | ~2x weight of suspended chain |
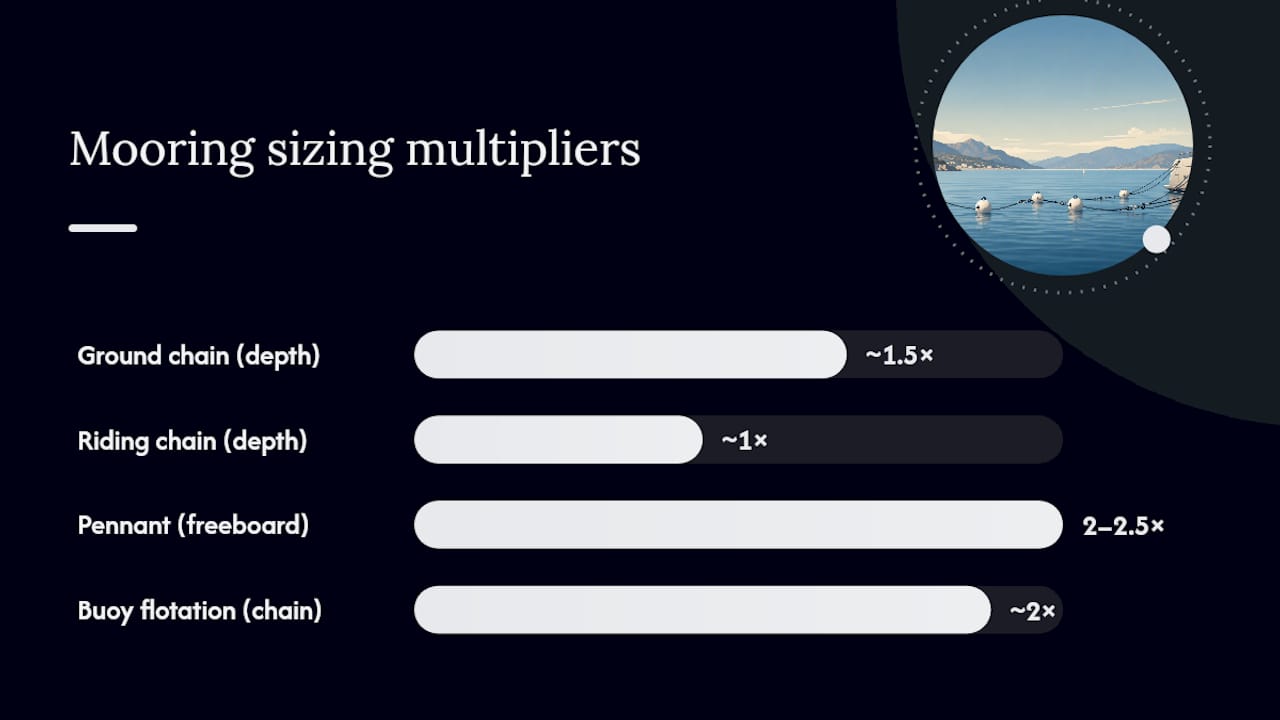
Pennant length runs 2 to 2.5 times your freeboard, giving enough scope for the boat to rise and fall without the connection point snubbing hard against the buoy. And per Better Boat’s mooring guidance, buoy flotation should provide roughly twice the weight of the suspended chain so the buoy still rides high and visible even when the chain is heavy and wet, not half-submerged and invisible at dusk.
Run these numbers before you order gear:
- Measure max depth, multiply by 1.5 for ground chain
- Measure max depth again for riding chain length
- Measure freeboard, multiply by 2 to 2.5 for pennant length
- Weigh (or estimate) suspended chain, double it for required buoy flotation
How Do You Install a Single-Point Yacht Mooring?
Installation is where planning either pays off or falls apart, and it’s genuinely not a solo dock project once you’re past the shallowest, most sheltered water.
Before anything goes in the water, stage your equipment: a workboat or small barge, a crane or hydraulic lift rated for your anchor’s submerged weight, properly sized shackles and swivels, lifting slings rated for wet use, and personal flotation for anyone working near the gunwale.
- Confirm final GPS position against your swing circle plot and mark it with a temporary float.
- Lower the anchor or block to the seabed using the crane or lift, verifying it seats flat rather than tipping on edge.
- Pay out the ground chain along the bottom in the direction of prevailing current, avoiding any seagrass or hard obstructions.
- Attach the swivel at the transition point between ground chain and riding chain.
- Connect the riding chain and run it to the surface, then attach the pennant and buoy.
- Confirm the pickup float or secondary buoy is rigged for easy single-handed retrieval.
Once the physical installation is done, commissioning tests separate a real mooring from a hopeful one. Watch how the buoy trims in the water; it should sit upright and visible, not listing or half-submerged. Bring the boat alongside and perform a pull test at several angles to confirm the anchor hasn’t shifted. Check that the pickup is reachable from the bow without leaning dangerously over the rail, and verify prop and keel clearance at the lowest tide you expect.
Safety callout: heavy-lift work and any diving required to confirm anchor seating carries real risk. Rigging failures, dropped loads, and underwater entanglement are not hypothetical concerns on a mooring install, which is a big reason experienced yards send divers and lift operators who do this weekly, not annually.
Pro Tip: Cut a stopper ring from an old tire and slide it around the top shackle before you lower the ground tackle. It keeps the swivel from riding down into the shackle throat and grinding a groove into the pin over years of tide movement, a hidden failure point that catches even experienced owners off guard.
How Often Should You Inspect and Maintain a Mooring?
A mooring you install and forget is a mooring that will eventually fail on a night you’re not there to see it happen. Annual inspection is the baseline most working yards recommend, and in high-salinity or high-traffic waters, twice a year is worth the extra trip.
Chain wear happens fastest where links rub against each other and where the chain contacts the seabed, so run a caliper over several links at those points rather than trusting a visual glance. Many owners plan full chain replacement on a set schedule tied to salt exposure rather than waiting for visible failure, since corrosion often hollows a link from the inside before it shows on the surface.
- Inspect shackle pins and swivels for hidden corrosion, not just surface rust
- Check the buoy for core crushing or cracking at the pennant attachment
- Replace pennants on a set schedule and add chafe protection at the buoy eye
- Log every inspection date, finding, and part replaced
- Call a certified mooring inspector or yard if you find chain wear, a stuck swivel, or a shifted anchor position
What Are the Safety Basics for Approaching a Mooring?
Tide and current decide your approach before wind ever gets a vote. Enter against whichever force is stronger, and always know your break-off point before you commit to the final approach.
- Rig fenders and lines before you start your final approach, not during it
- Never use hands or feet to fend off a hard contact; use a boat hook or accept the bump
- Coil pickup lines so they throw cleanly, and communicate clearly with crew before each maneuver
- Use spring lines to control fore-and-aft snatching once you’re made fast
Should You Install a Mooring Yourself or Hire a Professional?
Small, sheltered sites with light ground tackle and easy wading depth are reasonable DIY territory for a handy owner. Anything involving deep water, helical screw anchors, barge-mounted lifts, or heavy permitting falls squarely into professional territory.
- Exposed site, storm-rated ground tackle, or diver work needed: hire a pro
- Ask any installer for proof of past work, current insurance, and local permitting experience
What Does a Worked Mooring Example Look Like for a 45-Foot Yacht?
Assume a 45-foot yacht with moderate windage, 4 feet of freeboard, a maximum depth of 12 feet at high tide, and a sandy seabed in a moderately exposed anchorage.
- Ground chain length: 12 feet x 1.5 = 18 feet
- Riding chain length: approximately 12 feet
- Anchor type: pyramid or Dor-Mor block suited to sand, sized up for exposure
- Pennant length: 4 feet freeboard x 2.5 = 10 feet
- Buoy flotation: sized to roughly twice the combined weight of ground and riding chain
| Spec Element | Example Value |
|---|---|
| Ground chain length | 18 feet, hot-dip galvanized proof coil |
| Riding chain length | 12 feet |
| Anchor type | Pyramid/Dor-Mor block, sand-rated |
| Pennant | Nylon, 10 feet |
| Buoy flotation | ~2x suspended chain weight |
Treat these numbers as a starting point, not a finished spec. Local seabed variation, storm history, and your own harbormaster’s requirements can all push these figures up, and a proper site survey should always confirm or adjust the final design before anything goes in the water.
What Do Owners Get Wrong Most Often About Mooring Setup?
Here’s the pattern I keep seeing after enough of these installs cross Mazza Marine’s desk: owners obsess over the anchor and barely think about the shackle. The anchor is the part you can see in the catalog, so it gets all the attention and budget. Meanwhile the $8 shackle holding the whole system together sits underwater, out of sight, quietly corroding for two years until it lets go on a random Tuesday night.
We had a case where a well-maintained 50-footer dragged its mooring during a squall, and the owner assumed the anchor had failed. It hadn’t moved an inch. The swivel had seized from crushed buoy foam grinding into the pin for months, and once it seized, every twist of tide and wind transferred straight into a shackle never designed to take rotational load. A five-dollar mousing wire would have prevented the entire incident.
If your setup is more complex than a sheltered cove and a small daysailer, get a proper survey before you guess. Mazza Marine’s network handles exactly this kind of inspection and installation work across Florida waters.
How Mazza Marine Handles Your Mooring Project
Most owners don’t want to become mooring engineers, and you shouldn’t have to be one just to keep your boat safe overnight. Mazza Marine coordinates the full scope, from initial site survey through installation and the seasonal checkups that catch a corroding shackle before it becomes a dragged anchor.

When you bring a mooring project to Mazza Marine, expect a real site survey first: depth logged across tide states, seabed confirmed, and swing circle mapped against your neighbors. You get a written spec before anything is ordered, then installation using properly rated lifting equipment and divers who confirm the anchor is seated correctly. A commissioning report closes out the job, so you have a record of exactly what went in the water and when.
That same network also covers the deck side of the equation. If you’re questioning whether your cleats and chocks can actually handle mooring loads, our team can walk you through reinforcing deck fittings at the same time. And if the mooring conversation surfaced other wear you’d been putting off, our Florida yacht repair guide is a good next stop to check what else deserves a look this season. Reach out to Mazza Marine to schedule a mooring survey before your next haul-out window closes.
Where Can You Learn More About Mooring Standards?
For design principles behind swing circle calculation and load estimation, the PIANC single-point yacht moorings guidance remains the technical reference most yards build their own practices around. For hands-on installation steps, Jamestown Distributors’ mooring basics and West Marine’s construction guide both cover component selection in practical detail.
- Confirm swing circle and load design against PIANC guidance
- Cross-check installation steps against Jamestown and West Marine references
- Always verify local harbormaster rules and permit requirements before installing anything
Frequently Asked Questions
How deep should water be for a permanent yacht mooring?
There’s no universal minimum, but you need enough depth at the lowest tide to clear your keel and prop with margin, and enough scope at the highest tide to size your chain correctly using the mooring setup guide for yachts ratios above.
How long should mooring chain last before replacement?
It depends heavily on salt exposure and chain grade, but many owners plan replacement on a fixed schedule rather than waiting for visible failure, since corrosion often starts inside the link before it shows outside.
Can I install a yacht mooring myself?
Small, sheltered sites with light ground tackle are reasonable DIY territory. Deep water, heavy anchors, or any diver work needed to confirm seating are strong signals to hire a professional installer instead.
What’s the difference between ground chain and riding chain?
Ground chain is the heavier section that lies along the seabed and absorbs abrasion, while the riding chain is the lighter section that runs from the swivel up to the buoy and pennant.
Do I need a permit to install a mooring?
In most jurisdictions, yes. Check with your local harbormaster or marina authority before ordering gear, since permitting rules and environmental restrictions vary by location and can affect where you’re allowed to place ground tackle.
Sources
- Single point yacht moorings | PIANC
- Mooring Buoy Setup: From Anchor to Pennant | Better Boat
- Mooring Basics – How to install a permanent mooring – Jamestown Distributors
- Constructing a Permanent Mooring | West Marine
Recommended
Text or Call 954-330-9653 Schedule Appointment
Mazza Marine Yacht Services & Refit

Fiberglass Upgrades and Damage Repair

Premium Yacht Paint/ Faux Teak

Fishing: Custom Rods, Reels,Tackle

Electrical, Electronics and Navigation

Paint, Hull and Gelcoat

Teak Decks, Wood Cabinets, Carpentry

Canvas, Enclosures and Upholstery

Mechanical, Repower and Running Gear

Plumbing, Bilge and Thru-Hulls

Welding and Custom Fabrication

Interior Refit And Past Work
Get your yacht value Estimate
"*" indicates required fields