
View Our Recent Work:

Standard top-mount outrigger systems are well within reach for a handy boat owner, provided the mounting surface and backing plates check out before a single hole gets drilled. Complex jobs, carbon-fiber towers, or uncertain hardtop cores belong with a professional rigger. Before touching a drill, verify three things: the structure behind your mounting point, a pole length that clears your engines and trailer height, and a clear plan for halyard routing. Skip any of the three, and outrigger leverage can crack a T-top faster than a rogue wave.
TL;DR:
- Proper backing plates are essential for mounting outriggers on fiberglass or aluminum surfaces to prevent stress cracks and structural failure.
- When drilling into a T-top or hardtop, use the manufacturer’s template and avoid oversized holes to maintain mounting integrity.
- Tension adjustments in halyard rigging can significantly influence bait presentation and should be fine-tuned based on sea conditions.
- Trailering outriggers requires securing poles and halyards properly to prevent line damage and line tangles during transport.
- Professional installation is recommended for complex setups such as carbon fiber towers or when uncertain about underlying structure reinforcement.
Table of Contents
- Preparing for Your Outrigger Installation
- Mounting the Base and Reinforcing the Structure
- Fitting the Poles and Rigging the Halyards
- Setting Outrigger Angles for Your Trolling Spread
- Trailering, Stowage, and Ongoing Maintenance
- When a Professional Install Makes More Sense
- Get Your Outriggers Installed by Mazza Marine’s Sportfish Team
- Sources
Preparing for Your Outrigger Installation
Every good outrigger installation starts on the workbench, not the boat. Grab a tape measure and check your T-top, hardtop, or gunnel for thickness, curvature, and clearance around wiring or plumbing that might run through the mounting zone. Manufacturers publish install templates for a reason. The GS-390 mount manual, for instance, specifies a 3 1/8 inch center hole along with exact bolt spacing and backing plate dimensions, and skipping that template is how owners end up drilling twice.
Pole selection comes next. Telescoping poles collapse for easier trailering and tight marina storage, while fixed poles skip the moving parts that eventually wear out. Carbon fiber cuts weight and bounce dramatically but costs more than aluminum; either way, keep the tip length short enough to clear your outboards and trailer height. A boat in the 26 foot range typically runs 15 to 18 foot poles, which is enough to widen your trolling spread without turning every dock approach into a threading exercise.
Gather your materials before you start:
- Grade 316 stainless hardware (never standard stainless, which corrodes fast in salt air)
- Marine-grade sealant for the mounting base and bolt holes
- Anti-seize compound for every threaded connection
- A torque wrench, not a guess-and-check ratchet
- Drill bits sized to the manufacturer’s template, plus a backing plate or wedge plate if your top is curved
Working aloft on a T-top is a two-person job. One person supports the base while the other drills and bolts, and if your hardtop core feels soft or spongy when you press on it, stop and call a professional rather than mounting into rot.
Pro Tip: Tape a paper printout of the manufacturer’s drilling template to the mounting surface before you drill. It takes five extra minutes and eliminates the single most common mistake in DIY outrigger installation: a misaligned bolt pattern that never quite lines up right.
Mounting the Base and Reinforcing the Structure
This is where an outrigger upgrade succeeds or fails, and it happens in a specific order.
- Position the template. Line up the manufacturer’s paper template on the mounting surface, checking handle clearance and rotation radius before marking a single hole.
- Drill the center hole and bolt pattern. Follow the exact bit sizes specified in your mount’s manual. Drilling oversized “just to be safe” only weakens the hole.
- Fit the backing plate. Thin fiberglass tops or aluminum arches need a backing plate, weld-in plate, or wedge plate to spread the load across a wider area than the four bolts alone can handle.
- Apply sealant and bolt down. Run marine sealant around the plate’s perimeter and each bolt hole, then coat every thread with anti-seize before torquing to the manufacturer’s spec.
- Test the handle and lock mechanism. Rotate the pole through its full range and confirm the pull-pin locks firmly at each detent.
A few things separate a solid mount from a future repair job:
- Curved arches almost always need a wedge plate to seat the base flat
- Compression in foam-core hardtops sometimes calls for spacers so the bolts don’t crush the core when torqued
- Check for interference with antennas, radar arches, or canvas frames before final tightening
Professionals emphasize that money spent on a proper backing plate now is cheaper than replacing a stress-cracked hardtop later. That advice holds regardless of whether you hire it out or do it yourself.
Fitting the Poles and Rigging the Halyards
With the base mounted, sliding the pole in feels like the easy part, and mostly it is. Insert the pole with the handle passing through the larger slot, then work the pull-pin into its locking position before installing the rotator handle in the sequence your manual specifies.
Halyard routing is where most first-time installs go sideways. You have two choices: internal routing through the pole itself, or external routing along the outside with rollers guiding the line. Internal setups look cleaner and resist UV damage better, but chasing a halyard through 18 feet of aluminum tubing without a fish tape is its own kind of misery. Braided nylon halyard line around 3/16 inch is the industry standard, strong enough for the load and forgiving enough not to fray at the roller.
A few rigging basics worth locking in from day one:
- Wrap the roller correctly on the first pass, since a twisted wrap will jam a release clip at the worst possible moment
- Split rings sit closer to the stop point than snap swivels and simplify clip changes offshore, so keep a pair of split-ring pliers in the tackle box
- Leave extra halyard length when you first rig the system. You can always shorten it later, but you cannot easily add length back
- Add a stop or float near the tip to keep the halyard from disappearing back into the pole
Pro Tip: Check out TACO Marine’s rigging walkthroughs before you chase your first halyard. Watching the roller wrap technique once saves an hour of frustrated troubleshooting on your first attempt.
Setting Outrigger Angles for Your Trolling Spread
Angle is where outrigger installation stops being a mounting project and starts being a fishing tool. Run your poles at 0 to 15 degrees for a tight, close-in presentation, or open them to 30 to 45 degrees when you want a wider spread that keeps baits out of each other’s wake. A center rigger, when your tower or hardtop supports one, fills the gap down the middle for a bait that tracks straight behind the transom.
Illustrated rigging systems range from a single halyard running one bait per side to double-halyard setups with swivel collars that let you stagger two baits at different distances off the same pole. That flexibility is the whole point of running outriggers instead of flat lines.
Tension matters as much as angle:
- Loosen halyard tension slightly in rough seas to reduce bounce and keep baits from skipping unnaturally
- Tighten it back up in calm water where a tight line holds bait attitude better
- Small tension adjustments produce immediate changes in bait presentation and cut down on false clip releases
Before you leave the dock, run a quick spread check: extend both poles, confirm the release clips fire under load, and eyeball the stagger distance between baits. Five minutes at the dock beats discovering a jammed clip forty miles offshore.
Trailering, Stowage, and Ongoing Maintenance
Lower both poles before trailering and secure them to dedicated tie points, a line caddy, or heavy-duty Velcro straps rather than letting them flop against the hardtop. Wrapping loose halyard around a T-top leg or anchoring it with a bungee to a pad-eye keeps line from tangling during transport, which is the single most common source of frayed halyard on a trailered boat.
Run through this inspection list after your first outing and again each season:
- Check bolts and backing plate hardware for looseness or corrosion
- Inspect halyard line for chafe near the roller and tip
- Test the release clip tension and pull-pin lock action
- Look for hairline cracks in the mounting surface around the base
Roughly a season of saltwater exposure is enough to start pitting unprotected stainless, which is exactly why grade 316 hardware matters more on outriggers than almost any other hardware on the boat.
When a Professional Install Makes More Sense
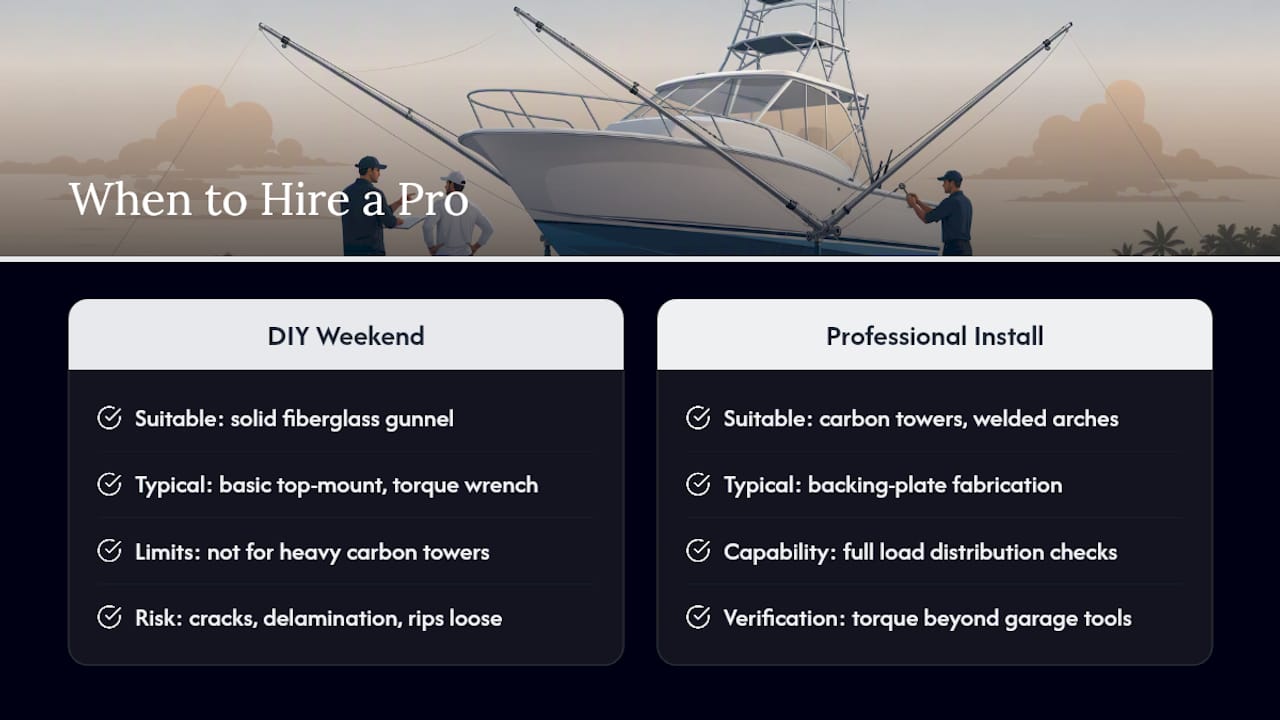
Here is where I will push back on the DIY enthusiasm a little. A basic top-mount system on a solid fiberglass gunnel is a reasonable weekend project for someone comfortable with a torque wrench. Heavy carbon-fiber towers, arches with welded reinforcement, or any hardtop where you are not fully sure what is behind the skin are a different conversation entirely.
Outriggers generate serious leverage once a fish loads the line, and a poorly reinforced mount does not fail gracefully. It cracks the gel coat, delaminates the core, or worse, rips loose while it is under load. A sportfish upgrade done right involves backing plate fabrication, load distribution checks across the whole structure, and torque verification that goes beyond what a home garage setup can confirm. That is not a knock on capable owners. It is a recognition of where the margin for error actually sits.
— Jason
Get Your Outriggers Installed by Mazza Marine’s Sportfish Team
A professional sportfish upgrade team can provide a more reliable and reinforced outrigger system installation than assembling it boat-side over a weekend, including custom welding, backing plate fabrication, structural reinforcement for arches and towers, and a thorough test run before departure.

A rushed DIY mount that cracks a hardtop core costs far more to repair than a professional install costs up front, and it can dent resale value when a surveyor spots stress fractures around the base. When you book an inspection, the mounting surface is checked, the appropriate pole and backing plate combination for your hull is confirmed, and a clear quote is provided before any drilling starts. If you are weighing a full sportfish upgrade rather than a standalone outrigger swap, reach out to Mazza Marine and let’s talk through what your boat actually needs.
Sources
- Spread ‘Em Out: A Guide to Adding Outriggers to Your Boat – On The Water
- GS-390 / 390XL Outrigger Mount
- How to Rig Outriggers on a Center Console – Saltwater Sportsman
- How to Rig Offshore Outriggers – Sport Fishing Magazine
Recommended
Text or Call 954-330-9653 Schedule Appointment
Mazza Marine Yacht Services & Refit

Fiberglass Upgrades and Damage Repair

Premium Yacht Paint/ Faux Teak

Fishing: Custom Rods, Reels,Tackle

Electrical, Electronics and Navigation

Paint, Hull and Gelcoat

Teak Decks, Wood Cabinets, Carpentry

Canvas, Enclosures and Upholstery

Mechanical, Repower and Running Gear

Plumbing, Bilge and Thru-Hulls

Welding and Custom Fabrication

Interior Refit And Past Work
Get your yacht value Estimate
"*" indicates required fields