
View Our Recent Work:

If your windlass shows gearbox failure, salt corrosion in the motor housing, or keeps tripping its breaker from overheating, replace it. If the fault is a sticky clutch, a fouled gypsy, or a loose wire, a rebuild often solves it. Either way, start by checking your rode, chain, and the voltage at the windlass terminals before you spend a dollar. Sizing, deck reinforcement, and wiring are the three planning items that decide whether your next windlass lasts fifteen years or five.
TL;DR:
- Proper windlass sizing requires calculating the total weight of the chain and anchor, then applying a safety multiplier of three to four times for the working load.
- When replacing a windlass, check for internal corrosion, gearbox issues, and repeated overheating signals that indicate a full drive unit swap is necessary.
- The deck under the windlass must be reinforced with solid backing plates and precisely aligned components, as structural weakness can cause early wear or failure.
- Electrical wiring must minimize voltage drop by using appropriate gauge cables and short runs, especially for long cable paths or 24V systems, to ensure the windlass reaches its rated capacity.
- Chain locker integrity, rode condition, and proper splicing are crucial to prevent jamming and premature wear, with inspection and re-splicing recommended before installation.
Table of Contents
- Quick Windlass Upgrade Decision Checklist
- Sizing the Right Windlass: Working Load, Peak Pull, and Practical Rules
- Fitment and Deck Prep: Mounting, Fair Lead, and Reinforcing the Foredeck
- Electrical Requirements: Cable Gauge, Battery, and Wiring Protection
- Rode and Chain Prep: Inspection, Splices, and Avoiding Jams
- Installation Overview: Sequence and Key Checks
- Common Windlass Problems and How to Troubleshoot Them
- What Owners Consistently Underestimate About This Project
- How Mazza Marine Handles Your Windlass Upgrade From Start to Finish
- Sources
Quick Windlass Upgrade Decision Checklist
We’ve walked enough foredecks in Miami to know the pattern: an owner calls about a “weak” windlass, and half the time the windlass is fine, but the wiring or the chain locker isn’t. Before you commit to a full windlass upgrade, run through this triage.
Replace the drive unit if you see:
- Grinding or slipping in the gearbox under load
- Visible corrosion inside the motor housing or on the shaft seal
- Repeated thermal shutdowns even after checking voltage and wiring
- A model discontinued so long ago that parts are scavenged from used units
Rebuild or repair if the issue is:
- A misadjusted clutch cone that lets the chain slip
- A gypsy worn to the wrong chain profile, chattering on retrieval
- Corroded terminal connections or a tired solenoid
- Deck fittings and backing plate in good shape, motor tests fine on the bench
A DIY rebuild of a solenoid or clutch typically runs a weekend and under $200 in parts. A full windlass replacement, done right with new wiring and a backing plate, is realistically a two to four day job for a yard crew and commonly lands between $2,000 and $6,000 depending on boat size, cable run length, and how much of the foredeck needs reinforcing. Repeated overheating or internal corrosion is one of the clearest signals that swapping the whole drive unit beats patching it piece by piece. Prioritize inspecting your rode before anything else. A jammed or fouled chain locker will make even a brand new windlass look defective.
Sizing the Right Windlass: Working Load, Peak Pull, and Practical Rules
Most windlass failures we see trace back to one thing: the unit was undersized on day one, and nobody noticed until the anchor came up slow, then not at all. Getting the math right up front is the single best insurance policy in this whole project.
Here’s the sizing logic, step by step:
- Calculate hanging weight. Multiply your chain’s weight per foot by the length you typically deploy, then add anchor weight. A cruiser running a typical length of 3/8 inch chain plus a moderate weight anchor is hanging a significant load off the bow at full scope.
- Apply the safety multiplier. Manufacturers apply a safety multiplier, typically 3× to 4×, to that hanging weight to land on the working load spec you should be shopping for. In our example, Multiply that load by a safety factor of about 3 to 4 to put you in the appropriate working load range to size your windlass.
- Separate continuous load from peak pull. Peak pull is the number on the box that looks impressive. Continuous working load, the force a windlass can sustain for a full retrieval without overheating, is the number that actually matters when you’re breaking a set anchor free in current.
- Match voltage to amp draw. A windlass rated for 1,200 pounds of continuous pull on 12V may draw 80 to 100 amps under load. The same class unit wired for 24V can cut that draw roughly in half, which matters if you’re running a long cable from the house bank to the bow.
Working backward from peak pull alone is the single most common sizing mistake we see on refits. A windlass rated for a one-time peak pull of 2,000 pounds might only sustain 600 pounds continuously, and that continuous figure is what determines whether your anchor comes up smoothly in a 20 knot crosswind or the motor stalls halfway through the retrieval.
Pro Tip: When comparing spec sheets, always ask the vendor for the continuous working load figure specifically. Marketing copy loves to print peak pull because it’s the bigger number.
For a 30 to 45 foot cruiser running all chain or a chain/rope combination, most owners select a windlass sized for typical working loads in this range. Go bigger if you regularly anchor in heavy current or carry an oversized primary anchor for your boat’s length, which is common with cruisers who’ve upsized their anchor beyond factory spec for extra holding power.
Fitment and Deck Prep: Mounting, Fair Lead, and Reinforcing the Foredeck
The windlass itself is rarely the hard part of this job. The deck underneath it is. A foredeck built for a manual anchor roller was never engineered to absorb the dynamic loads of a powered windlass hauling against a set anchor in a chop, and that gap is where most amateur installs go wrong.
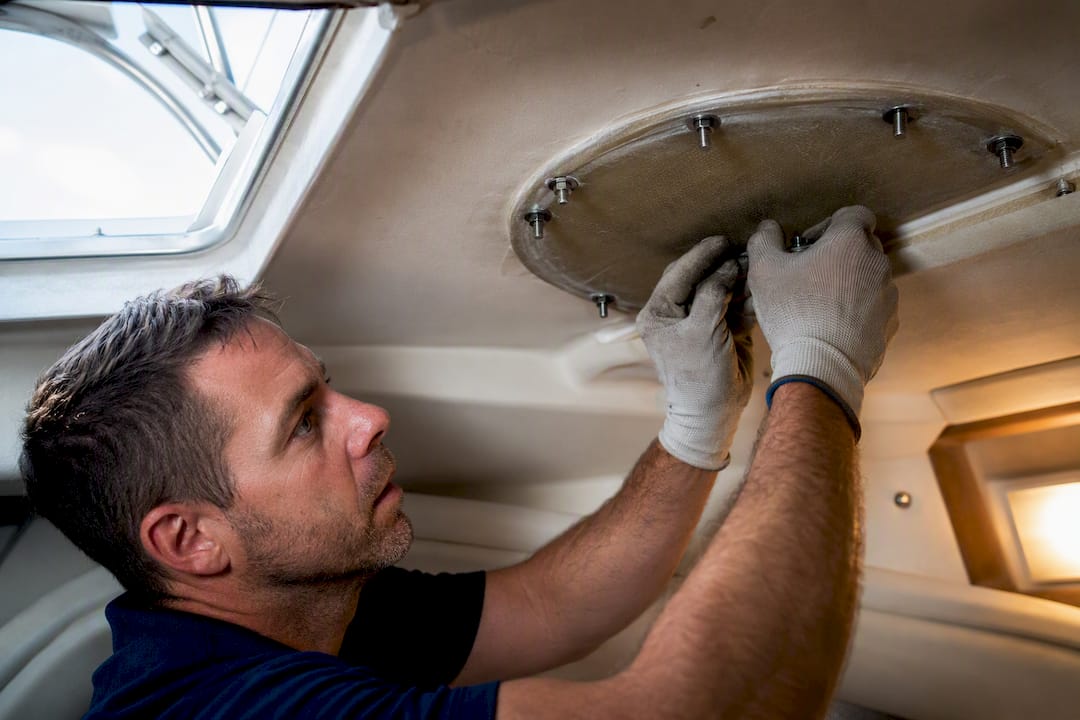
Start by evaluating what’s under the fiberglass. Balsa or foam coring that’s absorbed water over the decades will not hold a through-bolted windlass no matter how big the backing plate is. If you find soft spots when you tap the deck with a screwdriver handle, that core needs to come out and get replaced with solid glass or epoxy fill before you mount anything.
- Use aluminum or G10 fiberglass backing plates sized to spread load across the mounting bolts, not just under them
- Template the unit and dry fit it before drilling anything, matching hole patterns exactly to the manufacturer’s paper or digital template
- Check the fair lead angle from the gypsy to the bow roller. A fair lead even a few degrees off causes chronic jamming and premature chain wear, and professional installers routinely shim the base to correct it
- Confirm the hawsepipe lines up cleanly with the chain locker below so chain doesn’t have to fight a bend on the way down
- Check chain locker depth and stacking space; a locker too shallow for your scope length will jam the chain into a pyramid that jams the gypsy
Manufacturer templates and dry-fitting before cutting the deck are non-negotiable steps, not optional caution. A backing plate installed a half inch off center or a fair lead deflection over 5 degrees will show up as gypsy wear within a season, not years.
Pro Tip: Dry fit everything, including the chain running through the hawsepipe, before you drill a single hole. A hawsepipe that binds the chain even slightly will fight the windlass motor on every single retrieval.
Electrical Requirements: Cable Gauge, Battery, and Wiring Protection
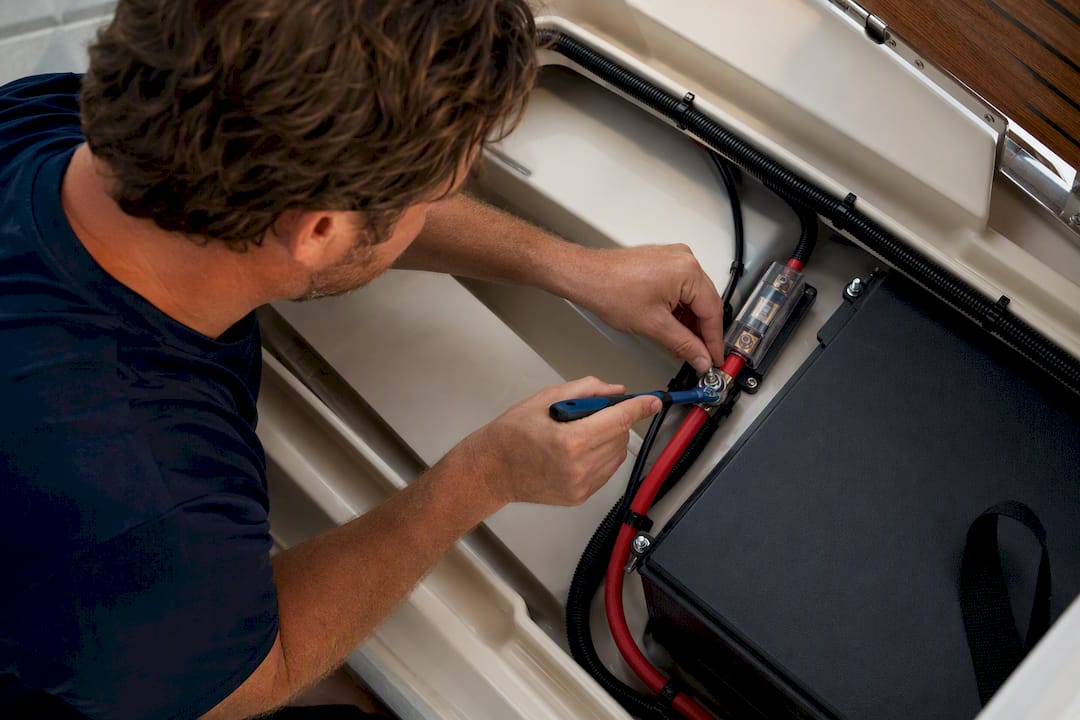
Voltage at the motor terminals, not at the battery, is what determines whether your new windlass performs like the spec sheet promises. A windlass rated for 1,200 pounds of continuous pull loses a huge chunk of that capacity if it’s only seeing 10.5 volts by the time current travels 40 feet of undersized cable from the house bank.
ABYC guidance on voltage-drop management points toward keeping drop in the 3% to 10% range depending on the circuit, with main circuit protection placed within 7 inches of the battery. For a windlass, that usually means:
- Sizing cable to your run length and the unit’s continuous amp draw, not its momentary peak draw
- Using marine-tinned copper cable rated for wet environments, not automotive wire
- Placing the breaker or fuse close to the battery source, within the ABYC-recommended distance
- Choosing 24V over 12V when your cable run exceeds roughly 20 feet, since it halves amp draw for the same power delivered
Two wiring approaches solve this differently. A dedicated bow battery paired with an Echo charger setup keeps the run short and the voltage drop minimal, at the cost of adding a second battery and charging circuit to maintain. A heavy-gauge cable run straight from the house bank skips the extra battery but demands thicker, more expensive cable and careful attention to drop over distance. For most boats under 45 feet, a properly sized cable run from the house bank is the simpler and cheaper path. Larger boats with long bow-to-engine-room distances often justify the dedicated battery. Marine electrical work that accounts for both options during the planning phase saves a rewire down the road.
Rode and Chain Prep: Inspection, Splices, and Avoiding Jams
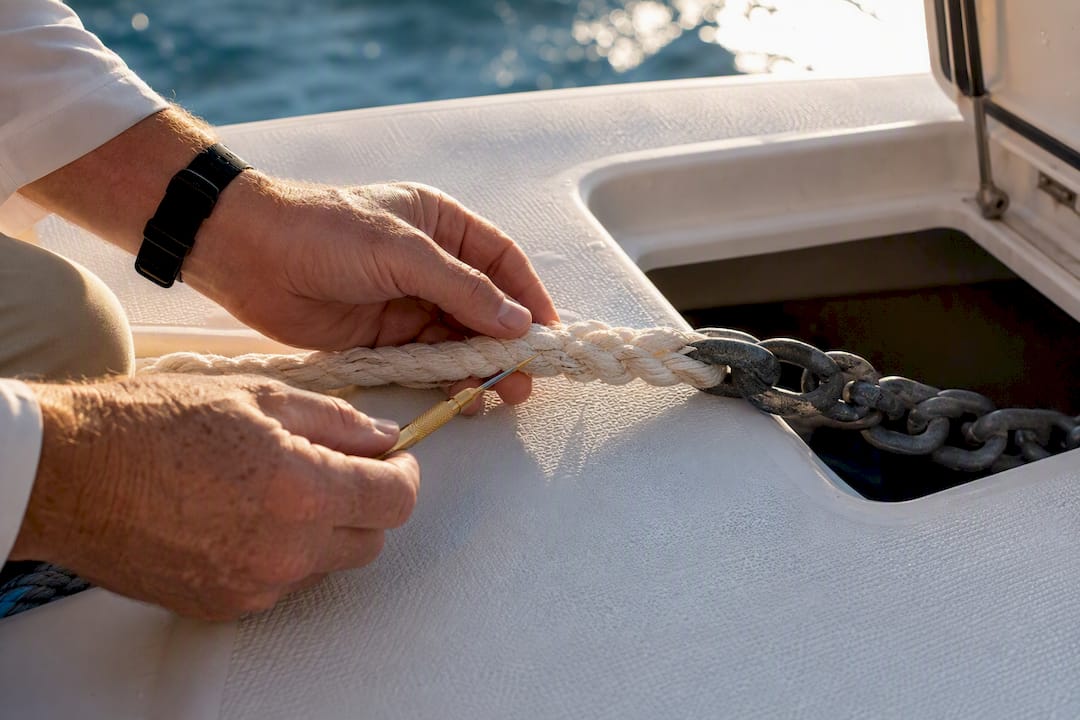
A brand new windlass paired with tired rode is a recipe for a service call within the first month. Inspect chain link by link for pitting, thinning at the wear points, and any galling where links have worn flat against each other. Rope should be checked for fraying at the chain splice and stiffness that suggests UV degradation or salt crystallization deep in the fibers.
The rope-to-chain splice is the weak point most owners overlook. Nylon rode shrinks over years of wet/dry cycles, and a splice that once fit the gypsy smoothly can bind or skip as the rope tightens around the chain. Soaking stiff nylon rode in cool water with a small amount of fabric softener restores flexibility without shrinking the rope further; hot water does the opposite and should be avoided entirely.
- Replace chain showing pitting deeper than roughly 10% of link diameter
- Re-splice or replace rope-to-chain connections that no longer pass smoothly through the gypsy
- Line the chain locker with StarBoard or a similar synthetic panel to stop galvanic staining and ease cleanout
- Install a snubber or chain stopper so anchoring loads transfer to a cleat, not the windlass gearbox, once the anchor is set
That last point matters more than most owners realize. A windlass is a retrieval tool, not a mooring fitting, and leaving your full anchoring load parked on the clutch overnight is a slow way to wear one out.
Installation Overview: Sequence and Key Checks
A marine windlass installation goes smoothly when the sequence is right and badly when steps get skipped to save a weekend. Here’s the order that avoids rework:
- Dry-fit the windlass on the deck template, confirm fair lead angle and hawsepipe alignment before any cutting
- Reinforce the deck core if needed, then fabricate and bed the backing plate
- Cut the mounting holes and hawsepipe opening, sized exactly to template
- Through-bolt the windlass and bed all fasteners with marine sealant
- Run and protect the wiring below deck, matching cable gauge to the calculated amp draw
- Test the gypsy against your actual chain standard before final assembly. A gypsy cut for the wrong chain size will slip or jam regardless of motor power
- Adjust the clutch to grip firmly without over-tightening, and confirm the manual crank or backup handle operates smoothly in case of electrical failure
Once it’s all bolted and wired, don’t just deploy the anchor once and call it done. A proper testing protocol runs at least 10 deployment and retrieval cycles, with rest intervals between each to let the motor cool and to catch any intermittent jamming or misalignment that a single cycle won’t reveal.
Pro Tip: Run your test cycles at the dock with a helper watching the chain locker from below. Most locker-stacking problems only show up on the fifth or sixth retrieval, not the first.
Common Windlass Problems and How to Troubleshoot Them
Most windlass complaints boil down to three categories, and figuring out which one you have takes fifteen minutes with a multimeter before you call anyone.
Electrical symptoms: Check the breaker first. A tripped breaker that won’t reset points to a genuine overload or short. If the breaker holds but the motor is sluggish, check voltage at the motor terminals under load. Anything under roughly 10.5 volts on a 12V system means your wiring or battery connection is the problem, not the windlass. A solenoid that clicks but doesn’t engage the motor is often a worn contact, a cheap and quick fix compared to replacing the whole unit.
Mechanical symptoms: A slipping clutch almost always means it needs re-tightening, not replacing. A gypsy that chatters or skips usually needs cleaning of built-up salt and grit, or it’s simply the wrong profile for your chain.
- Breaker won’t reset: check for a short in the wiring run, not the windlass itself
- Motor runs but chain doesn’t move: clutch is likely slipping
- Windlass refuses to haul at all under load: often a designed safety response to a locker tangle, not a motor fault
One mistake we see wreck windlasses fast: using the unit to tow the boat forward onto the anchor instead of using engine power to take up slack first. The correct technique is to motor slowly toward the anchor to unload the chain, then use the windlass purely to retrieve, never to drag the hull against resistance.
What Owners Consistently Underestimate About This Project
The windlass itself is the easy part of a windlass upgrade. What catches owners off guard is everything underneath it. We routinely find chain lockers that need a full refurbishment before new chain will even sit right, wiring runs that have to be rerouted because the old cable path is corroded or too small, and backing plates that need custom fabrication because the factory mount doesn’t match the new unit’s footprint.
Coordinating electrical, mechanical, and structural work as one project, rather than three separate calls to three separate specialists, is what actually cuts downtime. A yard that handles the wiring and the fiberglass work together can often finish in the same haul-out window that a piecemeal approach would stretch across two or three. Get a real on-site look before you commit to a number. A quote based on photos alone almost never accounts for what’s hiding in the chain locker.
— Jason
How Mazza Marine Handles Your Windlass Upgrade From Start to Finish
Professional windlass upgrade services that handle structural reinforcement, wiring, locker refurbishment, and commissioning testing as a single coordinated job can reduce your boat’s total haul-out time. We’ve seen too many upgrades stall halfway through because the fiberglass guy and the electrician never talked to each other.

Every quote begins with an on-site inspection of the foredeck and chain locker to ensure the estimate accurately reflects the boat’s needs, whether a simple drive unit swap or a full deck reinforcement and rewire. Our marine repair service guide outlines how we scope projects like this and what a realistic timeline looks like for your size of boat. If your windlass is showing failure signs as described, the recommended approach is to consult with a professional team for an on-site assessment tailored to your specific setup, chain size, and bow layout.
Sources
For deeper sizing math, consult manufacturer calculators and installation guides directly, along with ABYC’s standards work on marine wiring and voltage-drop practice. The installation and troubleshooting walkthroughs from Imtra and PassageMaker cover template use and common failure points in more technical detail than fits here.
- Troubleshooting Common Anchor Windlass Issues
- Windlass Sizing: How Much Pulling Power Do You Actually Need?
- How To Install a New Anchor Windlass
- Windlass maintenance/troubleshooting
Recommended
Text or Call 954-330-9653 Schedule Appointment
Mazza Marine Yacht Services & Refit

Fiberglass Upgrades and Damage Repair

Premium Yacht Paint/ Faux Teak

Fishing: Custom Rods, Reels,Tackle

Electrical, Electronics and Navigation

Paint, Hull and Gelcoat

Teak Decks, Wood Cabinets, Carpentry

Canvas, Enclosures and Upholstery

Mechanical, Repower and Running Gear

Plumbing, Bilge and Thru-Hulls

Welding and Custom Fabrication

Interior Refit And Past Work
Get your yacht value Estimate
"*" indicates required fields