
View Our Recent Work:

Florida yacht ownership is a privilege that comes with one serious responsibility: staying ahead of your plumbing before it gets ahead of you. A slow seacock leak at the dock becomes a flooding emergency the moment you push away from the slip. Salt air, warm water, and year-round use all conspire to degrade hoses, corrode fittings, and strain every joint below the waterline. This guide walks you through every stage of yacht plumbing repair, from grabbing the right tools to servicing your marine toilet, so your vessel stays watertight, functional, and ready for whatever Florida’s waters bring.
Table of Contents
- Essential tools, materials and safety checks
- Step-by-step yacht plumbing repair process
- Inspection routines and preventive maintenance for Florida yachts
- Servicing marine toilets and plumbing for longevity
- Florida expert perspective: What most guides miss about yacht plumbing repair
- Need help or upgrades? Florida yacht repair experts have you covered
- Frequently asked questions
Key Takeaways
| Point | Details |
|---|---|
| Act fast on leaks | Quick action to shut seacocks or plug leaks prevents serious yacht damage and stabilizes your vessel. |
| Systematic troubleshooting | Divide and test plumbing components methodically to isolate faults and solve issues efficiently. |
| Preventive maintenance matters | Daily, monthly, and annual inspections catch problems early, extending your yacht’s lifespan and value. |
| Service toilets regularly | Routine cleaning, seal/joker valve replacement, and timely hose upgrades prevent odors and breakdowns. |
| Documentation boosts reliability | Track hose install dates and clamp types to plan future maintenance and reduce unexpected failures. |
Essential tools, materials and safety checks
Now that you understand the stakes, let’s start with prepping for safe and efficient plumbing repairs. Arriving at a plumbing fault without the right gear costs you time and, potentially, your boat. Whether you’re dealing with a failed thru-hull or a weeping hose connection, preparation separates a quick fix from an all-day ordeal.
Tools and materials every Florida yacht owner should carry:
- Adjustable wrenches and open-end wrenches in multiple sizes
- Hose clamp screwdrivers (both flat and hex-head)
- Spare stainless steel double-gear clamps in multiple diameters
- Tapered wooden cone plugs in several sizes (attached near every thru-hull)
- Marine-grade emergency sealing putty and foam plugs
- Replacement hose sections (sanitation, raw water, bilge)
- Waterproof silicone sealant and marine bedding compound
- Flashlight or headlamp, preferably waterproof
- Gloves, safety glasses, and a bilge pump or wet-dry vacuum
The first step before touching any fitting is a careful visual inspection. Look for salt crust around hose connections, discoloration on bronze fittings, or soft spots in hose material. A pink or reddish tinge on bronze is a serious warning: it signals dezincification, which means the fitting is structurally compromised and seacock safety guidance recommends immediate replacement. Operate every seacock through its full range of motion. If it resists turning, do not force it; penetrating oil and patience come first.
The rule on clamping is worth understanding clearly. While ABYC standards don’t technically require double-clamping on every fitting, the industry widely treats it as low-cost insurance. Two clamps, offset from each other, give you redundancy if one fails under vibration or pressure.
Comparison table: temporary vs. permanent repair materials
| Material | Best use | Lifespan | Notes |
|---|---|---|---|
| Tapered cone plug | Emergency leak stop at thru-hull | Short-term | Attach near each seacock |
| Foam expanding plug | Irregular-shaped breaches | Short-term | One-time use |
| Marine epoxy putty | Temporary hull patch | Days to weeks | Not a final fix |
| Double-gear stainless clamp | Permanent hose connections | Years | Offset two clamps |
| Marine-grade silicone sealant | Hose-to-fitting sealing | Seasonal | Inspect annually |
| Proper bedding compound | Thru-hull installations | Long-term | Critical for watertight sealing |
To locate and explore your thru-hull safety options before an emergency arises, review your vessel’s layout and tag each fitting with its function.
Pro Tip: Zip-tie a cone plug directly to the hose at every below-waterline thru-hull. If that seacock fails or jams open, you can stop water ingress immediately and buy yourself critical time to stabilize the vessel and pump out excess water.
Florida owners heading to boat shows should also plan their logistics in advance. For those traveling to events, services like Miami boat show transport make it easier to focus on sourcing quality parts and gear during the event.
Step-by-step yacht plumbing repair process
With your tools and safety steps ready, here’s how to tackle yacht plumbing repairs efficiently and safely. Speed matters in a plumbing emergency, but order matters more. A rushed, random approach to diagnosis wastes time and can mask the real fault.
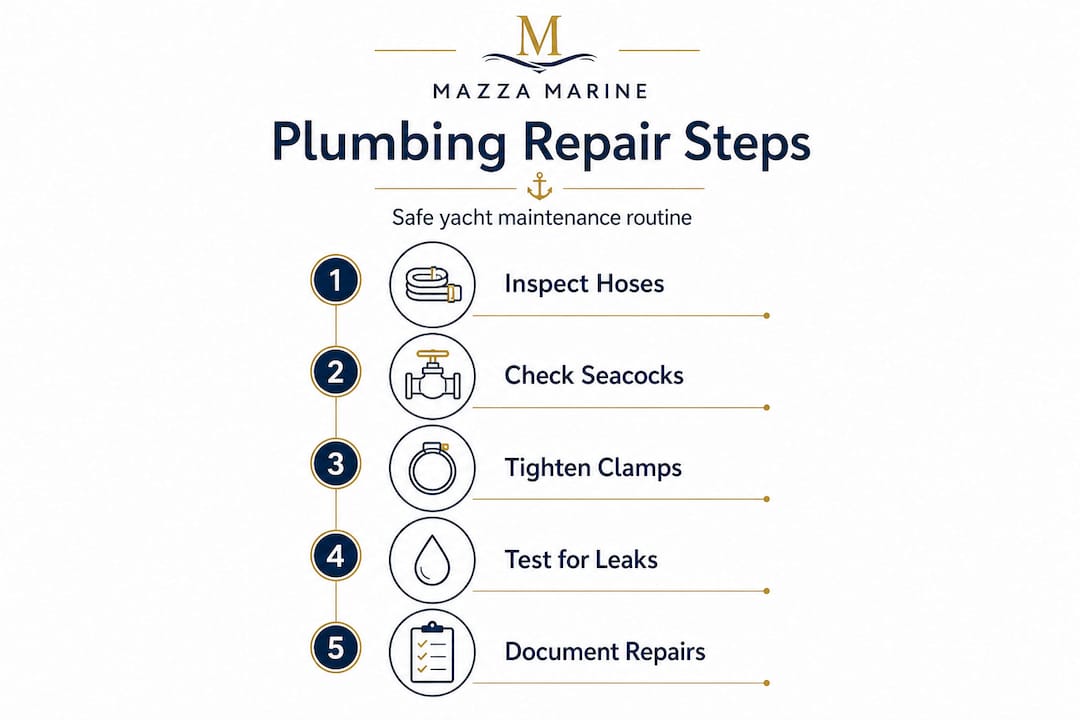
Step-by-step repair sequence:
- Locate the source. Follow water trails, staining, or salt deposits back to the origin point. Don’t assume the wet spot is directly below the leak.
- Shut the seacock. Close the relevant seacock to isolate that circuit. If the valve is stuck, use your emergency cone plug at the hose fitting.
- Pump out bilge water. Stabilize the vessel before proceeding. A wet bilge creates slip hazards and hides other issues.
- Diagnose the fault. Is the leak at a clamp, a hose body, or the thru-hull fitting itself? Probe gently and categorize.
- Make a temporary repair if needed. If you’re offshore or the marina is hours away, a temporary fix lets you get the boat home safely.
- Remove the faulty component. Cut or loosen the hose section, extract the fitting, or disassemble the pump with care.
- Install the replacement. Use proper materials, torque clamps firmly but without stripping, and apply bedding compound where appropriate.
- Verify the repair. Open the seacock, run the system, and watch for any seepage at every joint you touched.
Critical safety note: Water ingress waits for no one. The moment you identify an active leak below the waterline, your first priority is closing that seacock or plugging the breach. Pump out excess water before you do anything else. Diagnosis is step two, not step one.
For marine toilet faults, the systematic approach makes all the difference. Methodical troubleshooting works by breaking the plumbing system into sections and testing each in sequence, which isolates the fault quickly instead of random probing that wastes hours.
Diagnostic table: common marine plumbing faults
| System | Symptom | Likely cause | First check |
|---|---|---|---|
| Marine toilet | Won’t flush | Closed seacock or clogged strainer | Open intake seacock, clear strainer |
| Marine toilet | Weak flush | Air leak on suction side | Check hose connections, joker valve |
| Marine toilet | Slow discharge | Blocked line or faulty joker valve | Inspect discharge hose, replace joker valve |
| Raw water intake | Low flow | Clogged sea strainer | Clean strainer basket |
| Bilge pump | Won’t activate | Float switch failure | Test switch manually |
| Sanitation hose | Odor | Permeated or cracked hose | Replace hose, check vent line |
According to marine toilet troubleshooting guidance, the most common causes of a toilet that won’t flush include a closed intake seacock, clogged intake strainer, suction-side air leaks, discharge blockages, a faulty joker valve, a holding tank vent obstruction, or worn duckbill and bowl seals in vacuum systems. Always check the seacock and strainer first. Those two items account for the majority of “won’t flush” calls.
Our bilge and plumbing overview offers deeper context on how these systems connect across your vessel, which is particularly useful once you’re past the emergency stage and into proper diagnosis.
Inspection routines and preventive maintenance for Florida yachts
After repairs, ongoing maintenance ensures your plumbing stays reliable, and this is especially important for Florida yachts. Florida’s climate accelerates every form of marine deterioration. Humidity, heat, and constant salt exposure make the maintenance window shorter than owners in northern climates experience. What might be a once-a-year concern elsewhere requires quarterly attention here.
Core inspection and maintenance routines:
- Before every departure: Visually inspect all accessible thru-hulls for dampness, salt crust, or discoloration. Operate each seacock handle through its full range to confirm smooth travel.
- Monthly: Exercise all seacocks, inspect hose clamps for rust or loosening, and check hose bodies for softness, cracks, or swelling.
- Seasonally: Pressurize freshwater systems and scan near faucets, pumps, and connections for any dampness. Test all macerators and greywater valves.
- Annually or at haul-out: Inspect thru-hull fittings externally for bedding defects, marine growth interference, and corrosion indicators. This is your deepest look.
A key insight from South Florida yacht maintenance guidance is that some leaks only appear when the vessel is in motion. Pressure changes, hull flex, and vibration can open seams that look perfectly sound at the dock. Testing pumps, valves, and macerators underway is not optional; it’s where real conditions reveal what static checks miss.
Thru-hull inspection guidance recommends daily checks for visible leaks or dampness, monthly seacock exercise, and a full pre-season haul-out inspection for bedding defects and corrosion. Making these checks habitual takes less than ten minutes per session and prevents the kinds of failures that sideline a boat for weeks.
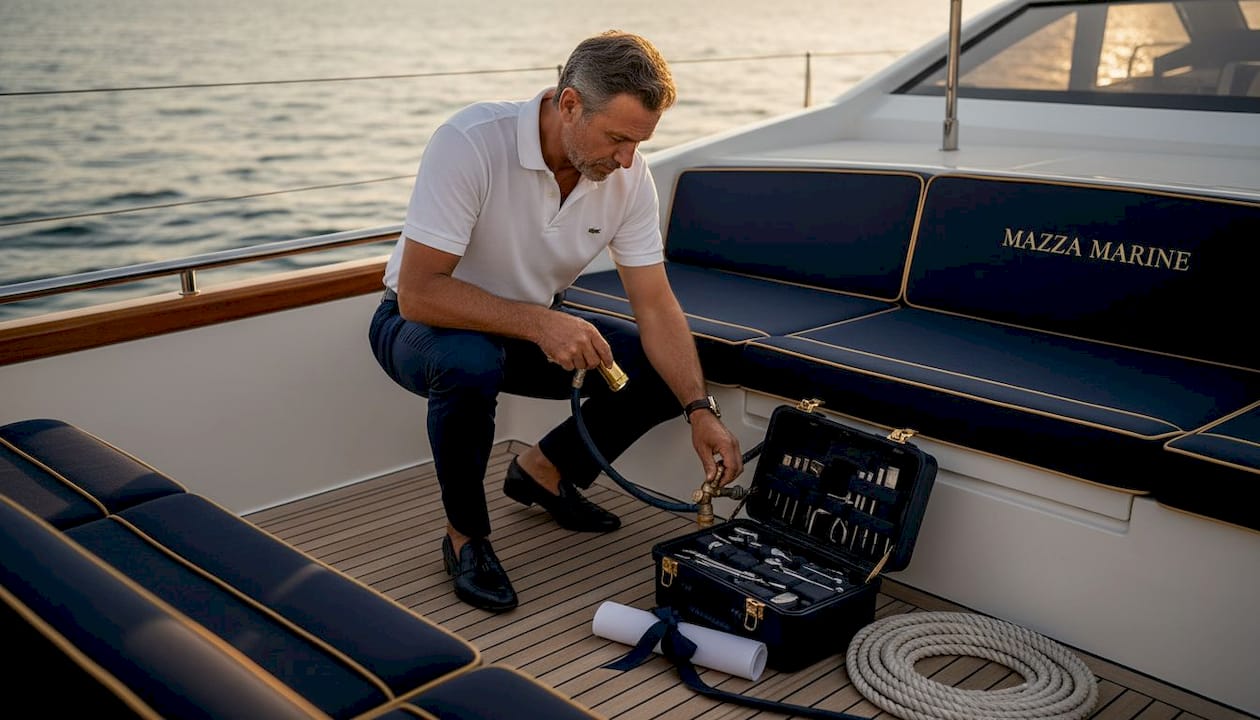
Pro Tip: Label each hose with its installation date and clamp type using a waterproof marker or adhesive label. Keep a small log in your engine room. When a hose hits the five or seven year mark in Florida’s conditions, you’ll know it’s time for replacement before it tells you the hard way.
Florida yachts also benefit from pairing plumbing maintenance with broader vessel care. The spring yacht checklist for Florida captains integrates plumbing, hull, and engine inspections into a single organized routine, while hull maintenance routines reinforce how below-waterline systems connect to overall vessel integrity. For owners with larger vessels and complex mechanical systems, the guide on how to reduce machinery breakdowns offers parallel principles applied to heavy machinery.
Servicing marine toilets and plumbing for longevity
To maximize plumbing longevity and hygiene, follow these servicing steps for toilets and main lines. Marine toilets are the most complained-about piece of equipment on any yacht, and they’re also the most neglected until something goes wrong. Regular servicing keeps odors at bay and prevents the cascading failures that come from ignoring worn seals.
Step-by-step marine toilet service:
- Flush with clean water and a marine-safe enzyme cleaner monthly to clear waste buildup in the discharge line.
- Inspect the joker valve every season. This rubber one-way valve is the most commonly failed component; if it’s torn, stiff, or collapsed, replace it immediately.
- Clean the pump assembly by disassembling the pump head and rinsing all internal components. Look for scoring or cracks in the cylinder walls.
- Replace worn seals and O-rings whenever you have the pump apart. New seals cost a few dollars; ignoring worn ones costs a full rebuild.
- Check discharge hose condition. Sanitation hose degrades from the inside as waste permeates the hose material. If your boat smells like the head even when everything is “sealed,” the hose is the culprit.
- Perform a full overhaul every 5 to 10 years or whenever pump cylinders show cracking or visible wear.
Warning signs that service or replacement is overdue:
- Persistent odor even after cleaning
- Slow or incomplete flushing action
- Visible cracks or crazing on pump housing
- Swollen or soft sanitation hose
- Discharge that requires excessive effort on the handle
- Leaking at the base of the pump assembly
When you’re removing a seacock or thru-hull fitting for any rebuild work, bedding choice is non-negotiable. Proper bedding compound and correct installation direction are what separate a watertight repair from a leak that returns six months later. Using the wrong compound or forcing a fitting in from the wrong side voids the integrity of the entire installation.
Pro Tip: When reassembling a thru-hull or seacock after service, always apply fresh bedding compound even if the original appears intact. Old sealant that looks fine often has microscopic failures at the mating surfaces. Fresh compound takes ten minutes to apply and could save your boat from a slow, invisible leak that only shows itself at sea.
Explore marine plumbing details on the Mazza Marine site for deeper coverage, and review interior materials for longevity to understand how internal refits connect to plumbing access and lifespan.
Florida expert perspective: What most guides miss about yacht plumbing repair
Most plumbing guides hand you a checklist and call it done. The reality on Florida water is more nuanced, and the gap between knowing what to do and knowing when and why is where boats get hurt.
Here’s the contrarian truth: random pobing is the single biggest time waster in marine plumbing troubleshooting. Owners open hatches, squeeze hoses, and wiggle fittings without a plan. The systematic method that experienced technicians use is to divide the system into zones, close or isolate each zone, and test pressure or flow in each section independently. You find the fault in minutes instead of hours.
The other thing most guides underemphasize is this: your boat does not show you its plumbing problems at the dock. The majority of leaks, weak flushes, and bilge pump activations happen when the vessel is underway, when hull flex opens joints, vibration loosens clamps, and water pressure changes with speed and sea state. If you only test your systems tied to the dock, you are not actually testing them.
Florida’s humidity and heat make procrastination uniquely dangerous. A seacock that stiffens a little in January will seize by April. A small weep at a hose clamp that you flag and forget becomes active corrosion within weeks in this climate. The uncomfortable truth is that small leaks are urgent in Florida, not just inconvenient.
“The best repairs are invisible because you prevent the failure before it happens.”
Document everything. Clamp type, hose brand, installation date, bedding compound used. The owner who knows their vessel down to the last fitting makes better decisions and catches problems earlier. That level of knowledge is what advanced maintenance insights are built on, and it’s what separates a vessel that holds its value from one that quietly deteriorates beneath a polished exterior.
Need help or upgrades? Florida yacht repair experts have you covered
Plumbing is one of those systems where confidence comes from hands-on experience and knowing the right people. When you’ve done what you can and need a trusted professional to take it further, or when you’re ready to upgrade aging systems before they fail, Florida’s top yacht owners know where to turn.

Mazza Marine connects you with a deep network of Florida yacht experts, from urgent plumbing and thru-hull repairs in Miami to complete maintenance packages and interior refits. Whether you need a second opinion on a seacock, want a full sanitation system overhaul, or are planning a broader refit, we match you with the right specialist for the job. Review the repair warning signs guide to know exactly when to call in professional support, and explore maintenance made simple for an ongoing care framework you can follow year-round. Mazza Marine is your one-stop shop for all aspects of Florida yacht ownership. Reach out today and let’s build a relationship that keeps your vessel in flawless condition for years to come.
Frequently asked questions
What is the quickest way to stop a plumbing leak on my yacht?
Locate and close the nearest seacock or plug the breach with an emergency cone plug or sealant product, then stop water ingress immediately by pumping out accumulated water to stabilize the vessel before attempting any diagnosis or repair.
How often should I inspect thru-hull fittings and seacocks?
You should inspect daily or before every departure for visible leaks, dampness, or salt crust, perform a thorough monthly exercise of all seacocks, and schedule a full haul-out inspection at least once per year.
What are the main reasons my marine toilet won’t flush?
Common causes include a closed intake seacock or clogged strainer, along with suction-side air leaks, blocked discharge lines, a faulty joker valve, holding tank vent obstructions, or worn seals in vacuum-type systems.
When should I fully overhaul marine toilet plumbing?
Plan a full service every 5 to 10 years, or sooner if you notice cracked pump cylinders, persistent odors, slow discharge, or if the hose material is swollen or permeable.
How can I ensure my repairs are watertight?
Always use correct bedding compound with proper installation direction for thru-hulls and seacocks, double-clamp all below-waterline hose connections with stainless steel gear clamps, and verify the repair is leak-free with the system pressurized and running.
Recommended
Text or Call 954-330-9653 Schedule Appointment
Mazza Marine Yacht Services & Refit

Fiberglass Upgrades and Damage Repair

Premium Yacht Paint/ Faux Teak

Fishing: Custom Rods, Reels,Tackle

Electrical, Electronics and Navigation

Paint, Hull and Gelcoat

Teak Decks, Wood Cabinets, Carpentry

Canvas, Enclosures and Upholstery

Mechanical, Repower and Running Gear

Plumbing, Bilge and Thru-Hulls

Welding and Custom Fabrication

Interior Refit And Past Work
Get your yacht value Estimate
"*" indicates required fields